创建内容类型
¥Creating content-types
仅当你的 Strapi 应用位于开发环境中时,才能访问内容类型生成器来创建和更新内容类型,否则它将在其他环境中处于只读模式。
¥The Content-type Builder is only accessible to create and update content-types when your Strapi application is in a development environment, else it will be in a read-only mode in other environments.
内容类型生成器允许创建新的内容类型:单一和集合类型。尽管它们不是正确的内容类型,因为它们不能独立存在,但组件也可以通过内容类型构建器创建,就像集合和单一类型一样。
¥The Content-type Builder allows to create new content-types: single and collection types. Although they are not proper content-types as they cannot exist independently, components can also be created through the Content-type Builder, in the same way as collection and single types.
创建新的内容类型
¥Creating a new content-type
内容类型是从内容类型构建器的集合类型和单一类型类别创建的,两者都显示在内容类型构建器子导航中。
¥Content types are created from the Content-type Builder's Collection types and Single types categories, both displayed in the Content-type Builder sub navigation.
要创建新的内容类型:
¥To create a new content-type:
-
选择是要创建集合类型还是单一类型。
¥Choose whether you want to create a collection type or a single type.
-
在你要创建的内容类型的类别中,单击创建新集合/单一类型。
¥In the category of the content-type you want to create, click on Create new collection/single type.
-
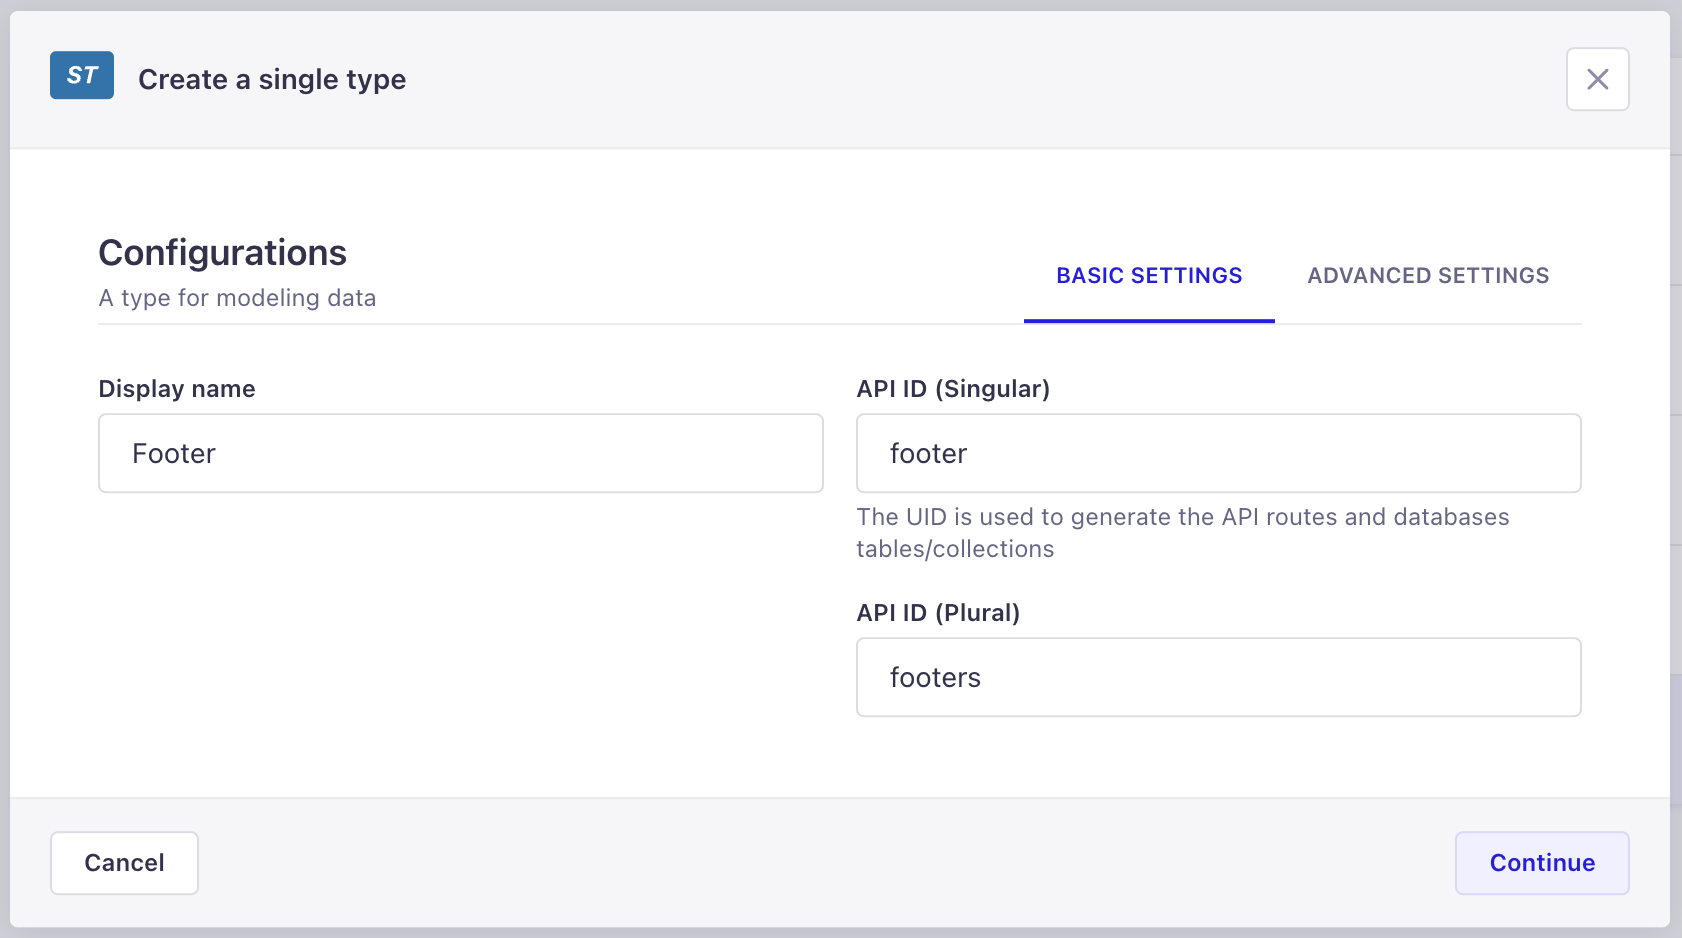
在内容类型创建窗口中,在显示名称文本框中写入新内容类型的名称。
¥In the content-type creation window, write the name of the new content-type in the Display name textbox.
-
检查 API ID 以确保自动预填充的值正确。当在内容管理器中显示时,集合类型名称确实会自动复数。建议选择单数名称,但 API ID 字段允许修复任何复数错误。
¥Check the API ID to make sure the automatically pre-filled values are correct. Collection type names are indeed automatically pluralized when displayed in the Content Manager. It is recommended to opt for singular names, but the API ID field allows to fix any pluralization mistake.
-
(可选)在“高级设置”选项卡中,配置新内容类型的可用设置:
¥(optional) In the Advanced Settings tab, configure the available settings for the new content-type:
设置名称 指示 起草并发布 勾选该复选框以允许内容类型的条目在发布之前作为草稿版本进行管理(请参阅 保存和发布内容)。 国际化 勾选该复选框以允许将内容类型的条目转换为其他语言环境。 -
单击继续按钮。
¥Click on the Continue button.
-
为你的内容类型添加并配置所选字段(参见 为内容类型配置字段)。
¥Add and configure chosen fields for your content-type (see Configuring fields for content-types).
-
单击“保存”按钮。
¥Click on the Save button.
新内容类型只有在保存后才被视为已创建。仅当添加了至少一个字段并正确配置后,才可以进行保存。如果未完成这些步骤,则无法创建内容类型,无法在内容类型生成器的类别中列出,并且无法在内容管理器中使用。
¥New content-types are only considered created once they have been saved. Saving is only possible if at least one field has been added and properly configured. If these steps have not been done, a content-type cannot be created, listed in its category in the Content-type Builder, and cannot be used in the Content Manager.
创建一个新组件
¥Creating a new component

组件是从内容类型生成器的子导航的同名类别创建的。
¥Components are created from the same-named category of the Content-type Builder's sub navigation.
要创建新组件:
¥To create a new component:
-
在内容类型构建器子导航的组件类别中,单击创建新组件。
¥In the Components category of the Content-type Builder sub navigation, click on Create new component.
-
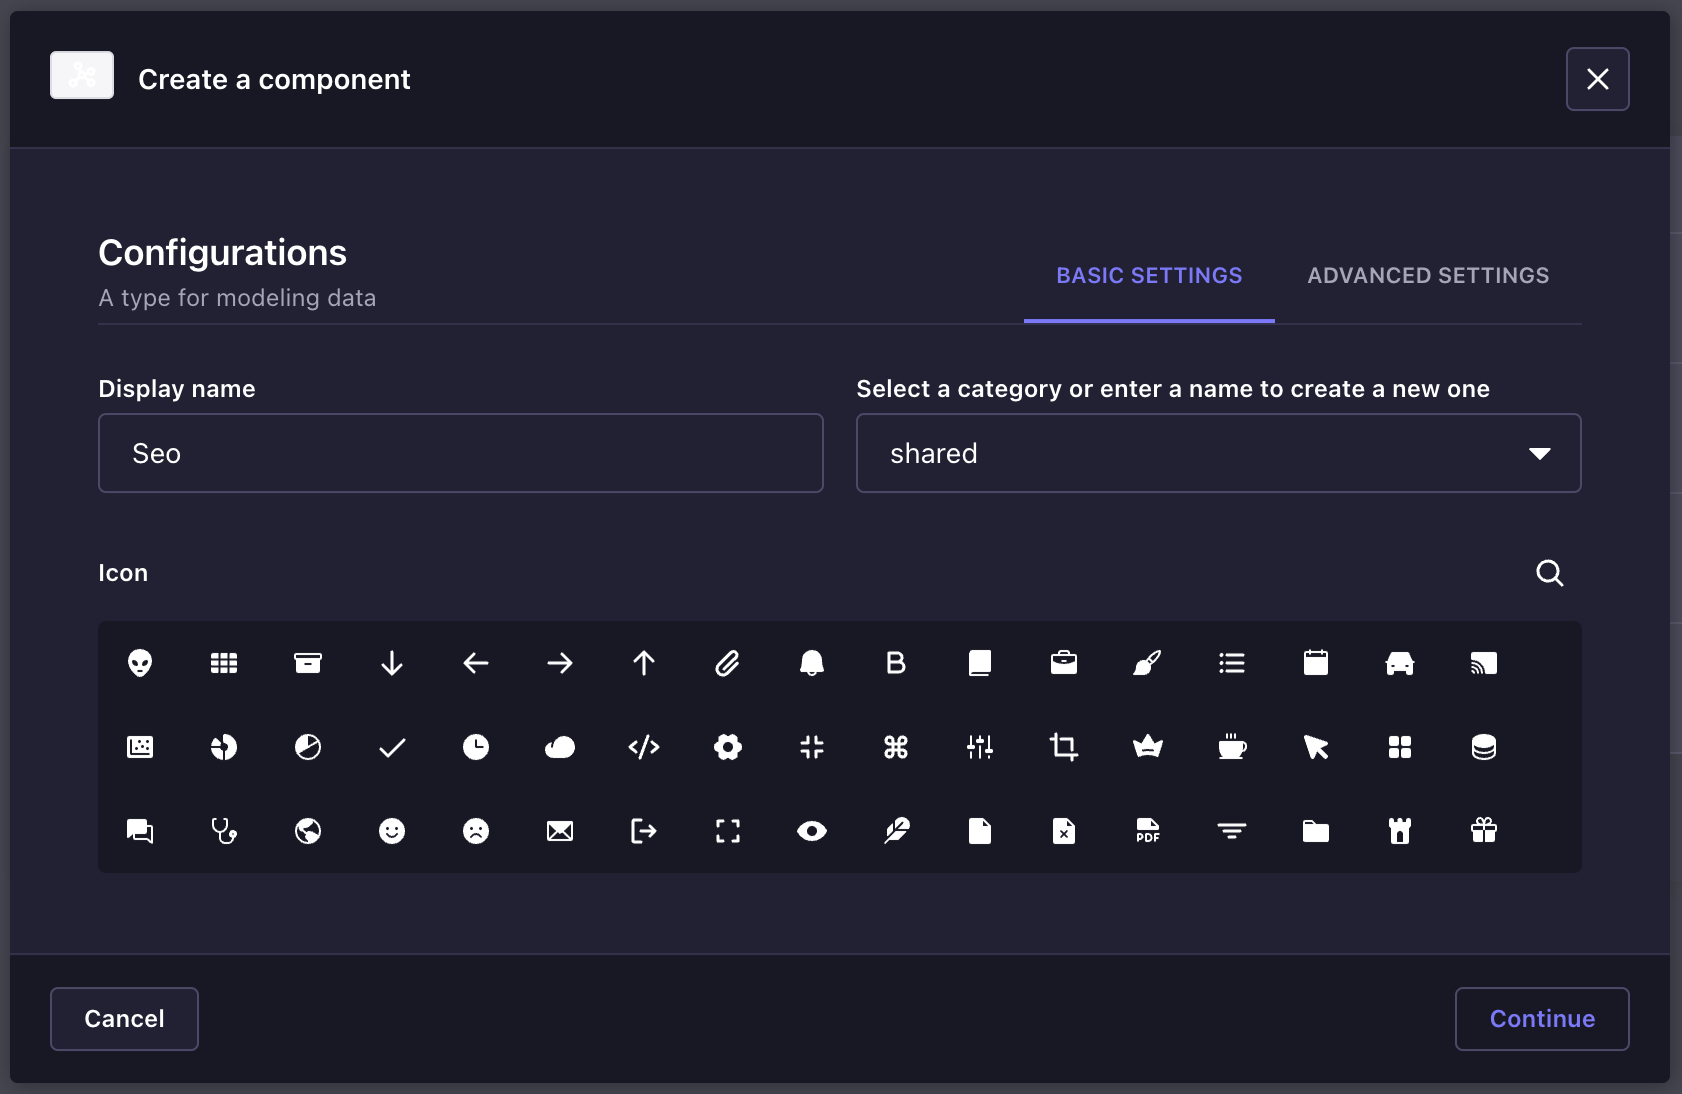
在组件创建窗口中,配置新组件的基本设置:
¥In the component creation window, configure the base settings of the new component:
-
在显示名称文本框中写入组件的名称。
¥Write the name of the component in the Display name textbox.
-
选择一个可用类别,或在文本框中输入新类别名称来创建类别。
¥Select an available category, or enter in the textbox a new category name to create one.
-
(可选)选择代表新组件的图标。你可以使用搜索 来查找图标,而不必滚动列表。
¥(optional) Choose an icon representing the new component. You can use the search to find an icon instead of scrolling through the list.
-
-
单击继续按钮。
¥Click on the Continue button.
-
为你的组件添加和配置所选字段(参见 为内容类型配置字段)。
¥Add and configure chosen fields for your component (see Configuring fields for content-types).
-
单击“保存”按钮。
¥Click on the Save button.