用户与权限
🌐 Users & Permissions
Page summary:
用户与权限管理终端用户账户、基于JWT的身份验证以及基于角色的API访问权限。本文档解释了如何创建角色、配置权限以及发布API令牌以实现安全访问控制。
“用户与权限”功能允许管理 Strapi 项目的终端用户 它提供基于 JSON Web Token(JWT)的完整身份验证流程来保护你的 API,并且提供访问控制列表(ACL)策略,使你能够管理用户组之间的权限。
管理面板配置
🌐 Admin panel configuration
用户和权限功能可从管理面板设置和代码库进行配置。
🌐 The Users & Permissions feature is configured from both the admin panel settings, and via the code base.
角色
🌐 Roles
用户和权限功能允许为终端用户创建和管理角色,以配置他们可以访问的内容。
🌐 The Users & Permissions feature allows to create and manage roles for end users, to configure what they can have access to.
创建新角色
🌐 Creating a new role
路径: 用户与权限插件 > 角色
在 Roles 界面的右上方,显示了一个 添加新角色 按钮。它允许为你的 Strapi 应用的终端用户创建新角色。
🌐 On the top right side of the Roles interface, an Add new role button is displayed. It allows to create a new role for end users of your Strapi application.
点击 添加新角色 按钮,将会跳转到角色编辑界面,在那里你可以为新角色命名并定义其详细信息和权限(参见 编辑角色)。
🌐 Click on the Add new role button to be redirected to the roles edition interface, where you will be able to name your new role and define its details and permissions (see Editing a role).
所有新终端用户默认分配的终端用户角色可以在用户与权限插件的高级设置子部分中定义(参见高级设置)。
🌐 The end-user role attributed by default to all new end users can be defined in the Advanced settings sub-section of Users & Permissions plugin (see Advanced settings).
编辑角色
🌐 Editing a role
路径: 用户与权限插件 > 角色
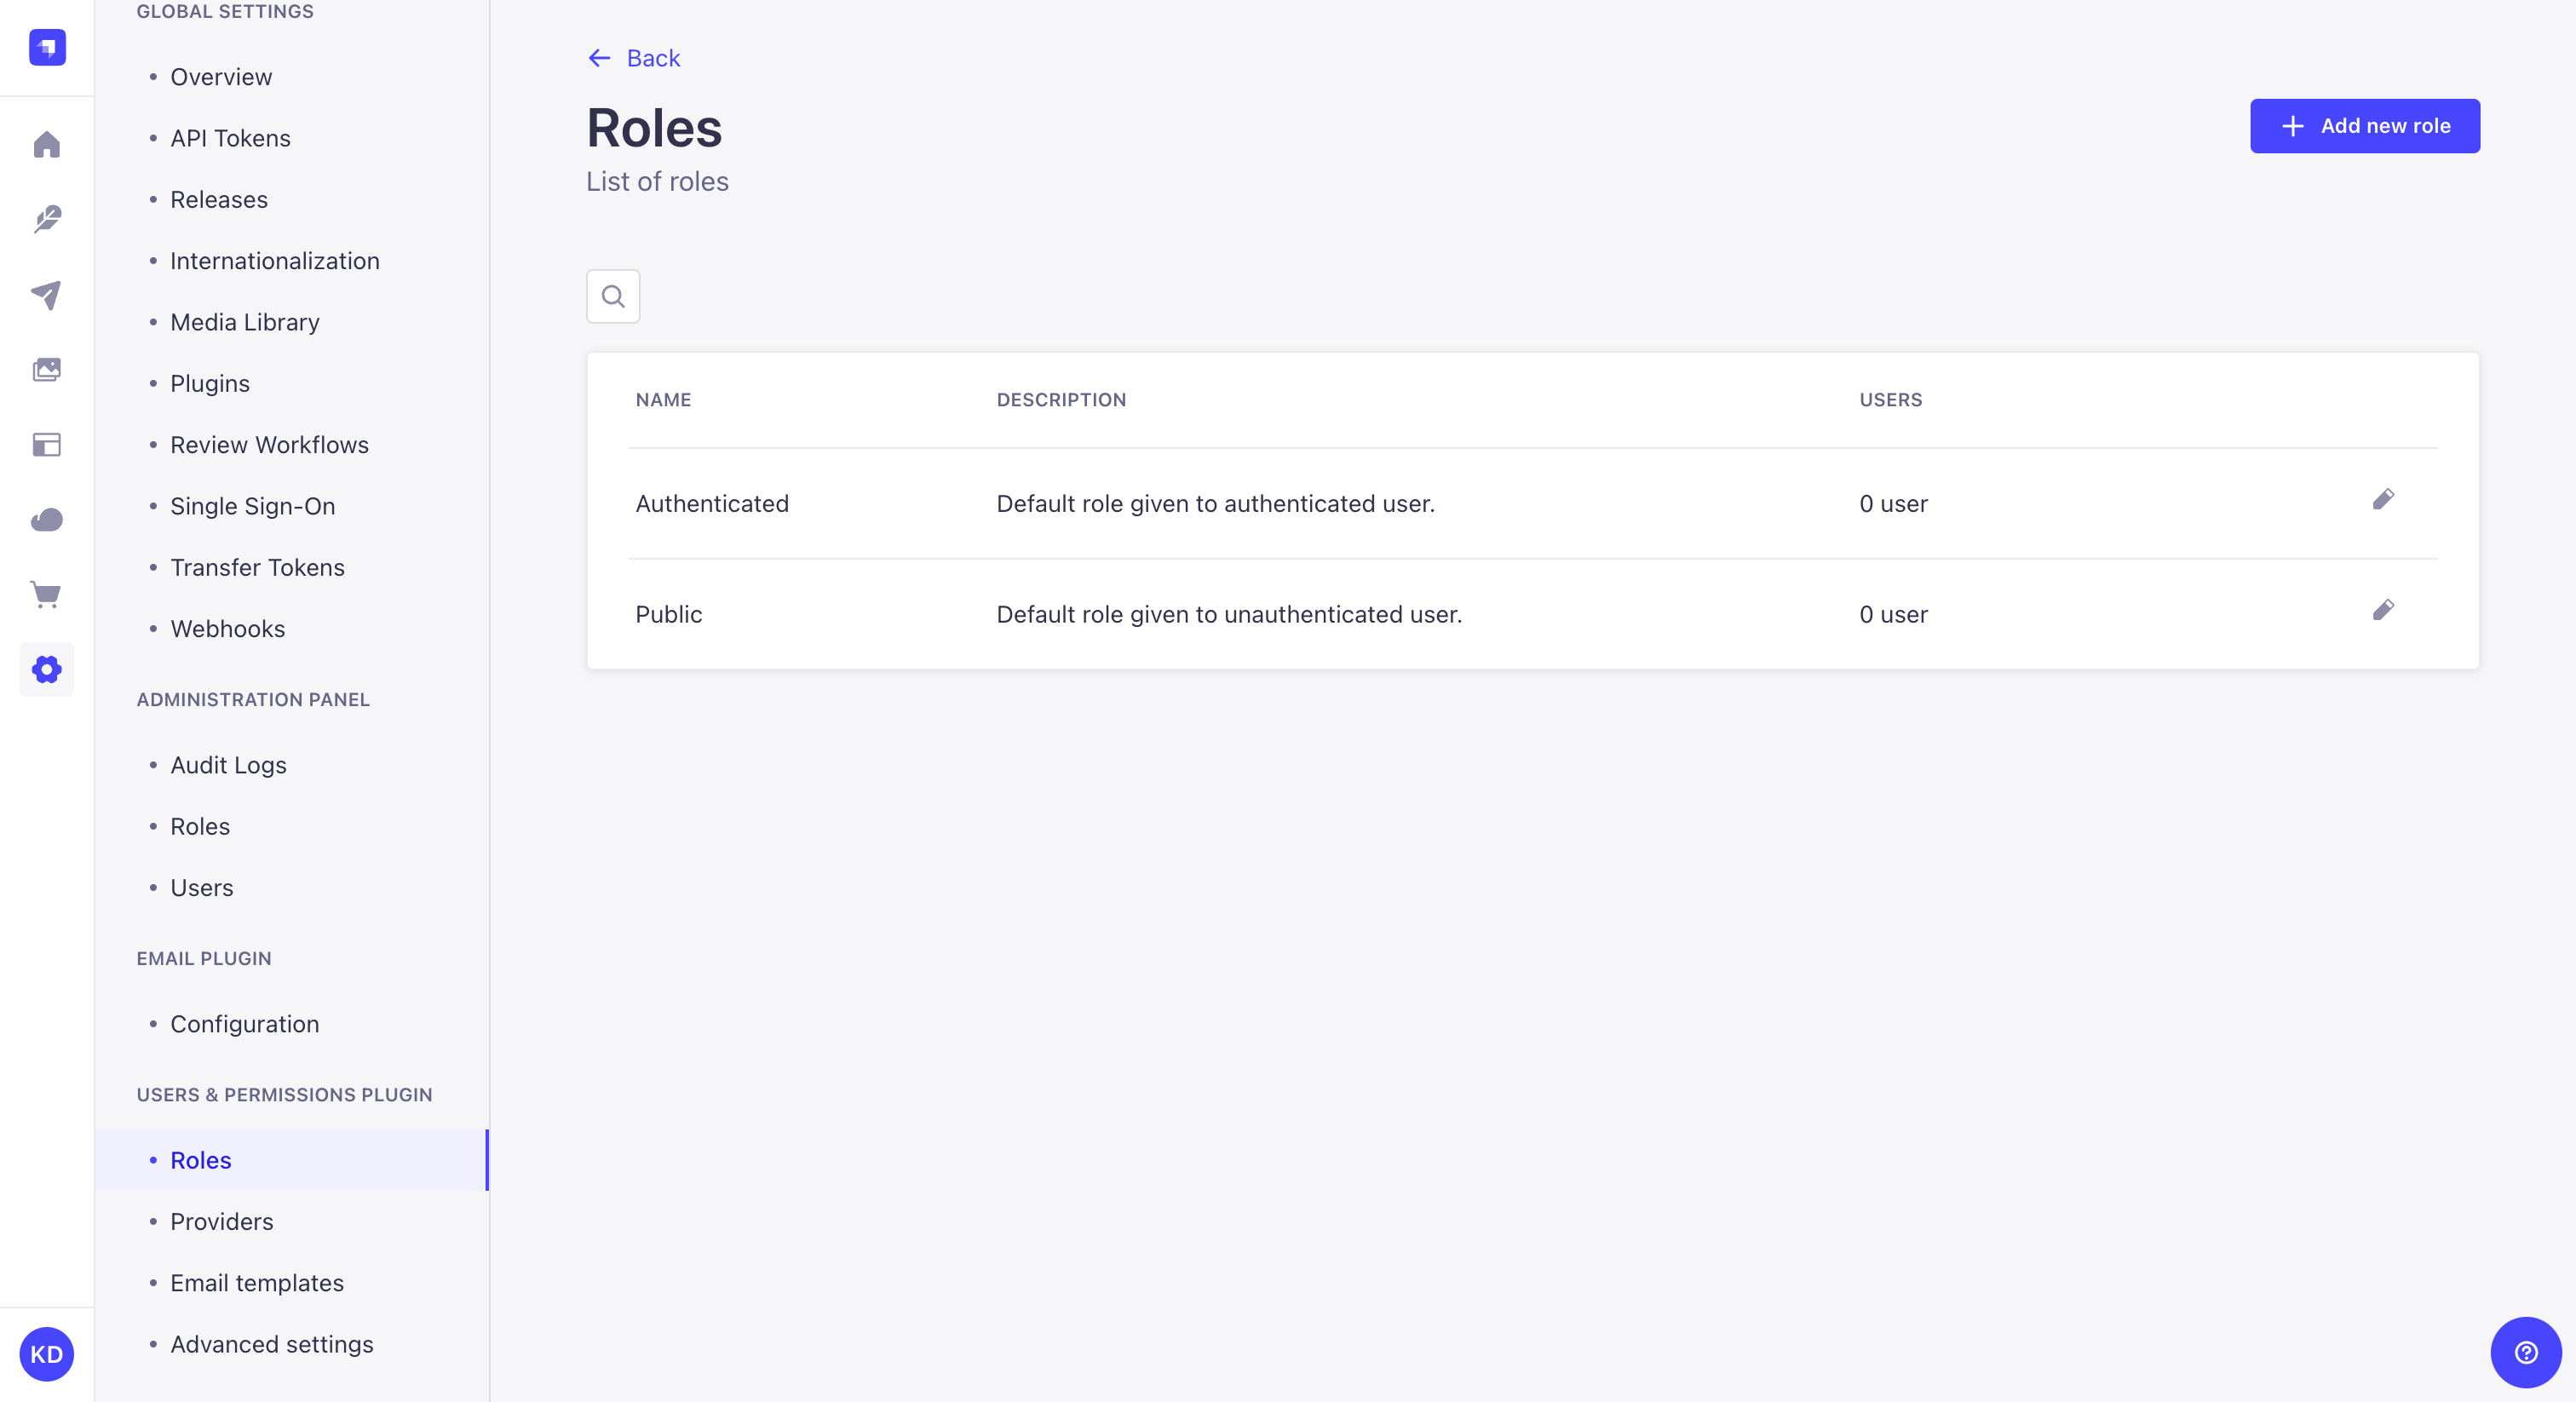
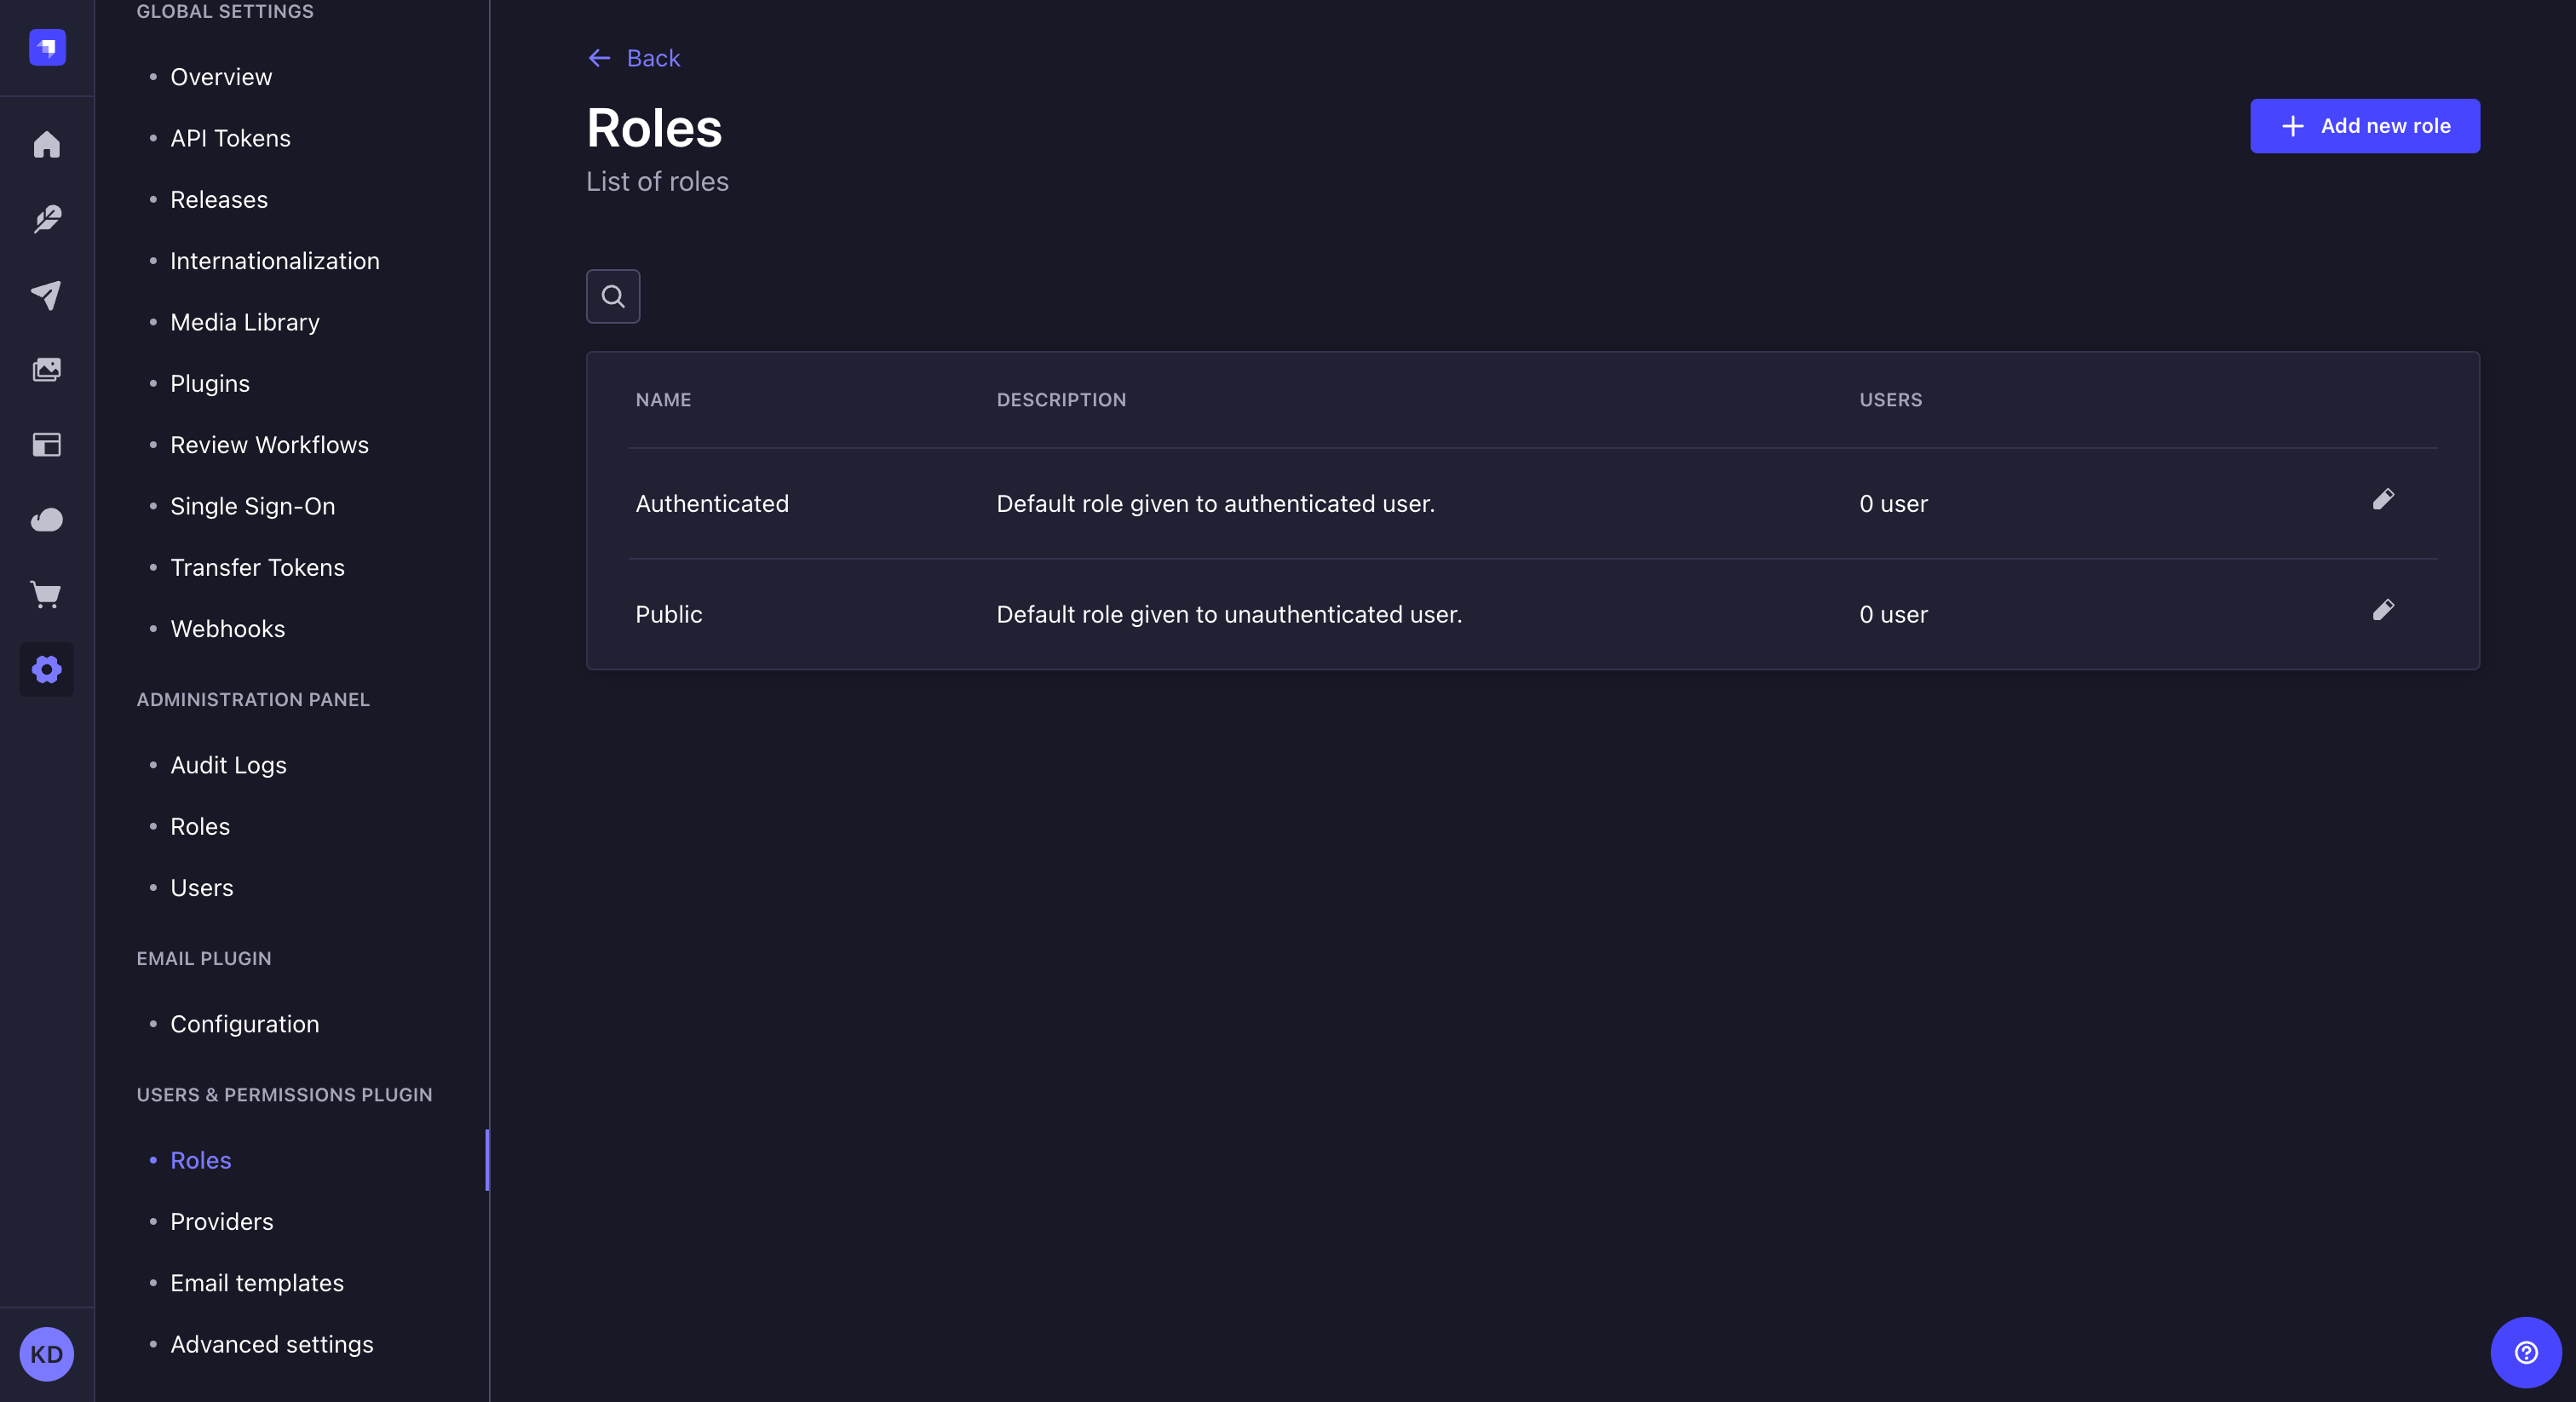
Roles 界面显示为你的 Strapi 应用的终端用户创建的所有角色。
🌐 The Roles interface displays all created roles for the end users of your Strapi application.
默认情况下,为任何 Strapi 应用定义 2 个终端用户角色:
🌐 By default, 2 end-user roles are defined for any Strapi application:
- 已认证:只有在登录前端应用的情况下,终端用户才能访问内容。
- 公共:供终端用户在未登录前端应用的情况下访问内容�。
然而,可以创建更多角色(参见创建新角色),并且所有角色都可以通过角色编辑界面进行编辑。
🌐 More roles can however be created (see Creating a new role), and all can be edited through the role edition interface.
-
点击角色的编辑按钮 进行编辑——除非你是直接从创建新角色进入角色编辑界面。
-
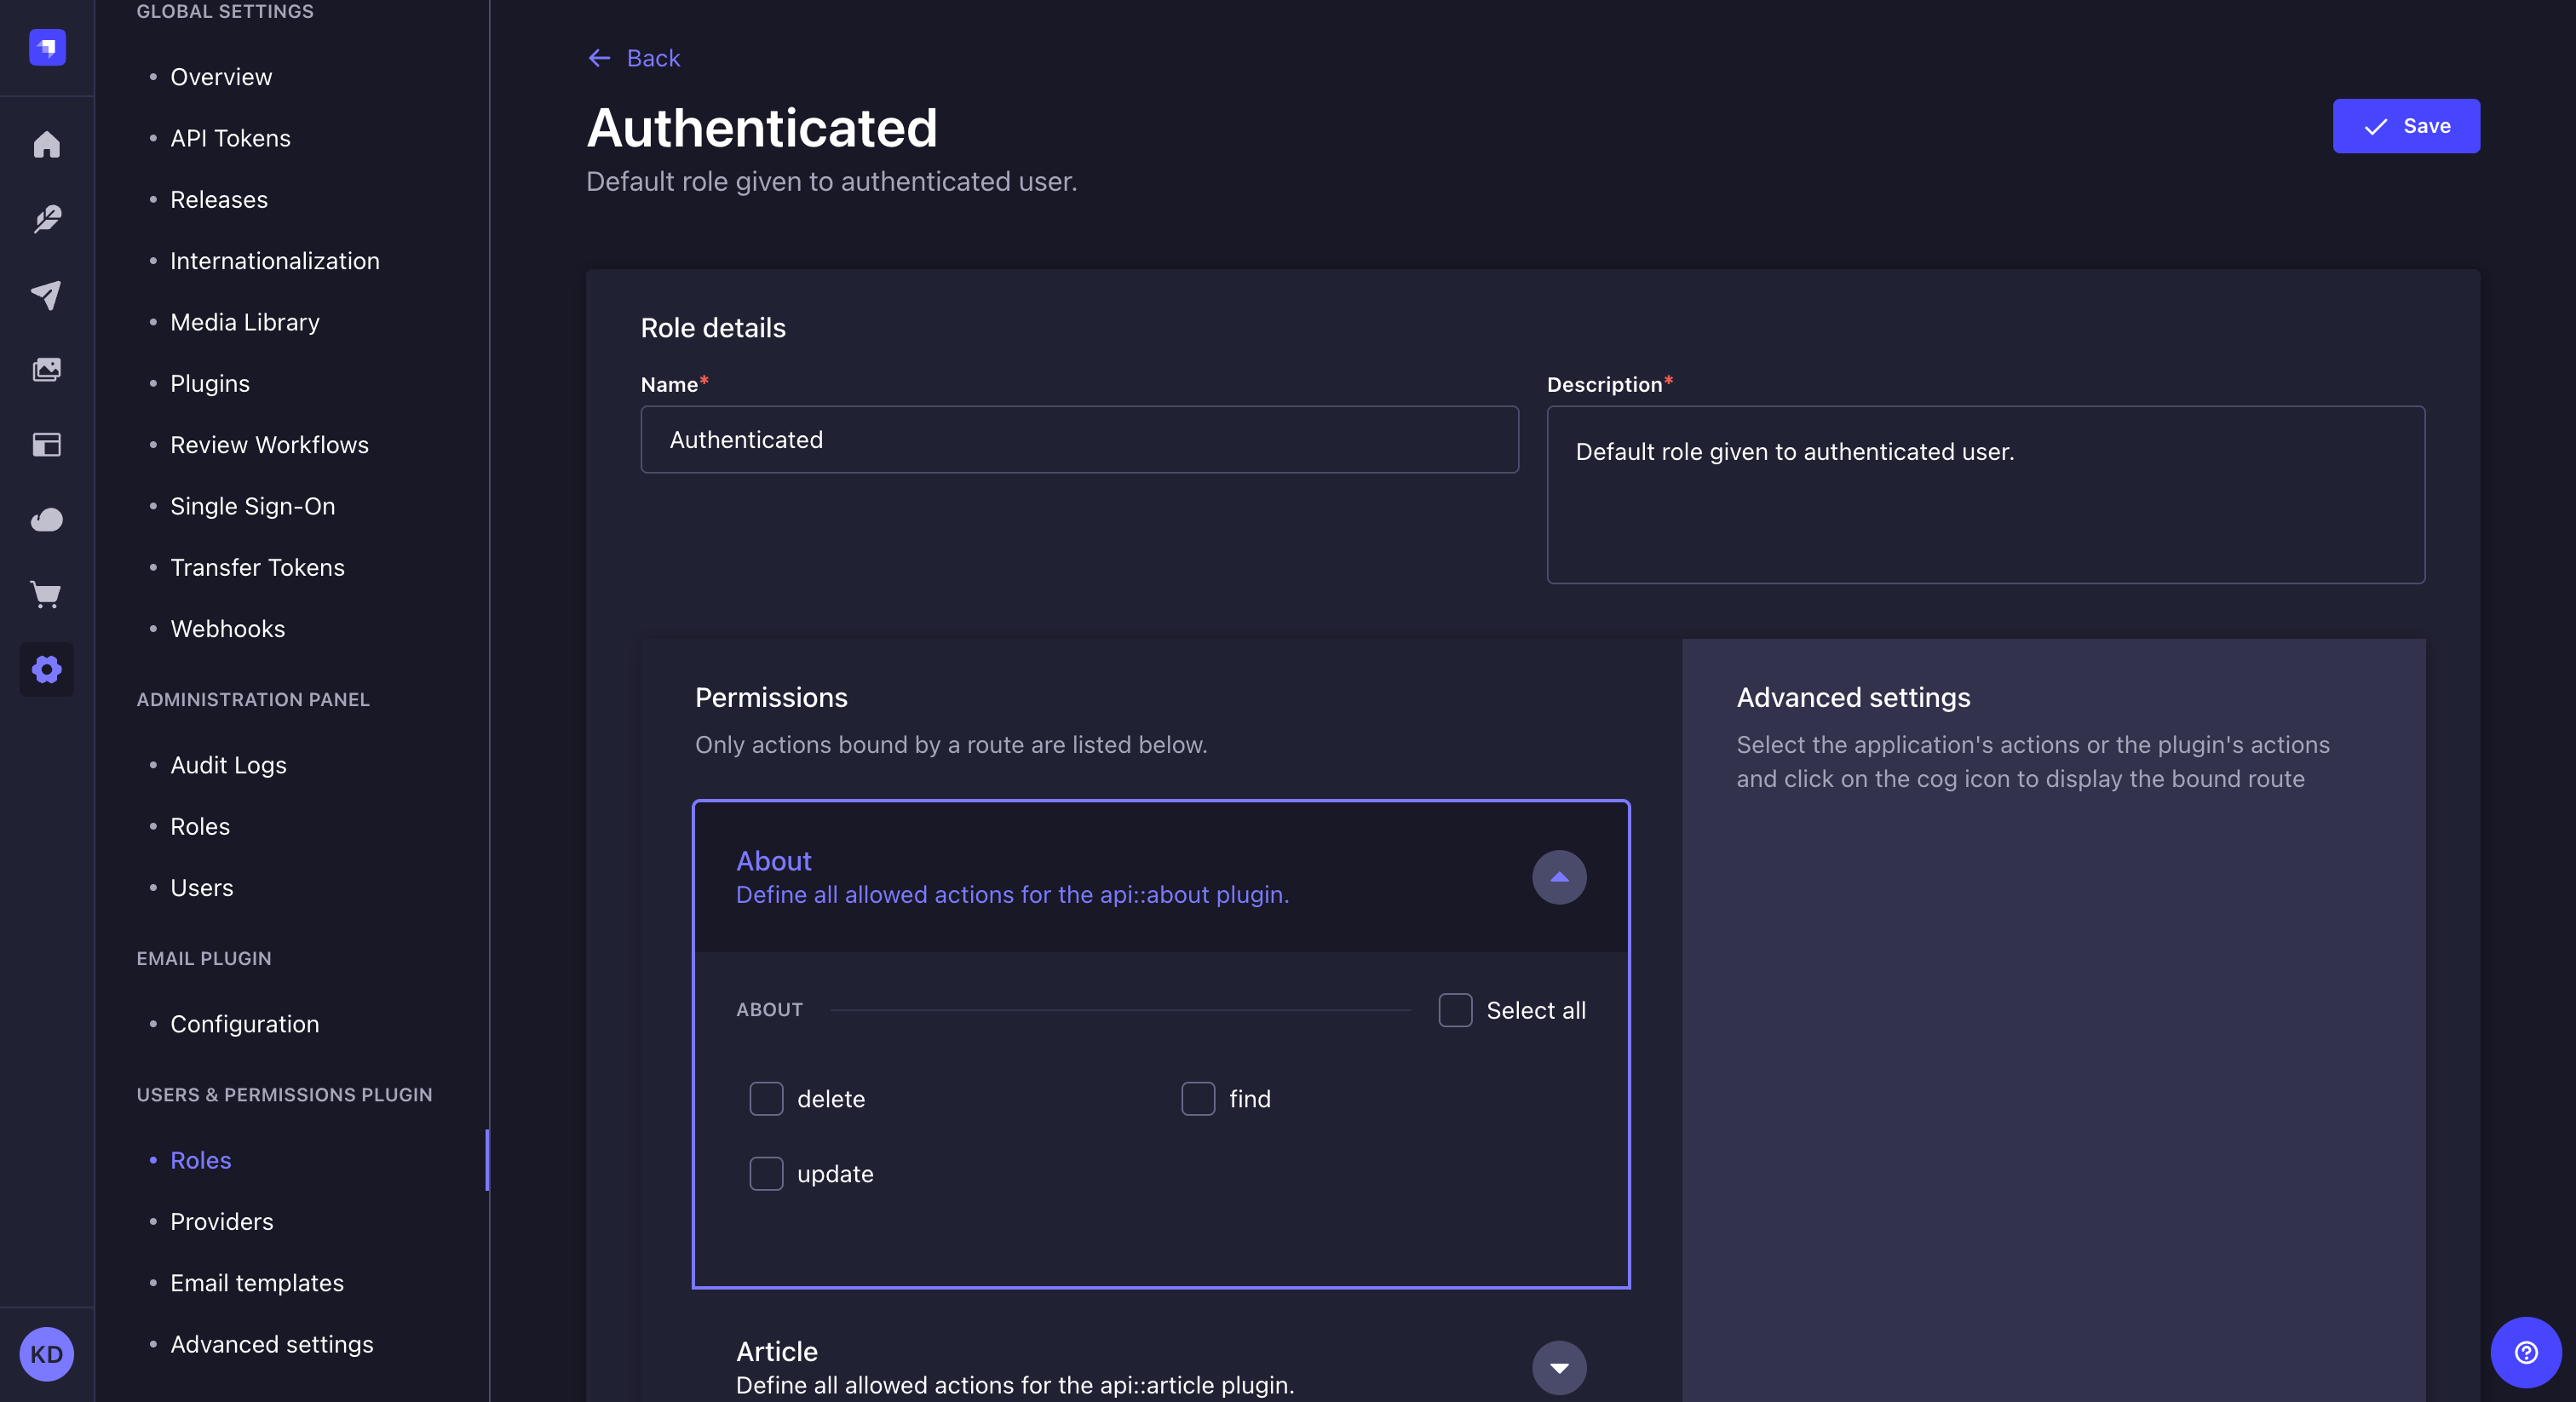
填写角色详情,按照下表中的说明操作: | 角色详情 | 指示 || --- | --- || 名称 | 在文本框中写下角色的新名称。 || 描述 | 在文本框中写下角色的描述。它应该帮助管理员了解该角色可以访问的内容。 |
-
通过以下方式配置终端用户角色的权限:
- 单击要配置的权限类别的名称(例如应用、内容管理器、电子邮件等)。
- 勾选要授予角色的操作和权限的框。
-
点击 保存 按钮。
当勾选某个操作或权限框时,界面右侧会显示该 API 的相关绑定路由。
🌐 When ticking an action or permission box, related bound routes of the API are displayed in the right side of the interface.

删除角色
🌐 Deleting a role
路径: 用户与权限插件 > 角色
尽管无法删除 2 个默认终端用户角色,但其他角色可以删除,只要没有终端用户仍将此角色归属于其账户即可。
🌐 Although the 2 default end-user roles cannot be deleted, the other ones can, as long as no end user still has this role attributed to their account.
- 点击角色记录右侧的删除按钮 。
- 在删除窗口,点击 确认按钮以确认删除。
提供者
🌐 Providers
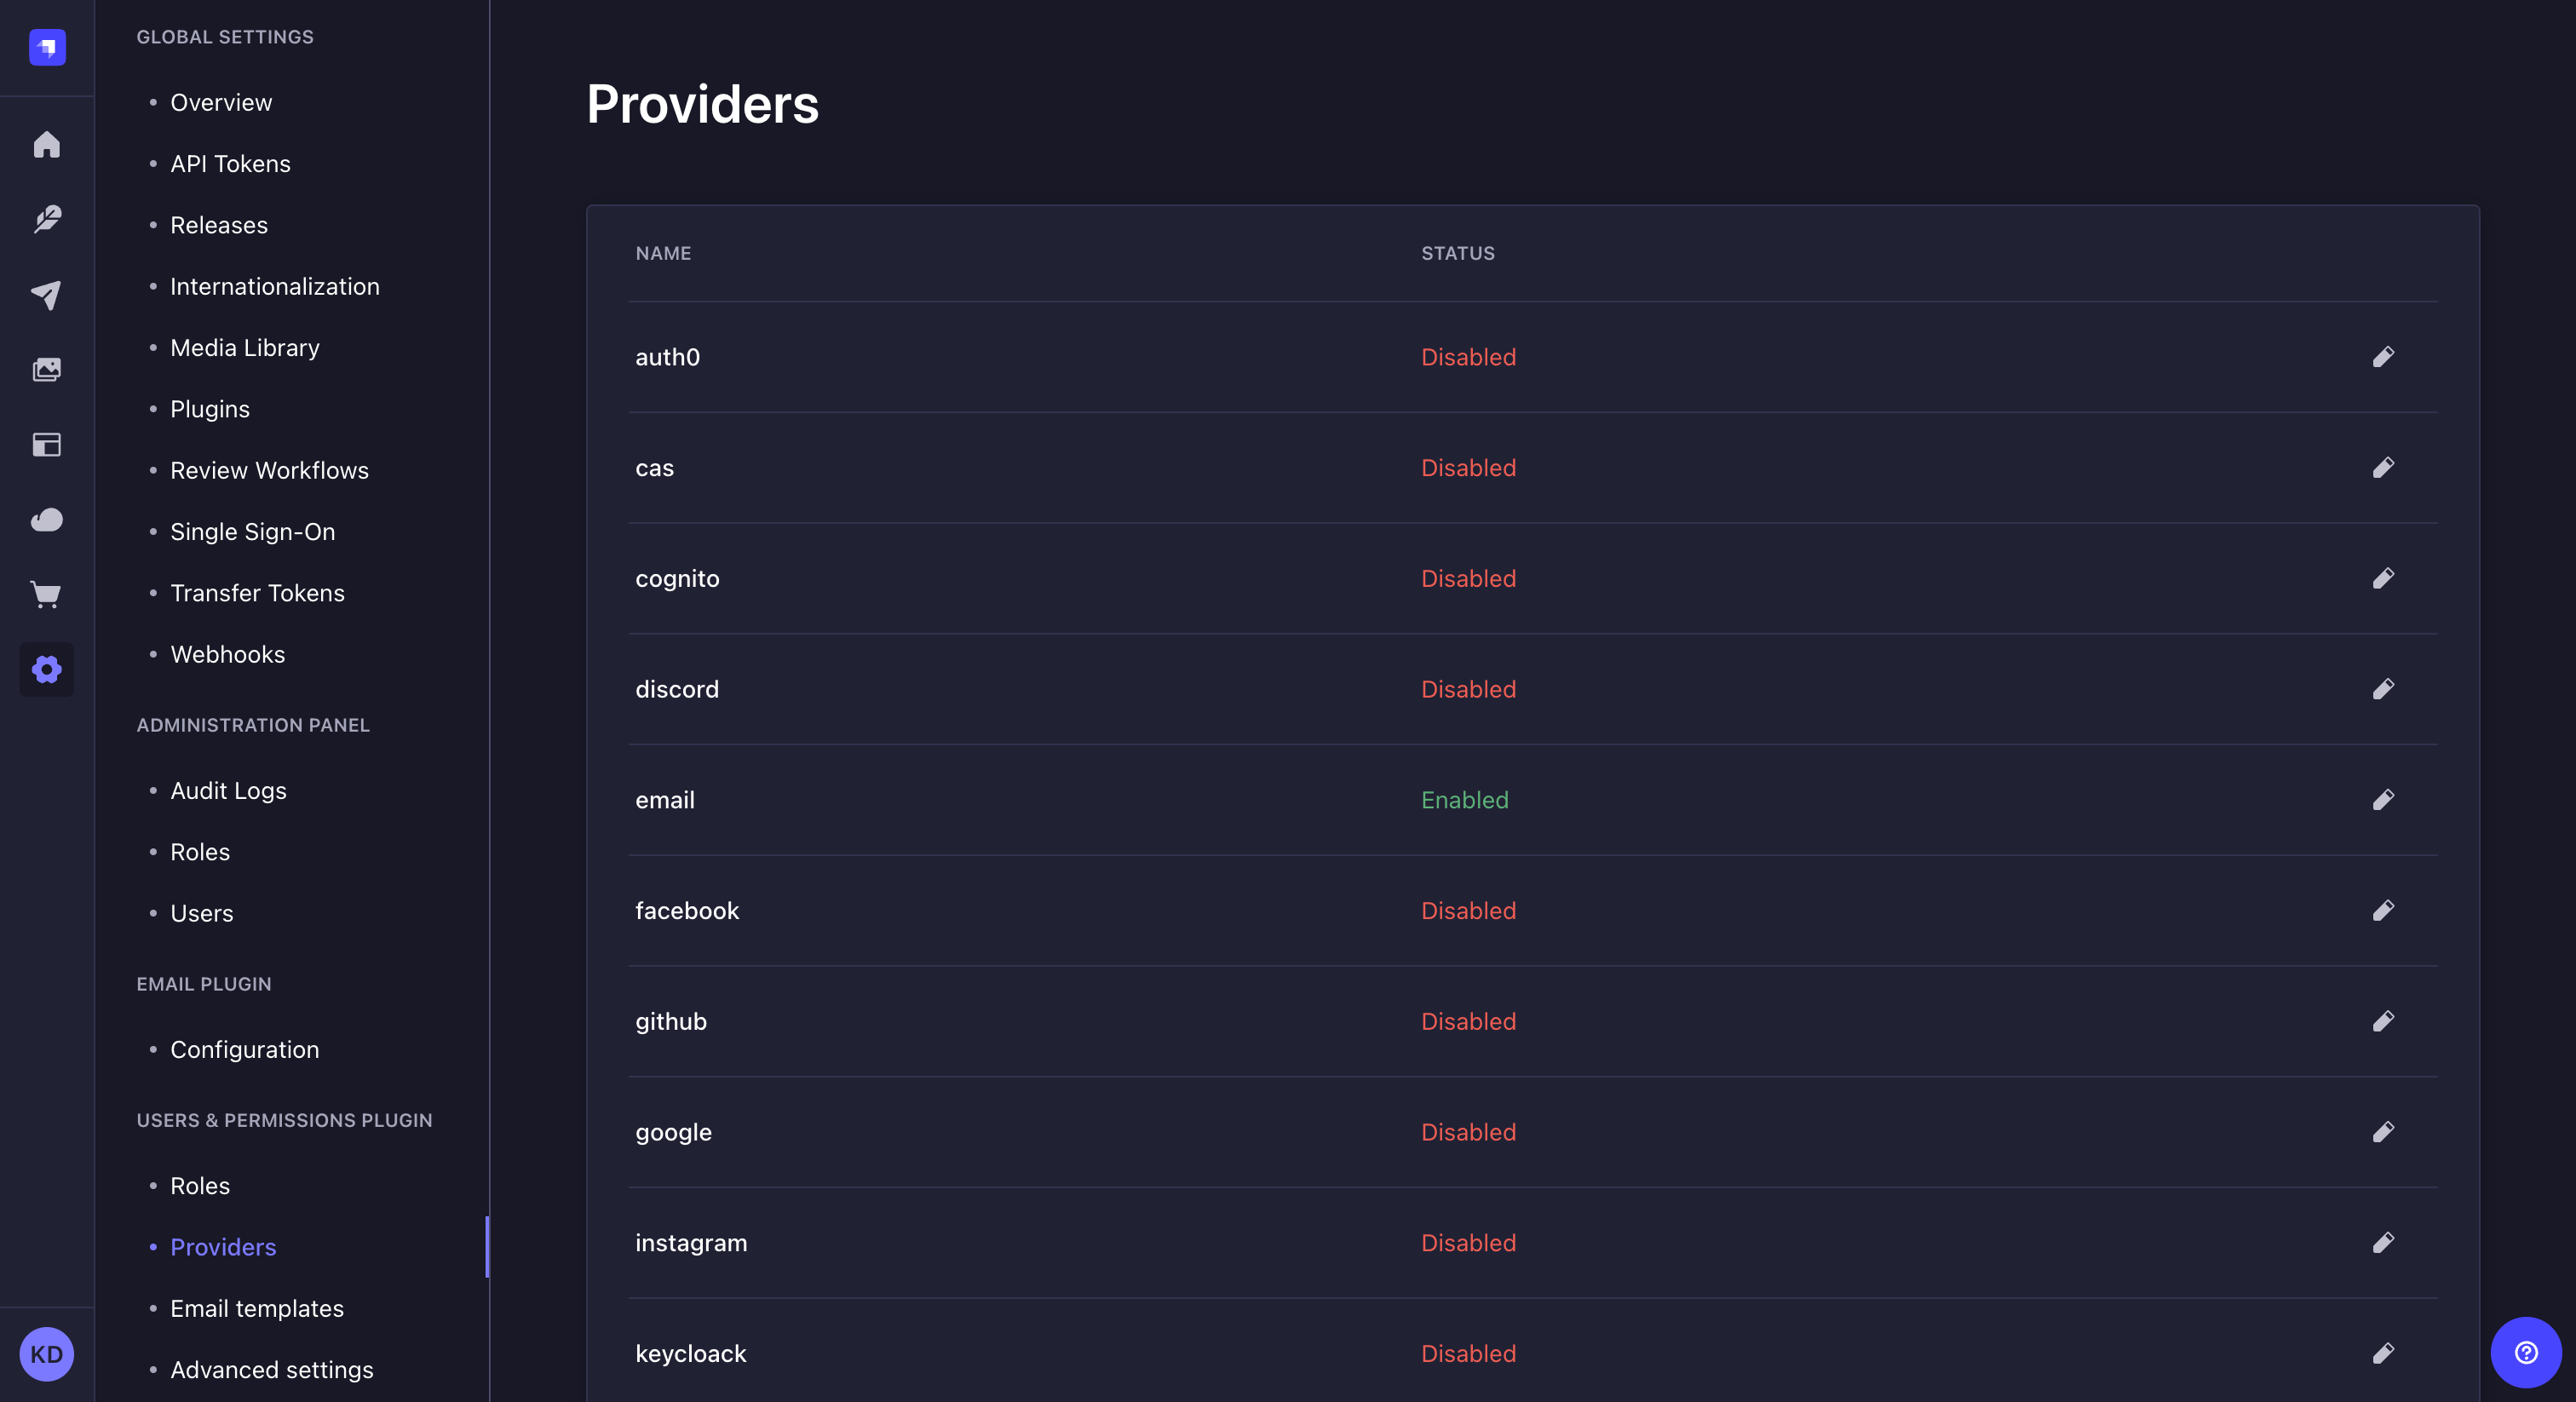
路径: 用户与权限插件 > 提供者
用户和权限功能允许启用和配置提供商,以便终端用户通过第三方提供商登录,通过 Strapi 应用 API 访问前端应用的内容。
🌐 The Users & Permissions feature allows enabling and configuring providers, for end users to login via a third-party provider to access the content of a front-end application through the Strapi application API.
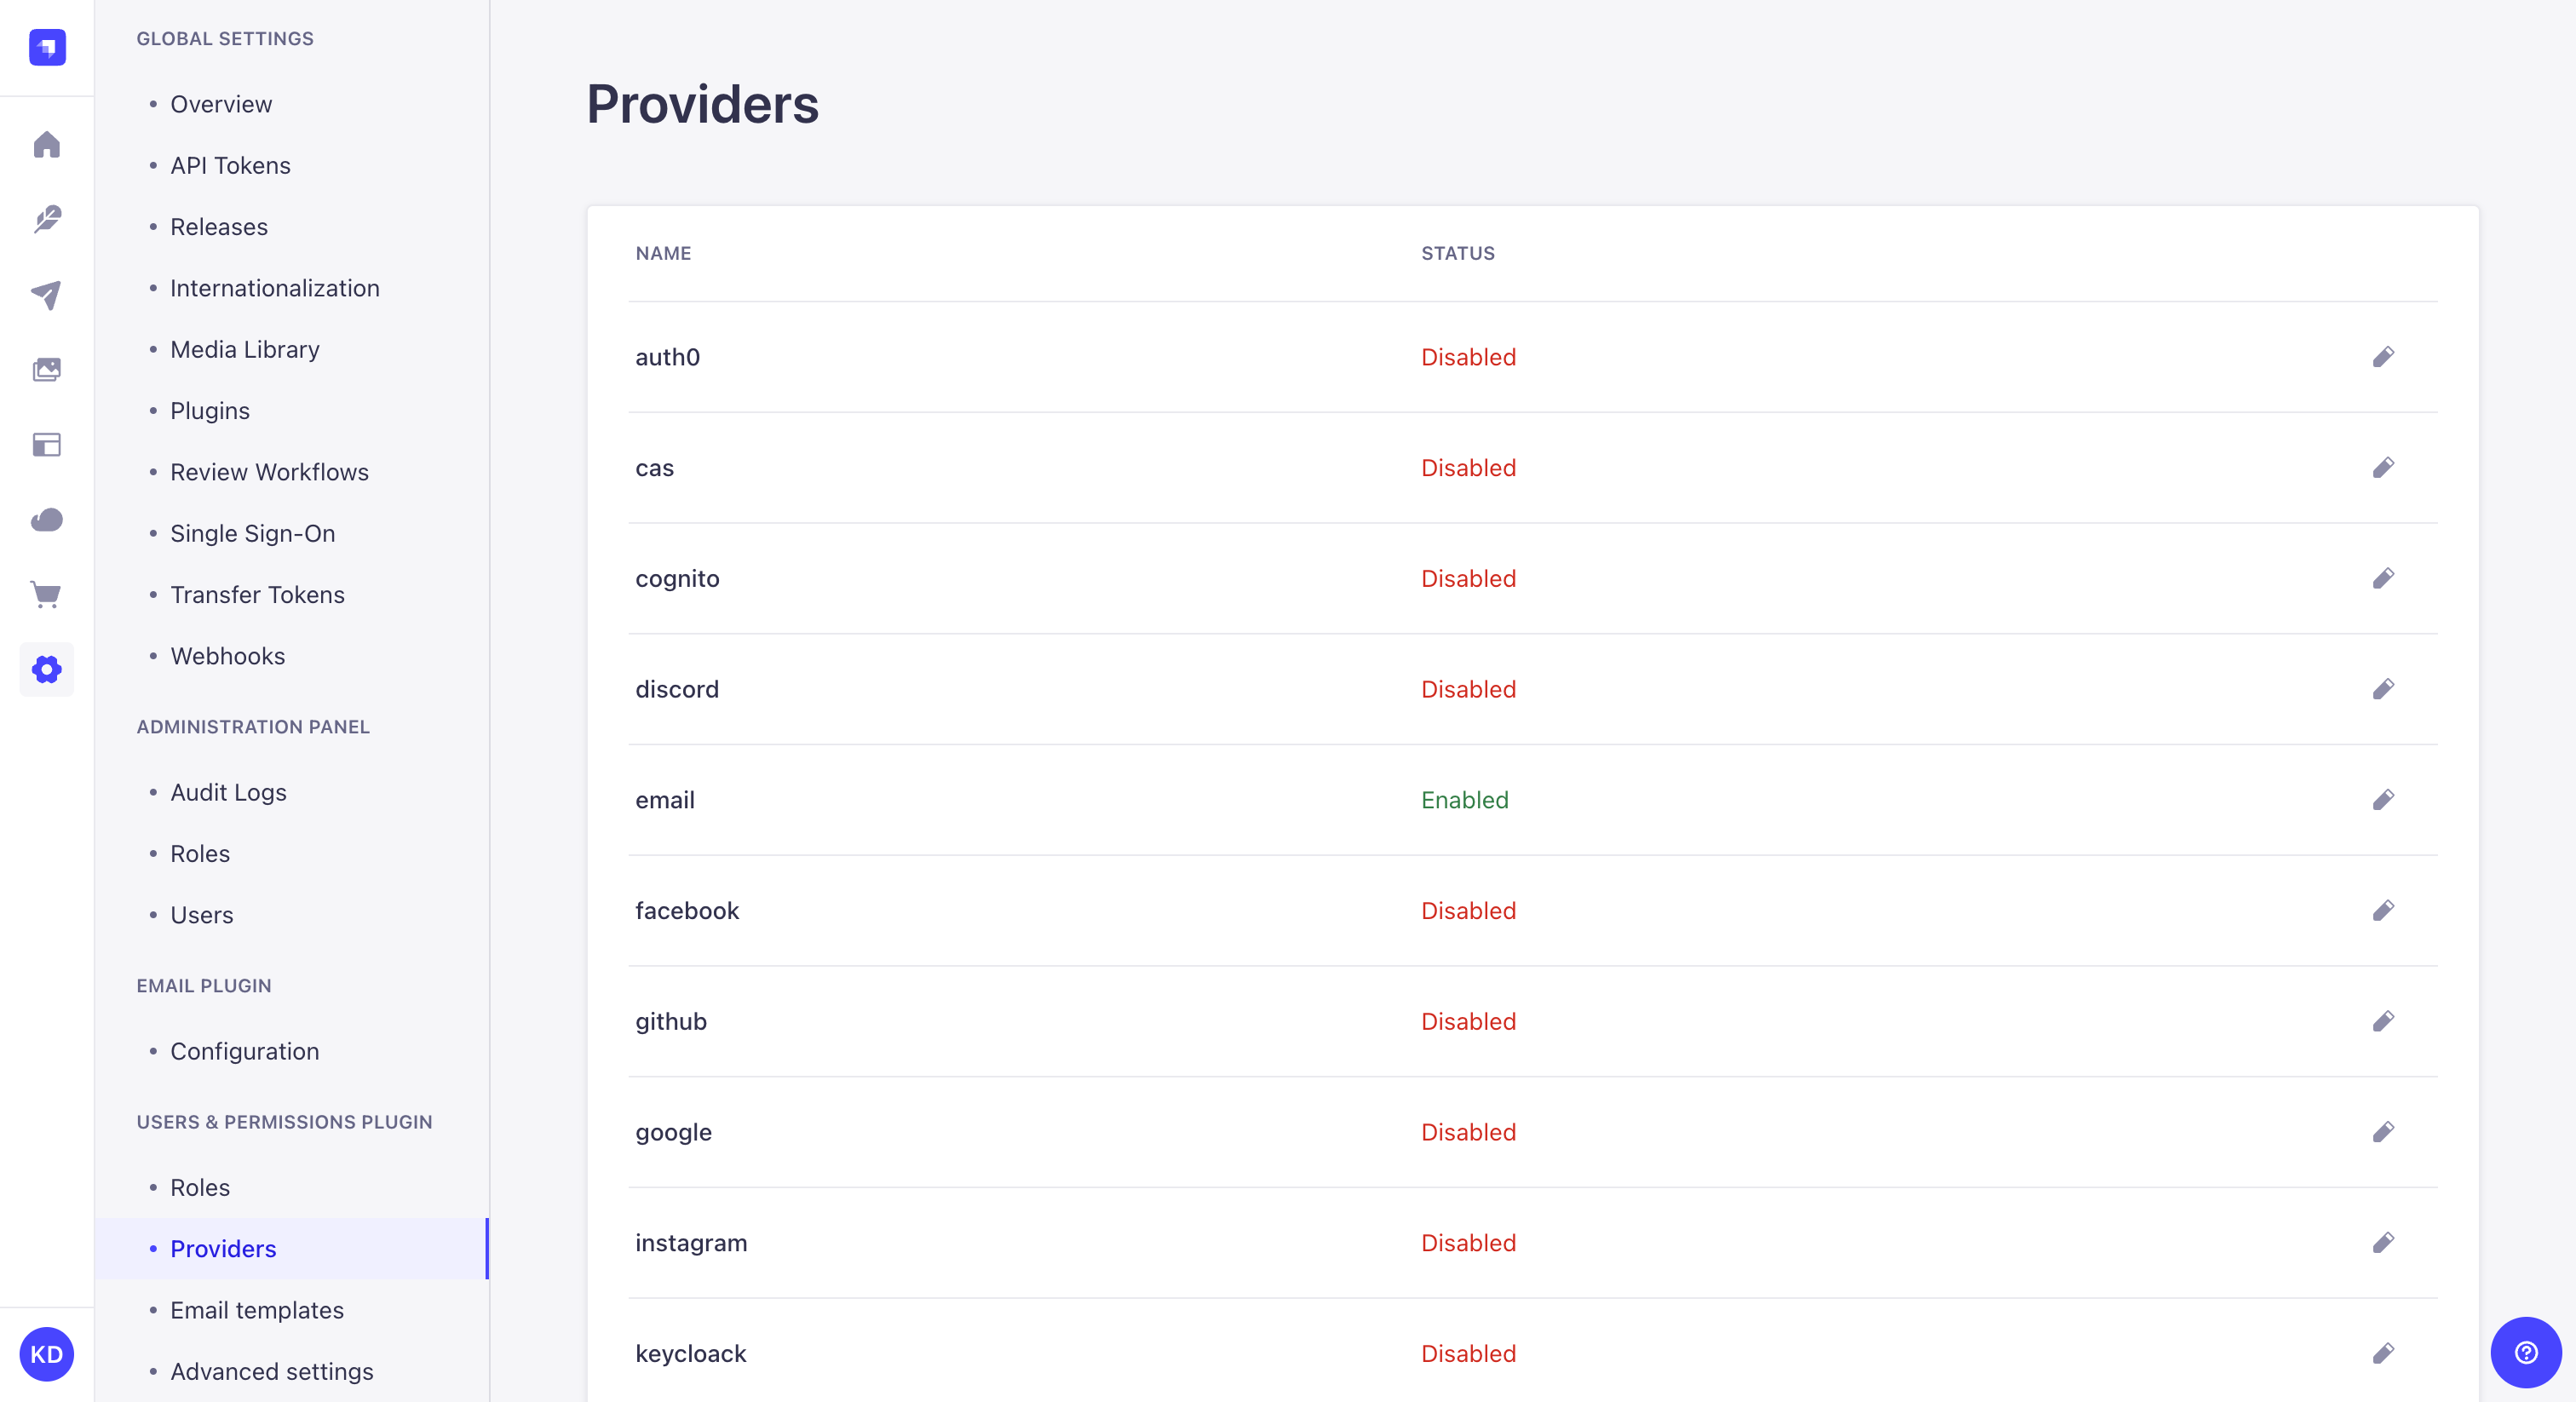
默认情况下,会提供一个提供者列表,其中包括“电子邮件”,它在启用用户和权限的所有 Strapi 应用中默认启用。
🌐 By default, a list of providers is available including one, "Email", enabled by default for all Strapi applications with Users & Permissions enabled.
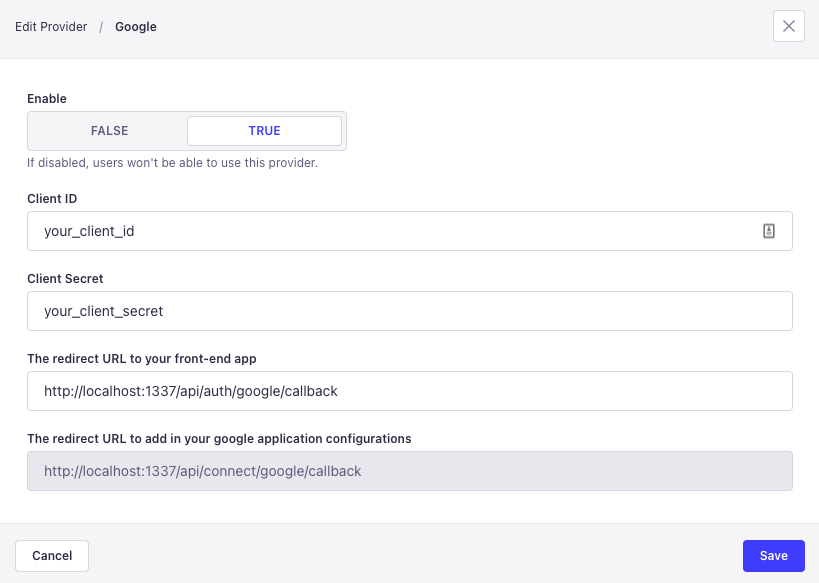
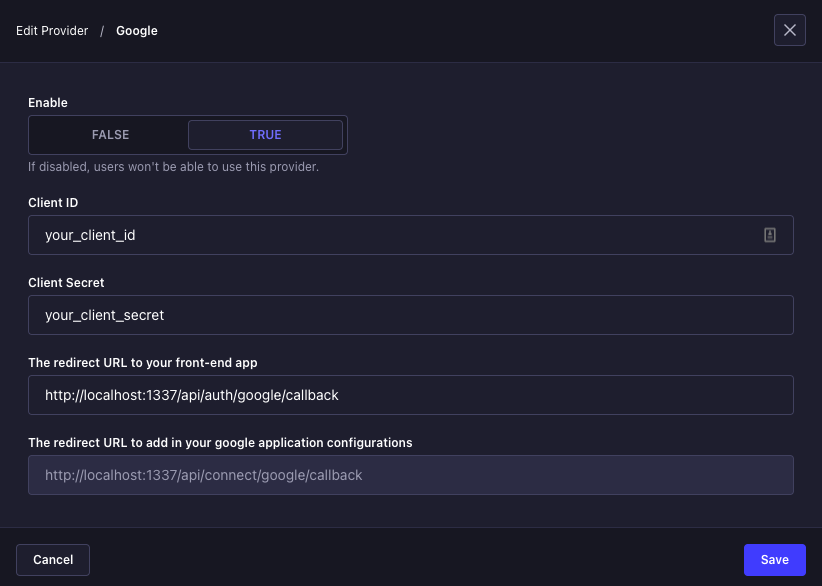
- 点击供应商的编辑 按钮以启用并配置。
- 在提供者版本窗口中,点击启用选项的TRUE按钮。
- 填写提供商的配置。每个提供商都有自己特定的配置集(请参阅用户与权限提供商文档)。
- 点击 保存 按钮。
Strapi 默认未提供的其他服务提供商可以通过手动修改 Strapi 应用的代码来添加。点击以下任意卡片以获取有关配置或创建第三方服务提供商的更多信息:
🌐 Other providers that are not proposed by default by Strapi can be added manually through the code of your Strapi application. Click on any of the following cards to get additional information on configuring or creating third-party providers:
电子邮件模板
🌐 Email templates
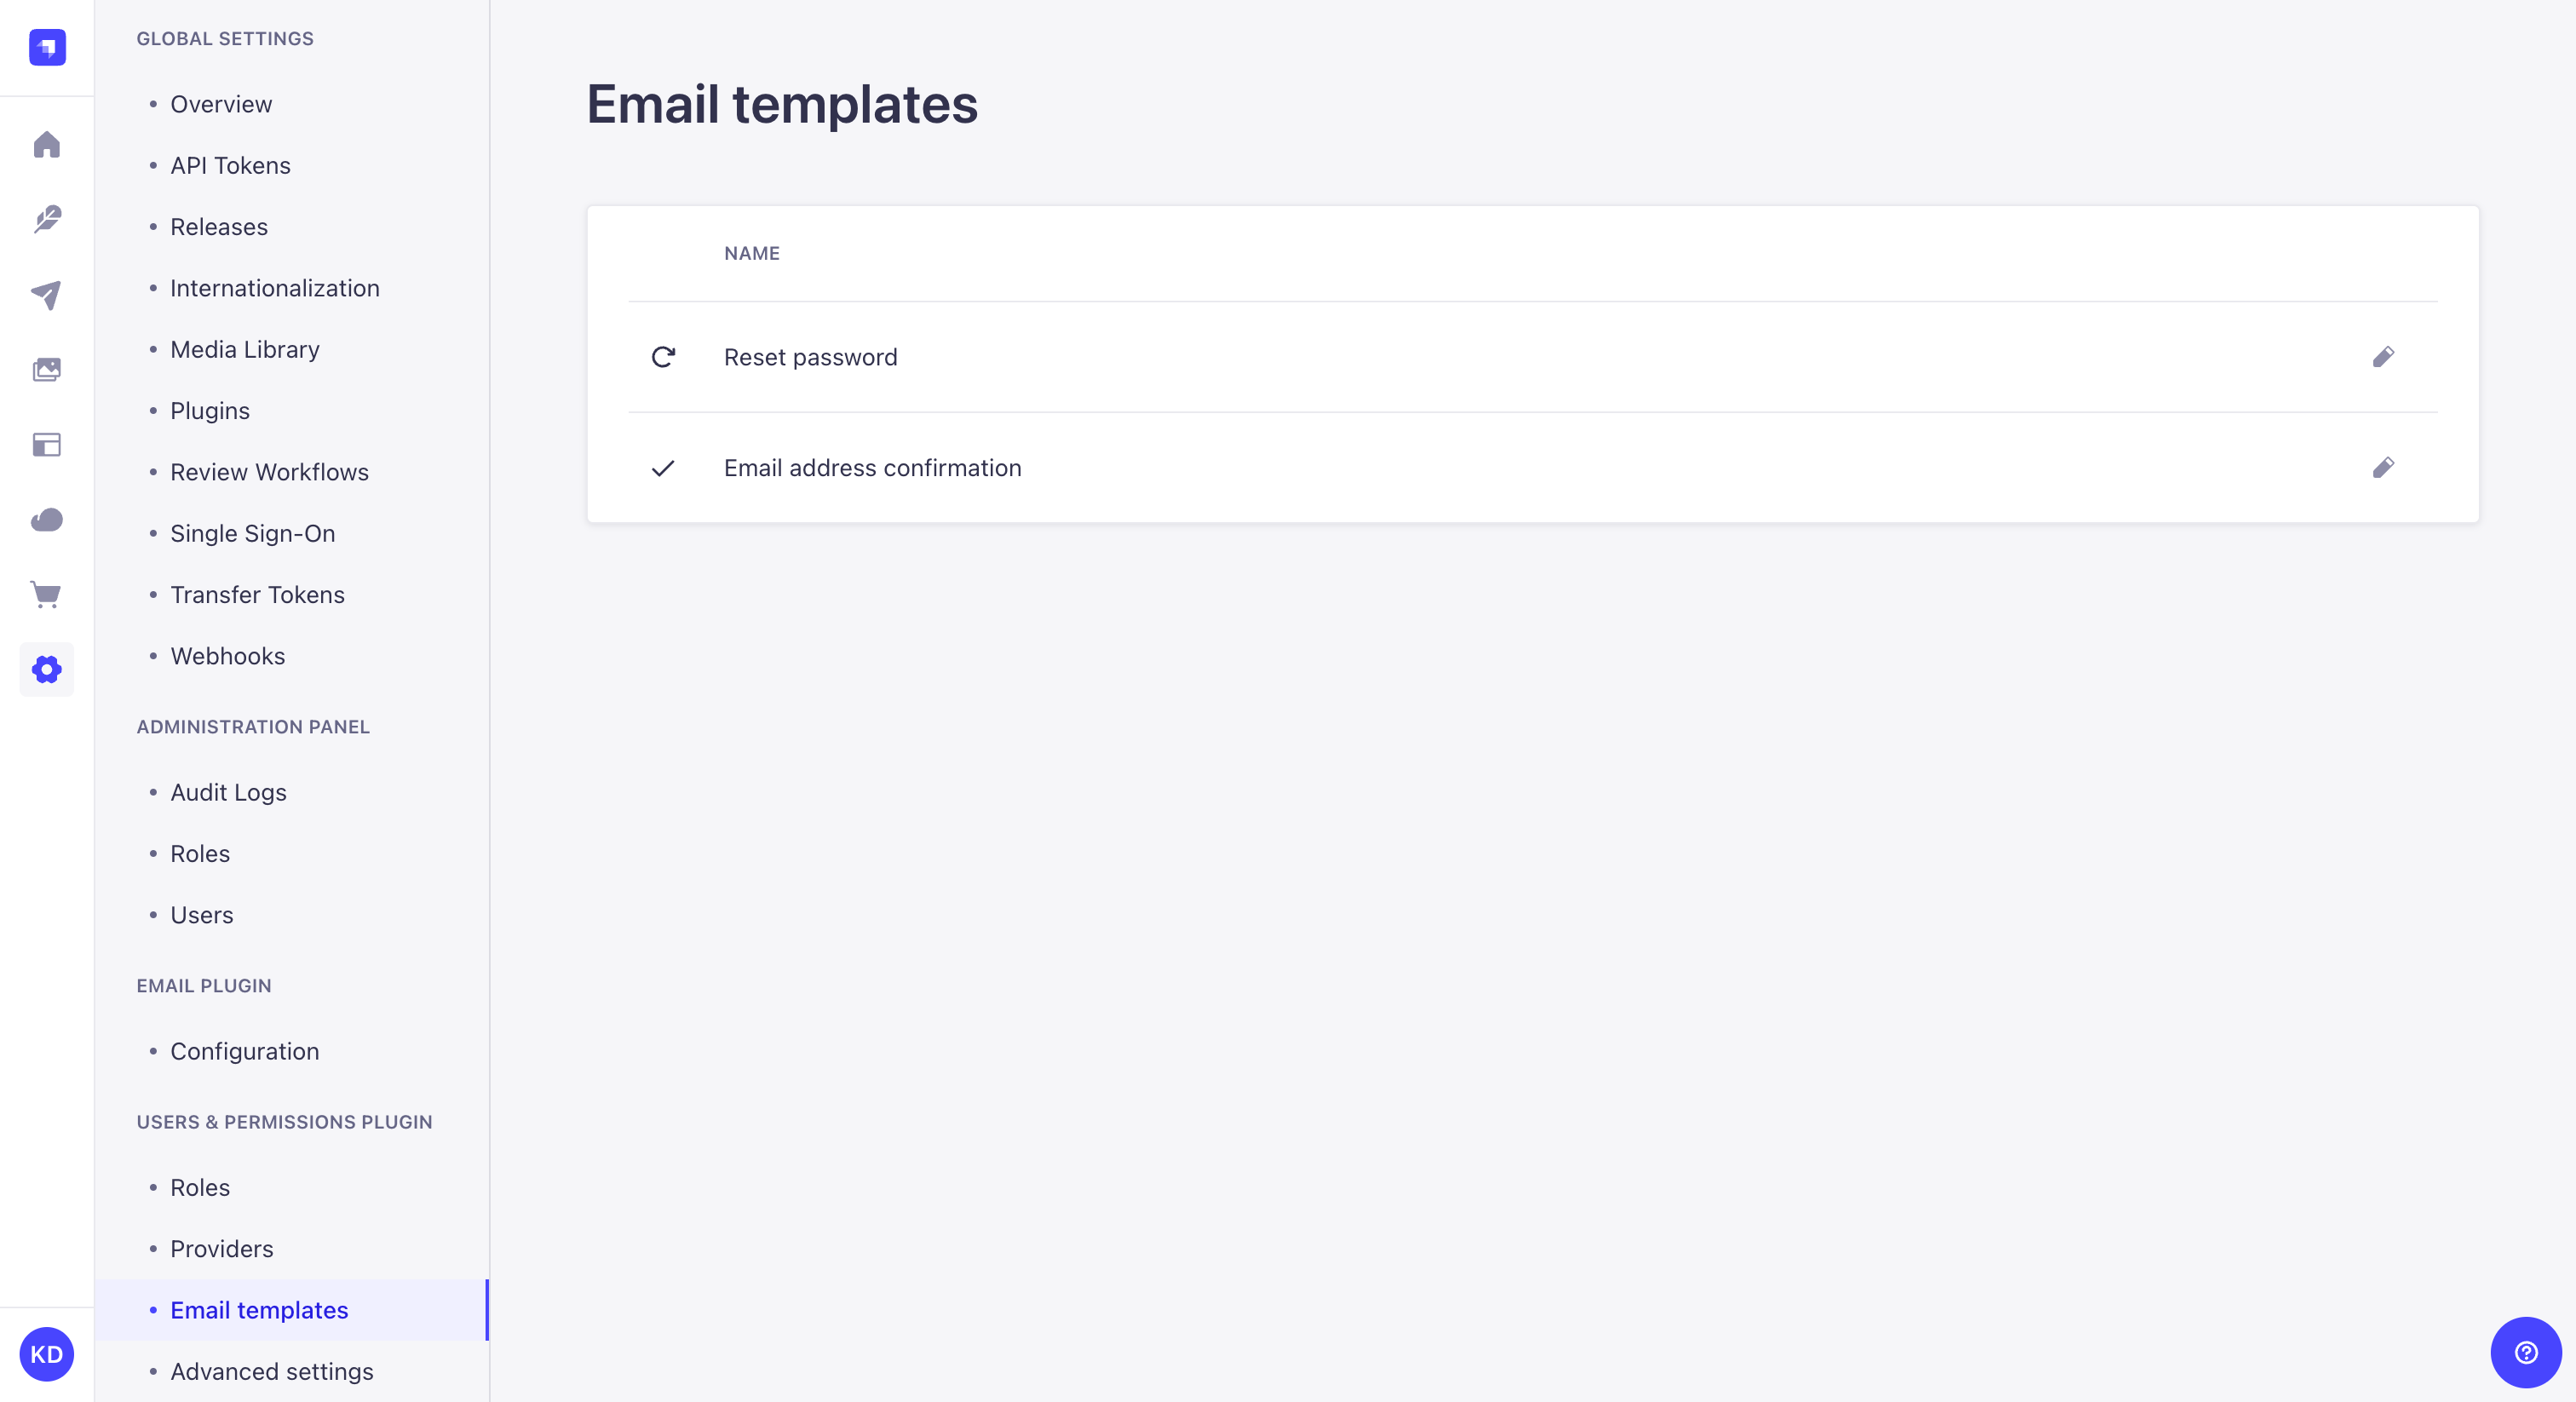
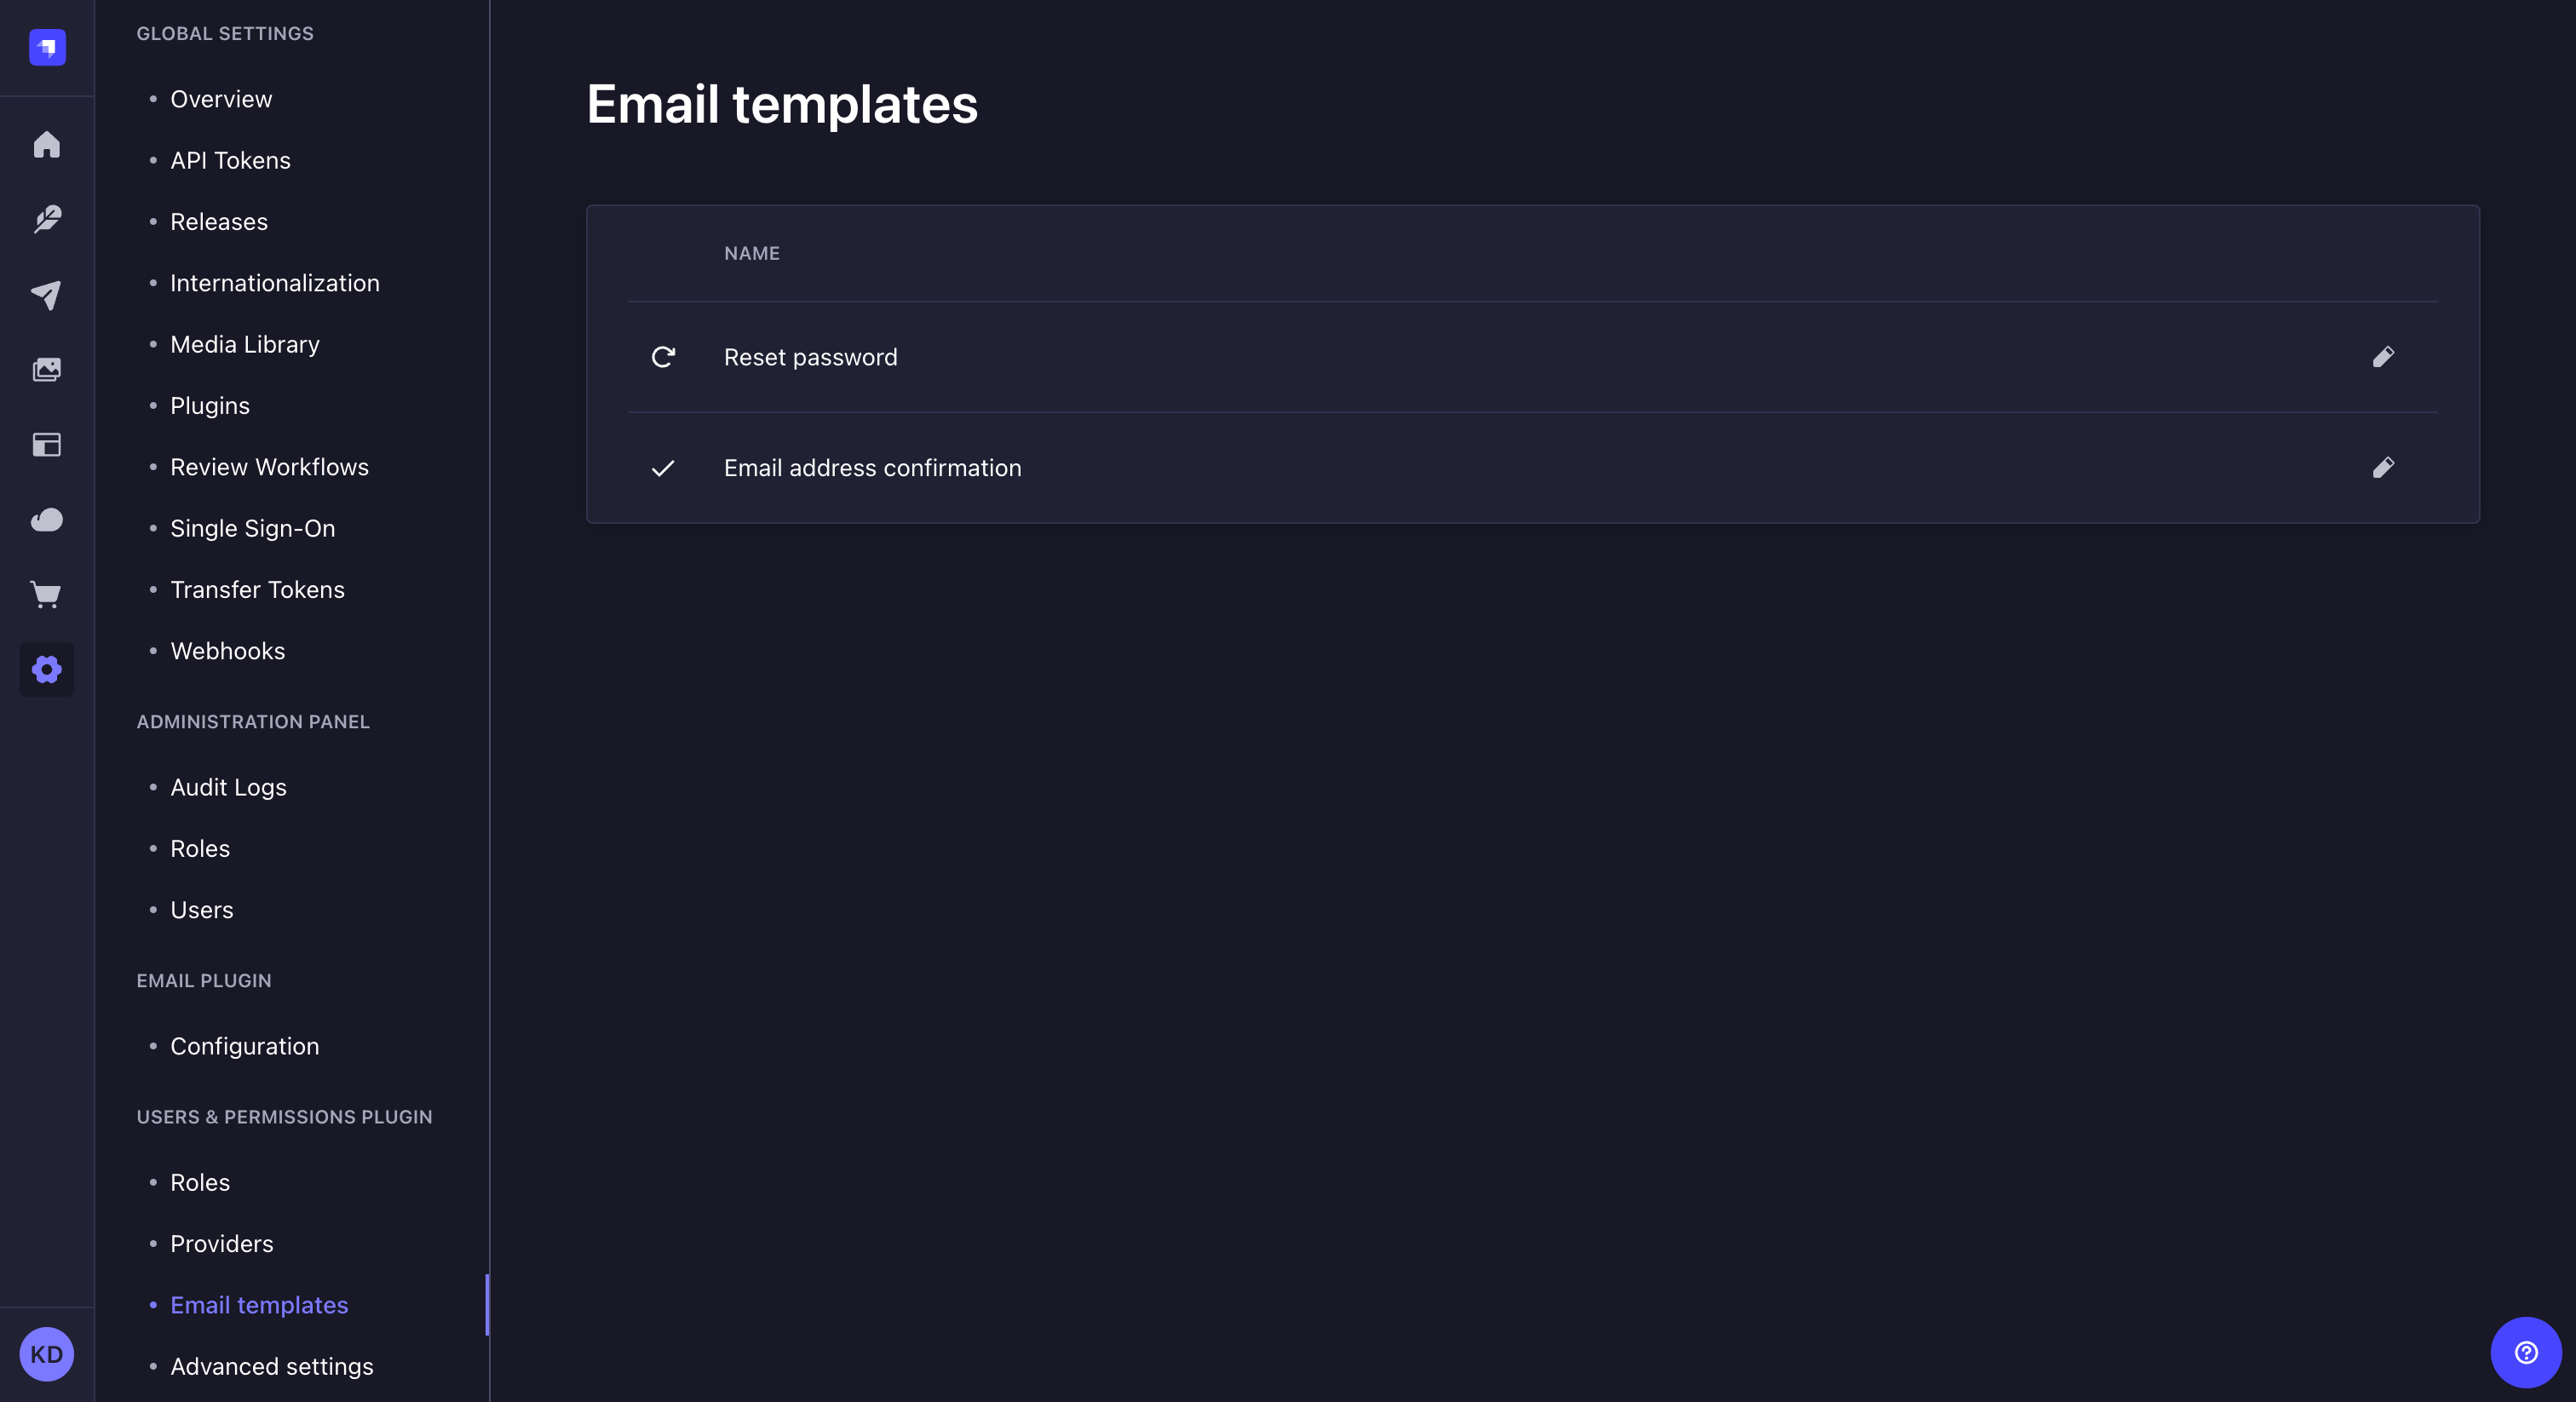
路径: 用户与权限插件 > 邮件模板
“用户与权限”功能使用两个电子邮件模板,“电子邮件地址确认”和“重置密码”,这些模板会发送给终端用户:
🌐 The Users & Permissions feature uses 2 email templates, "Email address confirmation" and "Reset password", that are sent to end users:
- 如果必须确认他们的账户才能激活,
- 如果他们需要重置 Strapi 账户的密码。
两个电子邮件模板都可以修改。
🌐 Both email templates can be modified.
- 点击电子邮件模板的编辑 按钮进行配置和编辑。
- 配置电子邮件模板: | 设置名称 | 说明 | |--------------- | ----------------------------------------------- | | 发件人名称 | 指明电子邮件发件人的名称。 | | 发件人邮箱 | 指明电子邮件发件人的邮箱地址。 | | 回复邮箱 | (可选)指明用于接收终端用户回复邮件的邮箱地址。 | | 主题 | 编写电子邮件的主题。可以使用变量(参见 �模板邮件)。 |
- 编辑“消息”文本框中的电子邮件内容。电子邮件模板内容为 HTML 并使用变量(见 模板化电子邮件)。
- 点击 完成 按钮。
高级设置
🌐 Advanced Settings
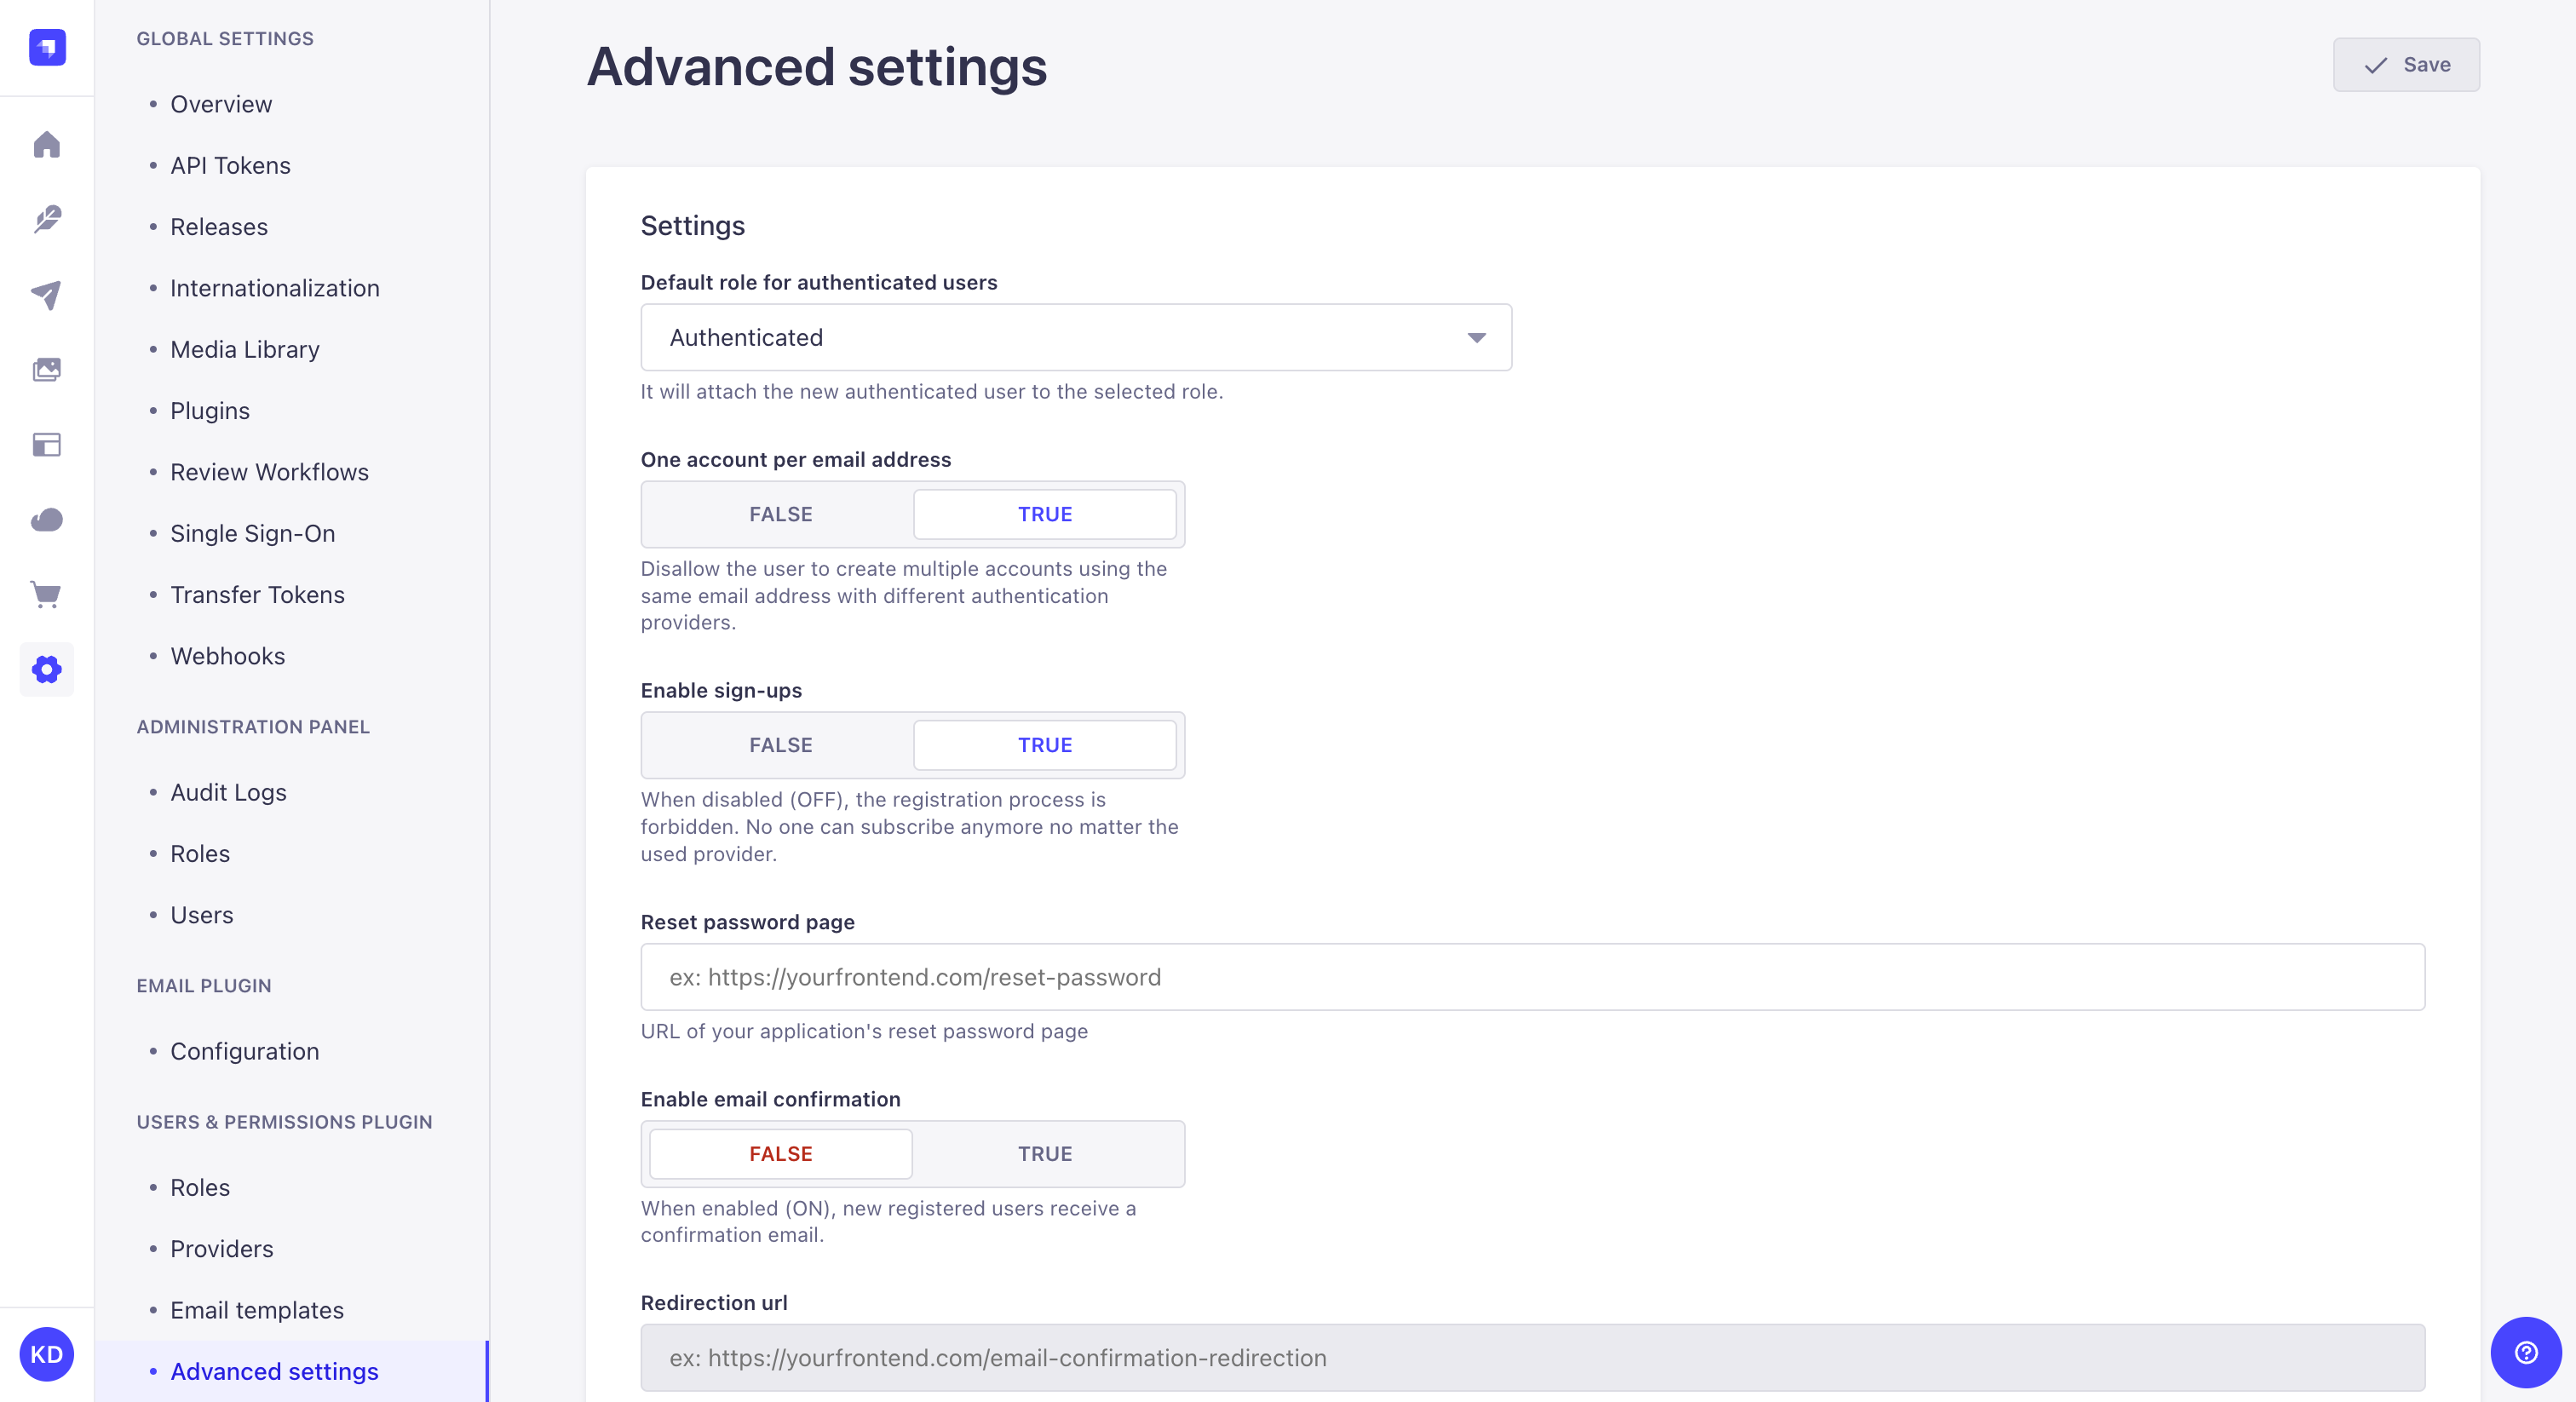
路径: 用户与权限插件 > 高级设置
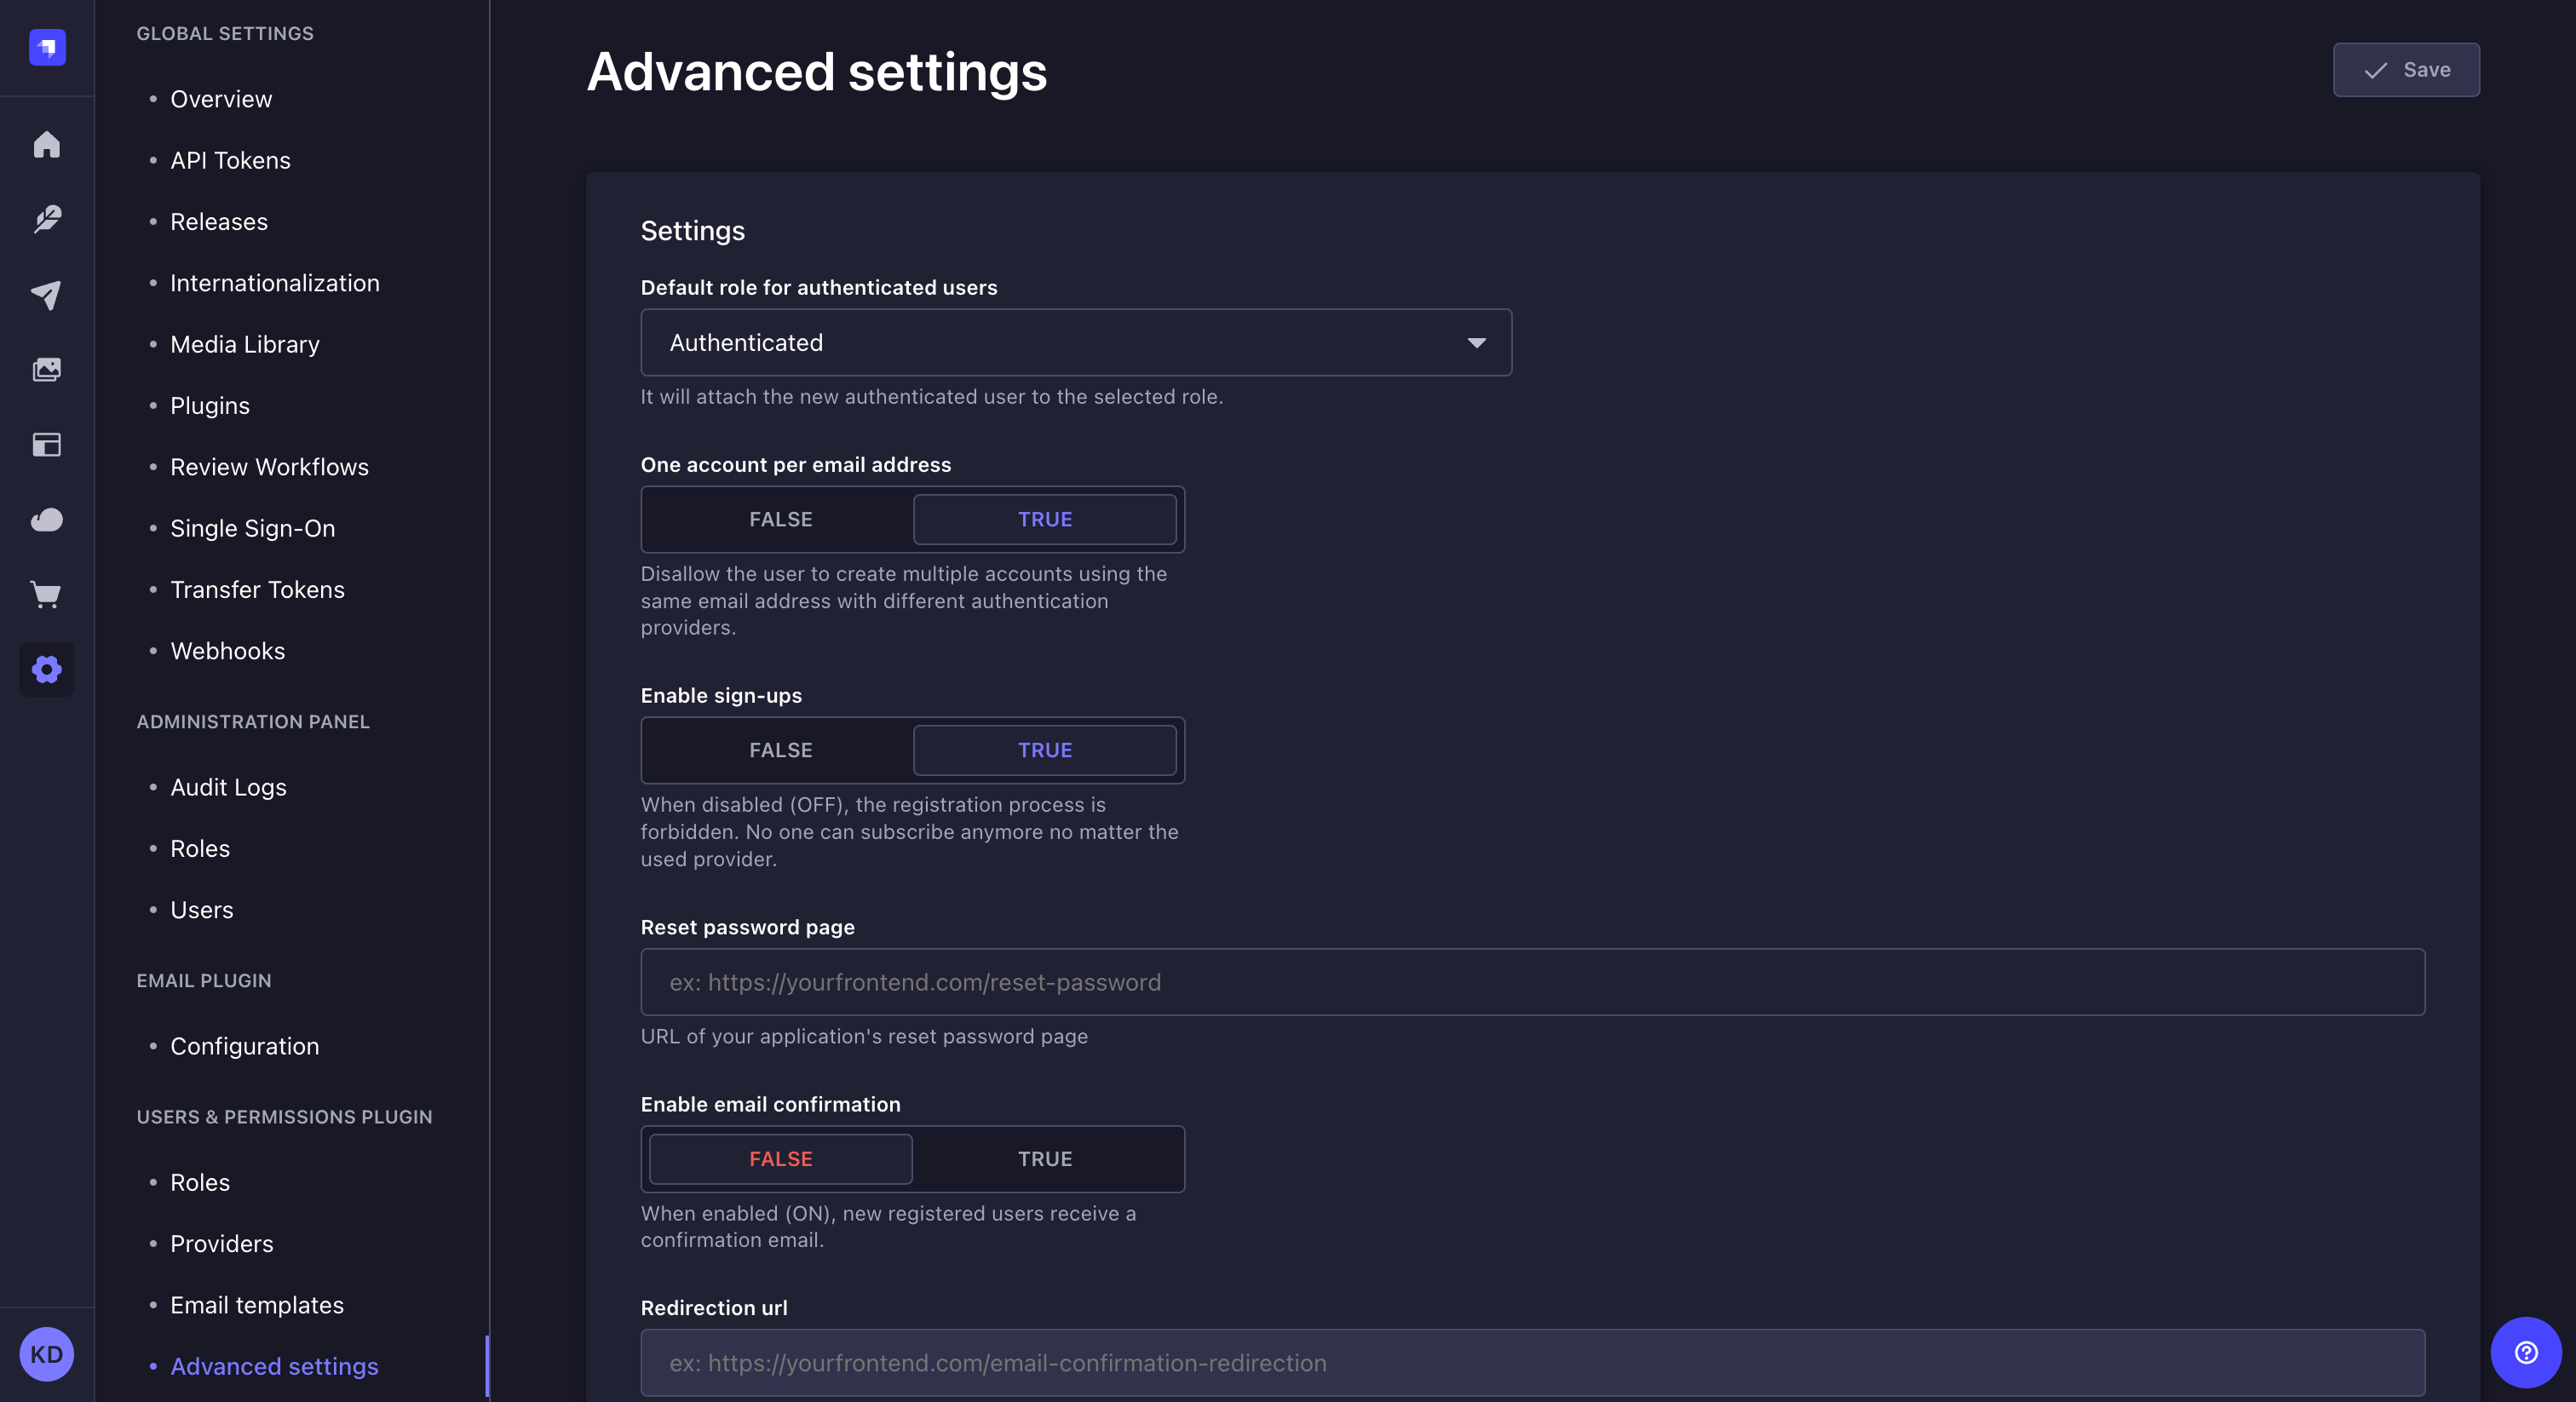
与“用户与权限”功能相关的所有设置均在高级设置界面中进行管理,包括为终端用户选择默认角色、启用注册和电子邮件确认,以及选择重置密码的着陆页。
🌐 All settings related to the Users & Permissions feature are managed from the Advanced Settings interface, including the choice of a default role for end users, the enablement of sign-ups and email confirmation, as well as the choice of landing page for resetting a password.
- Configure the settings of your choice, following the instructions below: | Setting name | Instructions | | ------------------------------------ | --------------------------------------------------------------| | Default role for authenticated users | Click the drop-down list to choose the default role for new end users. | | One account per email address | Click on the TRUE button to limit to 1 the number of end-user accounts with the same email address.
Click on FALSE to disable this limitation and allow several end-user accounts to be associated with the same email address (e.g.kai.doe@strapi.iocan be used when logging in via several different providers). | | Enable sign-ups | Click on the TRUE button to enable end-user sign-ups.
Click on FALSE to prevent end-user registration to your front-end application(s). | | Reset password page | Indicate the URL of the reset password page for your front-end application(s). | | Enable email confirmation | Click on the TRUE button to enable end-user account confirmation by sending them a confirmation email.
Click on FALSE to disable account confirmation. | | Redirection url | Indicate the URL of the page where end users should be redirected after confirming their Strapi account. | - 点击 保存 按钮。
基于代码的配置
🌐 Code-based configuration
虽然大多数用户和权限设置都是通过管理面板处理的,但可以通过配置和自定义 Strapi 项目的代码来微调一些更具体的设置。
🌐 While most of the Users & Permissions settings are handled via the admin panel, some more specific settings can be fine-tuned by configuring and customizing your Strapi project's code.
JWT 配置
🌐 JWT configuration
你可以通过使用插件配置文件来配置 JSON Web Token (JWT) 的生成。
🌐 You can configure the JSON Web Token (JWT) generation by using the plugins configuration file.
Strapi 使用 jsonwebtoken 来生成 JWT。
JWT 管理模式
🌐 JWT management modes
用户和权限功能支持两种 JWT 管理模式。
🌐 The Users & Permissions feature supports 2 JWT management modes.
通过在 /config/plugins 文件 中设置 users-permissions.config 对象的 jwtManagement 属性来定义使用哪种模式。该属性可以接受 legacy-support 或 refresh:
🌐 Defining which mode is used is done by setting the jwtManagement property of the users-permissions.config object in the /config/plugins file. The property accepts either legacy-support or refresh:
| 模式 | 描述 | 使用场景 ||------|-------------|----------|| legacy-support | (默认)使用传统配置颁发长期有效的 JWT | 现有应用,简单身份验证 || refresh | 使用会话管理和短期访问令牌及刷新令牌以增强安全性 | 新应用,增强的安全性要求
(更多信息可参见 管理面板配置 文档) |
为了向后兼容,“用户和权限”功能默认为旧模式:
🌐 For backwards compatibility, the Users & Permission feature defaults to legacy mode:
module.exports = ({ env }) => ({
  'users-permissions': {
    config: {
      jwtManagement: 'legacy-support',
      jwt: {
        expiresIn: '7d', // Traditional JWT expiry
      },
    },
  },
});
jwtSecret是用于创建新的 JWT 的随机字符串,通常通过JWT_SECRET环境变量 设置。jwt.expiresIn(仅旧版模式)以秒为单位表示,也可以是描述时间段的字符串。
例如:60, "45m", "10h", "2 days", "7d", "2y"。数字值会被解释为秒数。如果使用字符串,请确保提供时间单位(分钟、小时、天、年等),否则默认使用毫秒单位("120" 等于 "120ms")。
出于安全考虑,不建议将 JWT 过期时间设置为超过 30 天。
🌐 Setting JWT expiry for more than 30 days is not recommended due to security concerns.
当使用 refresh 模式时,配置文件可能如下所示:
🌐 When the refresh mode is used, the configuration file could look like as follows:
- JavaScript
- TypeScript
module.exports = ({ env }) => ({
  // …
  'users-permissions': {
    config: {
      jwtManagement: 'refresh',
      sessions: {
        accessTokenLifespan: 604800, // 1 week (default)
        maxRefreshTokenLifespan: 2592000, // 30 days
        idleRefreshTokenLifespan: 604800, // 7 days
        httpOnly: false, // Set to true for HTTP-only cookies
        cookie: {
          name: 'strapi_up_refresh',
          sameSite: 'lax',
          path: '/',
          secure: false, // true in production
        },
      },
    },
  },
  // ...
});
export default ({ env }) => ({
  // …
  'users-permissions': {
    config: {
      jwtManagement: 'refresh',
      sessions: {
        accessTokenLifespan: 604800, // 1 week (default)
        maxRefreshTokenLifespan: 2592000, // 30 days
        idleRefreshTokenLifespan: 604800, // 7 days
        httpOnly: false, // Set to true for HTTP-only cookies
        cookie: {
          name: 'strapi_up_refresh',
          sameSite: 'lax',
          path: '/',
          secure: false, // true in production
        },
      },
    },
  },
  // ...
});
注册配置
🌐 Registration configuration
如果你在你的用户 模型 需要在注册时被接受的字段,你需要将它们添加到 the /config/plugins file 中 config.register 对象的允许字段列表,否则它们将不会被接受。
以下示例展示了如何确保在用户注册时 API 接受名为“nickname”的字段:
🌐 The following example shows how to ensure a field called "nickname" is accepted by the API on user registration:
- JavaScript
- TypeScript
module.exports = ({ env }) => ({
  // ...
  "users-permissions": {
    config: {
      register: {
        allowedFields: ["nickname"],
      },
    },
  },
  // ...
});
export default ({ env }) => ({
  // ...
  "users-permissions": {
    config: {
      register: {
        allowedFields: ["nickname"],
      },
    },
  },
  // ...
});
速率限制配置
🌐 Rate limiting configuration
对身份验证和注册端点应用速率限制以防止滥用。可以配置以下参数以更改其行为。 koa2-ratelimit 包提供了其他配置选项:
以下选项可在 the /config/plugins 文件 中使用:
🌐 The following options are available in the /config/plugins file:
| 参数 | 描述 | 类型 | 默认值 || --- | --- | --- | --- || ratelimit | 自定义身份验证和注册端点的速率限制的设置 | 对象 | {} || ratelimit.enabled | 启用或禁用速率限制器 | 布尔值 | true || ratelimit.interval | 将请求视为属于同一个速率限制桶的时间窗口 | 对象 | { min: 5 } || ratelimit.max | 时间窗口内允许的最大请求数 | 整数 | 5 || ratelimit.prefixKey | 速率限制键的前缀 | 字符串 | ${userIdentifier}:${requestPath}:${ctx.request.ip} |
- JavaScript
- TypeScript
module.exports = ({ env }) => ({
  // ... other plugins configuration ...
  // Users & Permissions configuration
  'users-permissions': {
    config: {
      ratelimit: {
        enabled: true,
        interval: { min: 5 },
        max: 5,
      },
    },
  },
  // ...
});
export default ({ env }) => ({
  // ... other plugins configuration ...
  // Users & Permissions configuration
  'users-permissions': {
    config: {
      ratelimit: {
        enabled: true,
        interval: { min: 5 },
        max: 5,
      },
    },
  },
  // ...
});
邮件模板化
🌐 Templating emails
默认情况下,这个插件附带两个模板:重置密码和邮箱地址确认。模板使用 Lodash 的 `template()` 方法 来填充变量。
🌐 By default this plugin comes with two templates: reset password and email address confirmation. The templates use Lodash's `template()` method to populate the variables.
你可以在管理员面板的 插件 > 角色与权限 > 电子邮件模板 标签下更新这些模板(参见 配置电子邮件模板)。
🌐 You can update these templates under Plugins > Roles & Permissions > Email Templates tab in the admin panel (see configuring email templates).
可以使用以下变量:
🌐 The following variables can be used:
- Reset password
- Email address confirmation
USER(对象)usernameemail
TOKEN对应于生成的用于重置密码的令牌。URL是用户在点击电子邮件中的链接后将被重定向到的链接。SERVER_URL是绝对服务器网址(在服务器配置中设置)。
USER(对象)usernameemail
CODE对应生成的代码,用于确认用户的电子邮件。URL是确认代码的 Strapi 后端 URL(默认是/auth/email-confirmation)。SERVER_URL是绝对服务器网址(在服务器配置中设置)。
安全配置
🌐 Security configuration
JWT 可以被验证和信任,因为信息是经过数字签名的。要签署令牌需要一个 secret。默认情况下,Strapi 会生成并将其存储在 /extensions/users-permissions/config/jwt.js 中。
🌐 JWTs can be verified and trusted because the information is digitally signed. To sign a token a secret is required. By default Strapi generates and stores it in /extensions/users-permissions/config/jwt.js.
这在开发过程中非常有用,但出于安全原因,建议在部署到生产环境时通过环境变量 JWT_SECRET 设置自定义令牌。
🌐 This is useful during development but for security reasons it is recommended to set a custom token via an environment variable JWT_SECRET when deploying to production.
默认情况下,你可以设置一个 JWT_SECRET 环境变量,它将被用作密钥。如果你想使用另一个变量,可以更新配置文件。
🌐 By default you can set a JWT_SECRET environment variable and it will be used as secret. If you want to use another variable you can update the configuration file.
- JavaScript
- TypeScript
module.exports = {
  jwtSecret: process.env.SOME_ENV_VAR,
};
export default {
  jwtSecret: process.env.SOME_ENV_VAR,
};
创建自定义回调验证器
🌐 Creating a custom callback validator
默认情况下,Strapi SSO 仅重定向到与配置中的 URL 完全相等的重定向 URL:
🌐 By default, Strapi SSO only redirects to the redirect URL that is exactly equal to the url in the configuration:
如果你需要配置一个自定义处理程序以接受其他 URL,你可以在你的 plugins.js 中为 users-permissions 插件创建一个回调 validate 函数。
🌐 If you need to configure a custom handler to accept other URLs, you can create a callback validate function in your plugins.js for the users-permissions plugin.
  // ... other plugins configuration ...
  // Users & Permissions configuration
  'users-permissions': {
    enabled: true,
    config: {
      callback: {
        validate: (cbUrl, options) => {
          // cbUrl is where Strapi is being asked to redirect the auth info
          // that was received from the provider to

          // in this case, we will only validate that the
          // if using a base url, you should always include the trailing slash
          // although in real-world usage you should also include the full paths
          if (cbUrl.startsWith('https://myproxy.mysite.com/') ||
              cbUrl.startsWith('https://mysite.com/')) {
            return;
          }

          // Note that you MUST throw an error to fail validation
          // return values are not checked
          throw new Error('Invalid callback url');
        },
      },
    },
  },
使用
🌐 Usage
用户和权限功能既可以通过管理面板使用,也可以通过 API 使用,以创建新的终端用户账户。
🌐 The Users & Permissions feature can be used both via the admin panel, to create new end-user accounts, and via the APIs.
管理员面板使用
🌐 Admin panel usage
使用此功能的路径: 内容管理器
通过“用户与权限”功能,终端用户及其账户信息被作为一种内容类型进行管理。当“用户与权限”安装在 Strapi 应用上时,会自动创建 3 种集合类型,其中包括“用户”,这是唯一可以直接在内容管理器中使用的类型。
🌐 With the Users & Permissions feature, the end users and their account information are managed as a content-type. When Users & Permissions is installed on a Strapi application, 3 collection types are automatically created, including "User" which is the only one available directly in the Content Manager.
使用用户和权限插件在前端应用中注册新的终端用户包括向用户集合类型添加新条目。
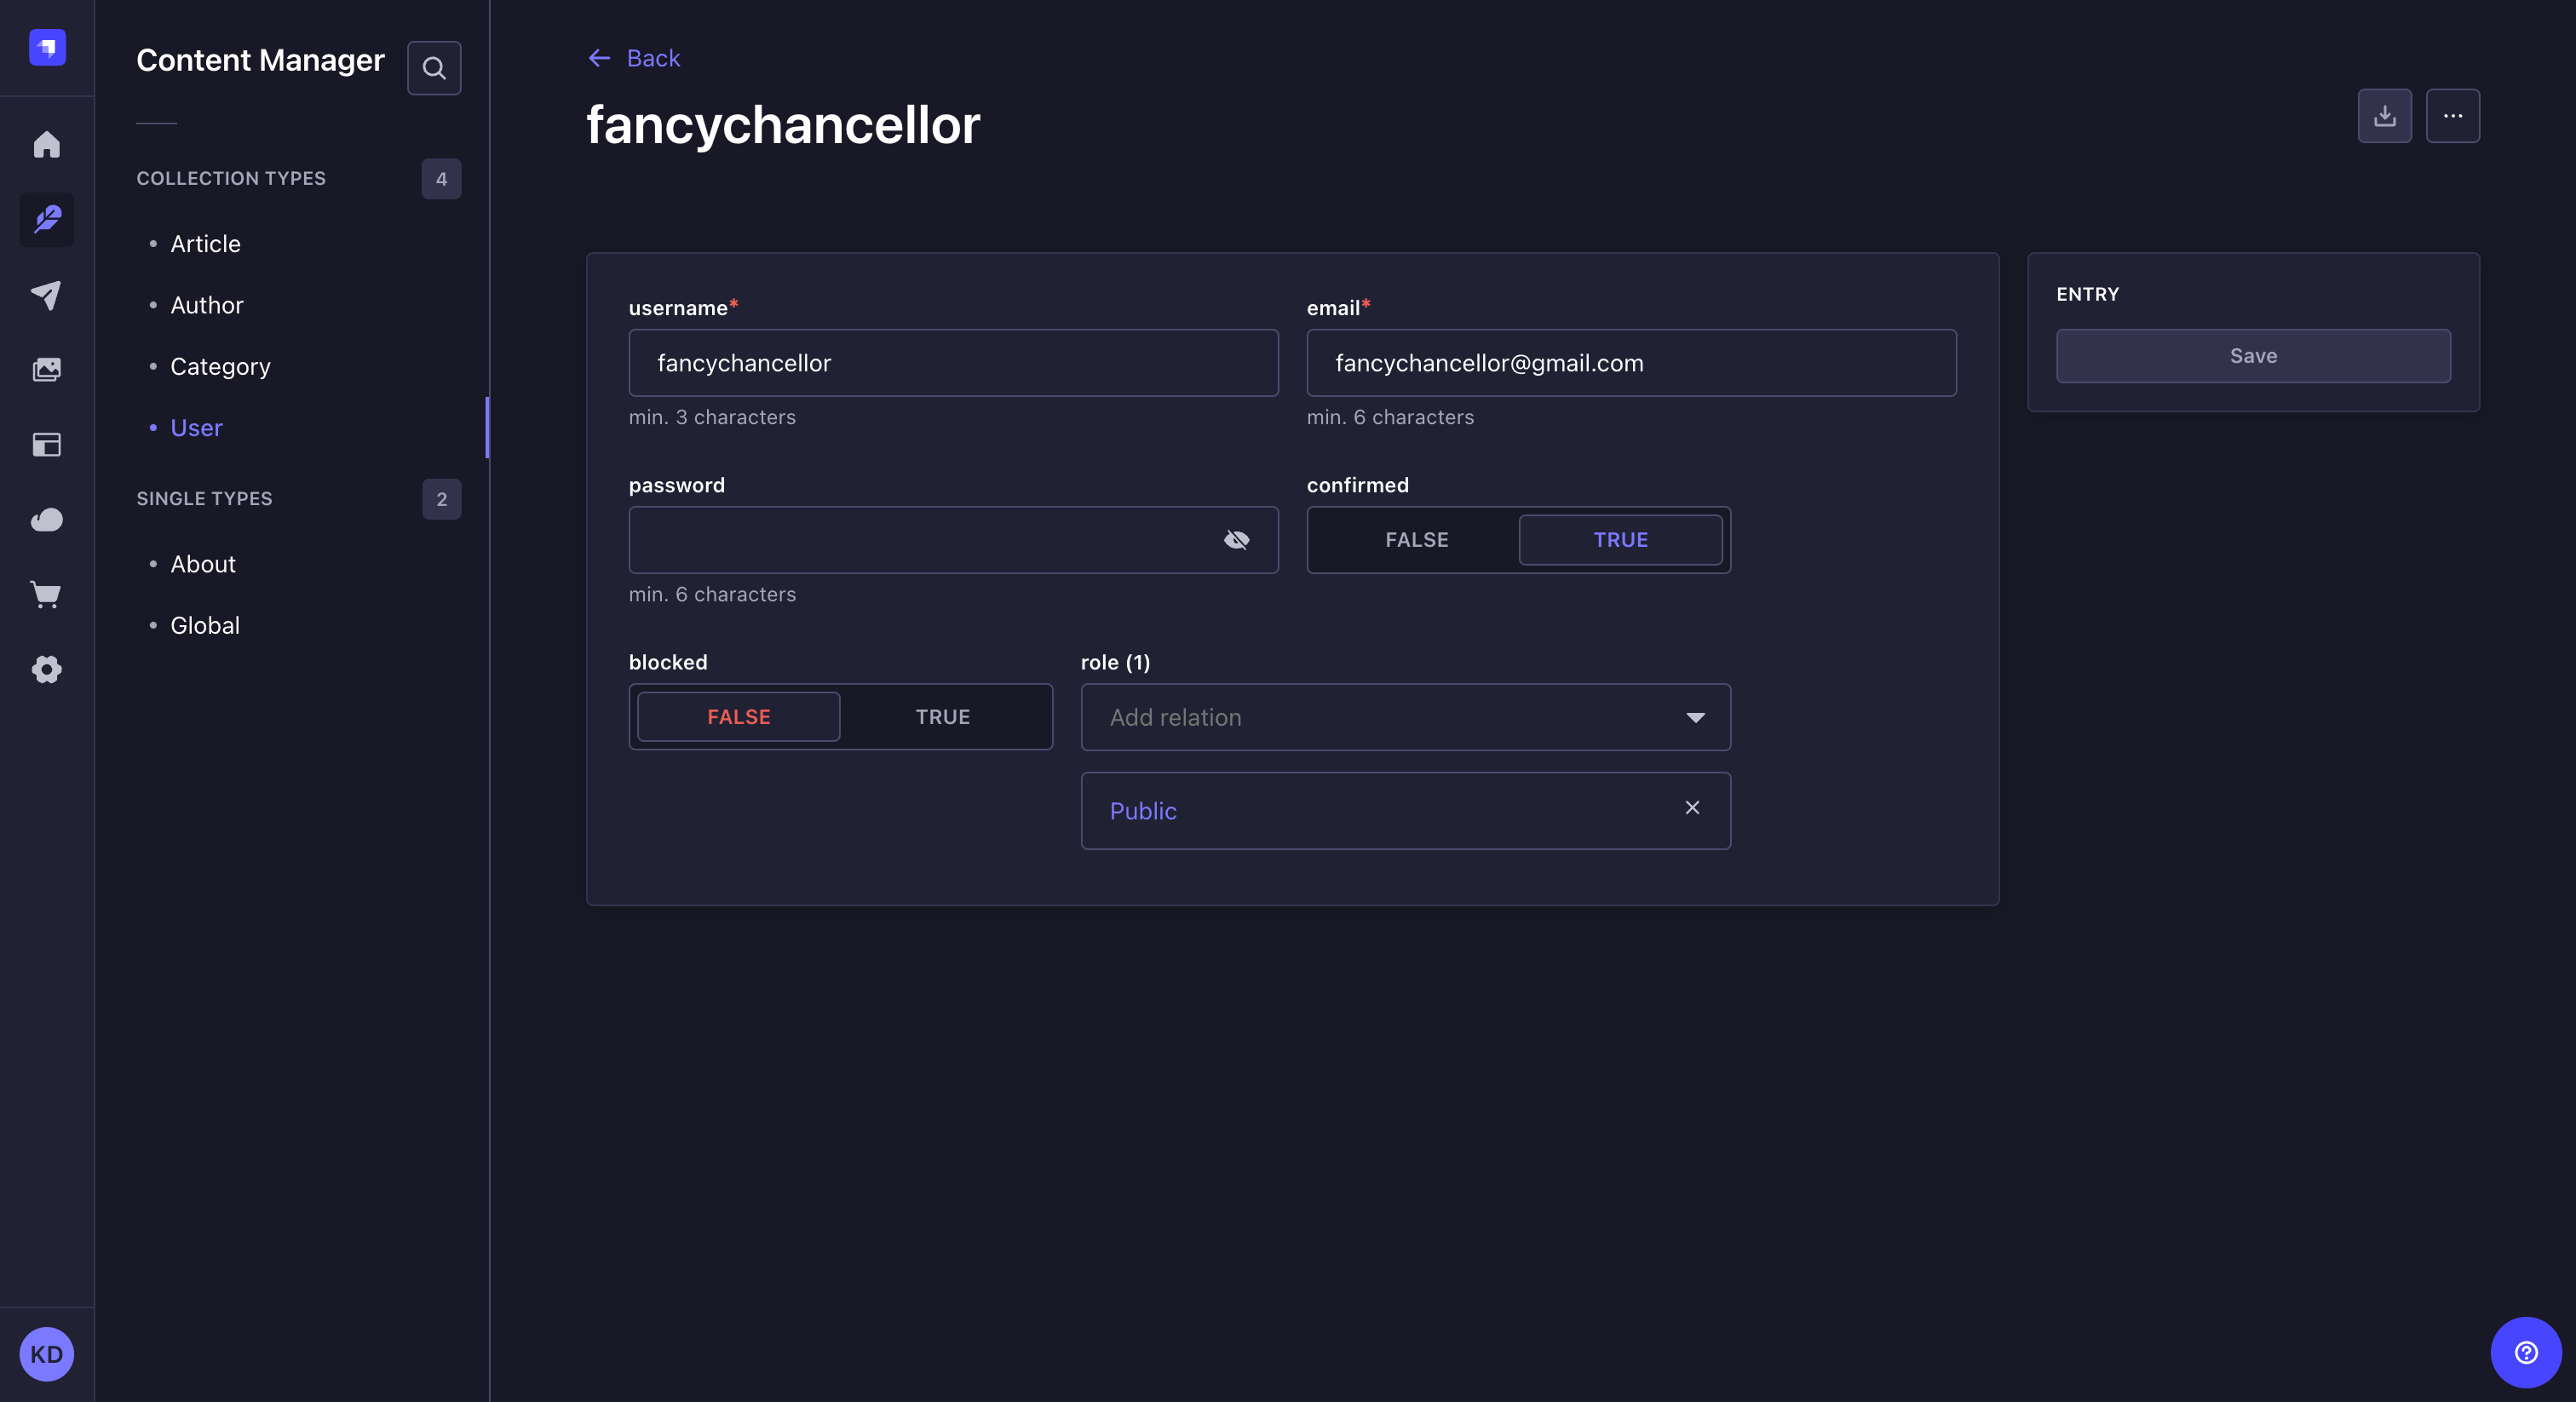
🌐 Registering new end users in a front-end application with the Users & Permissions plugin consists in adding a new entry to the User collection type.
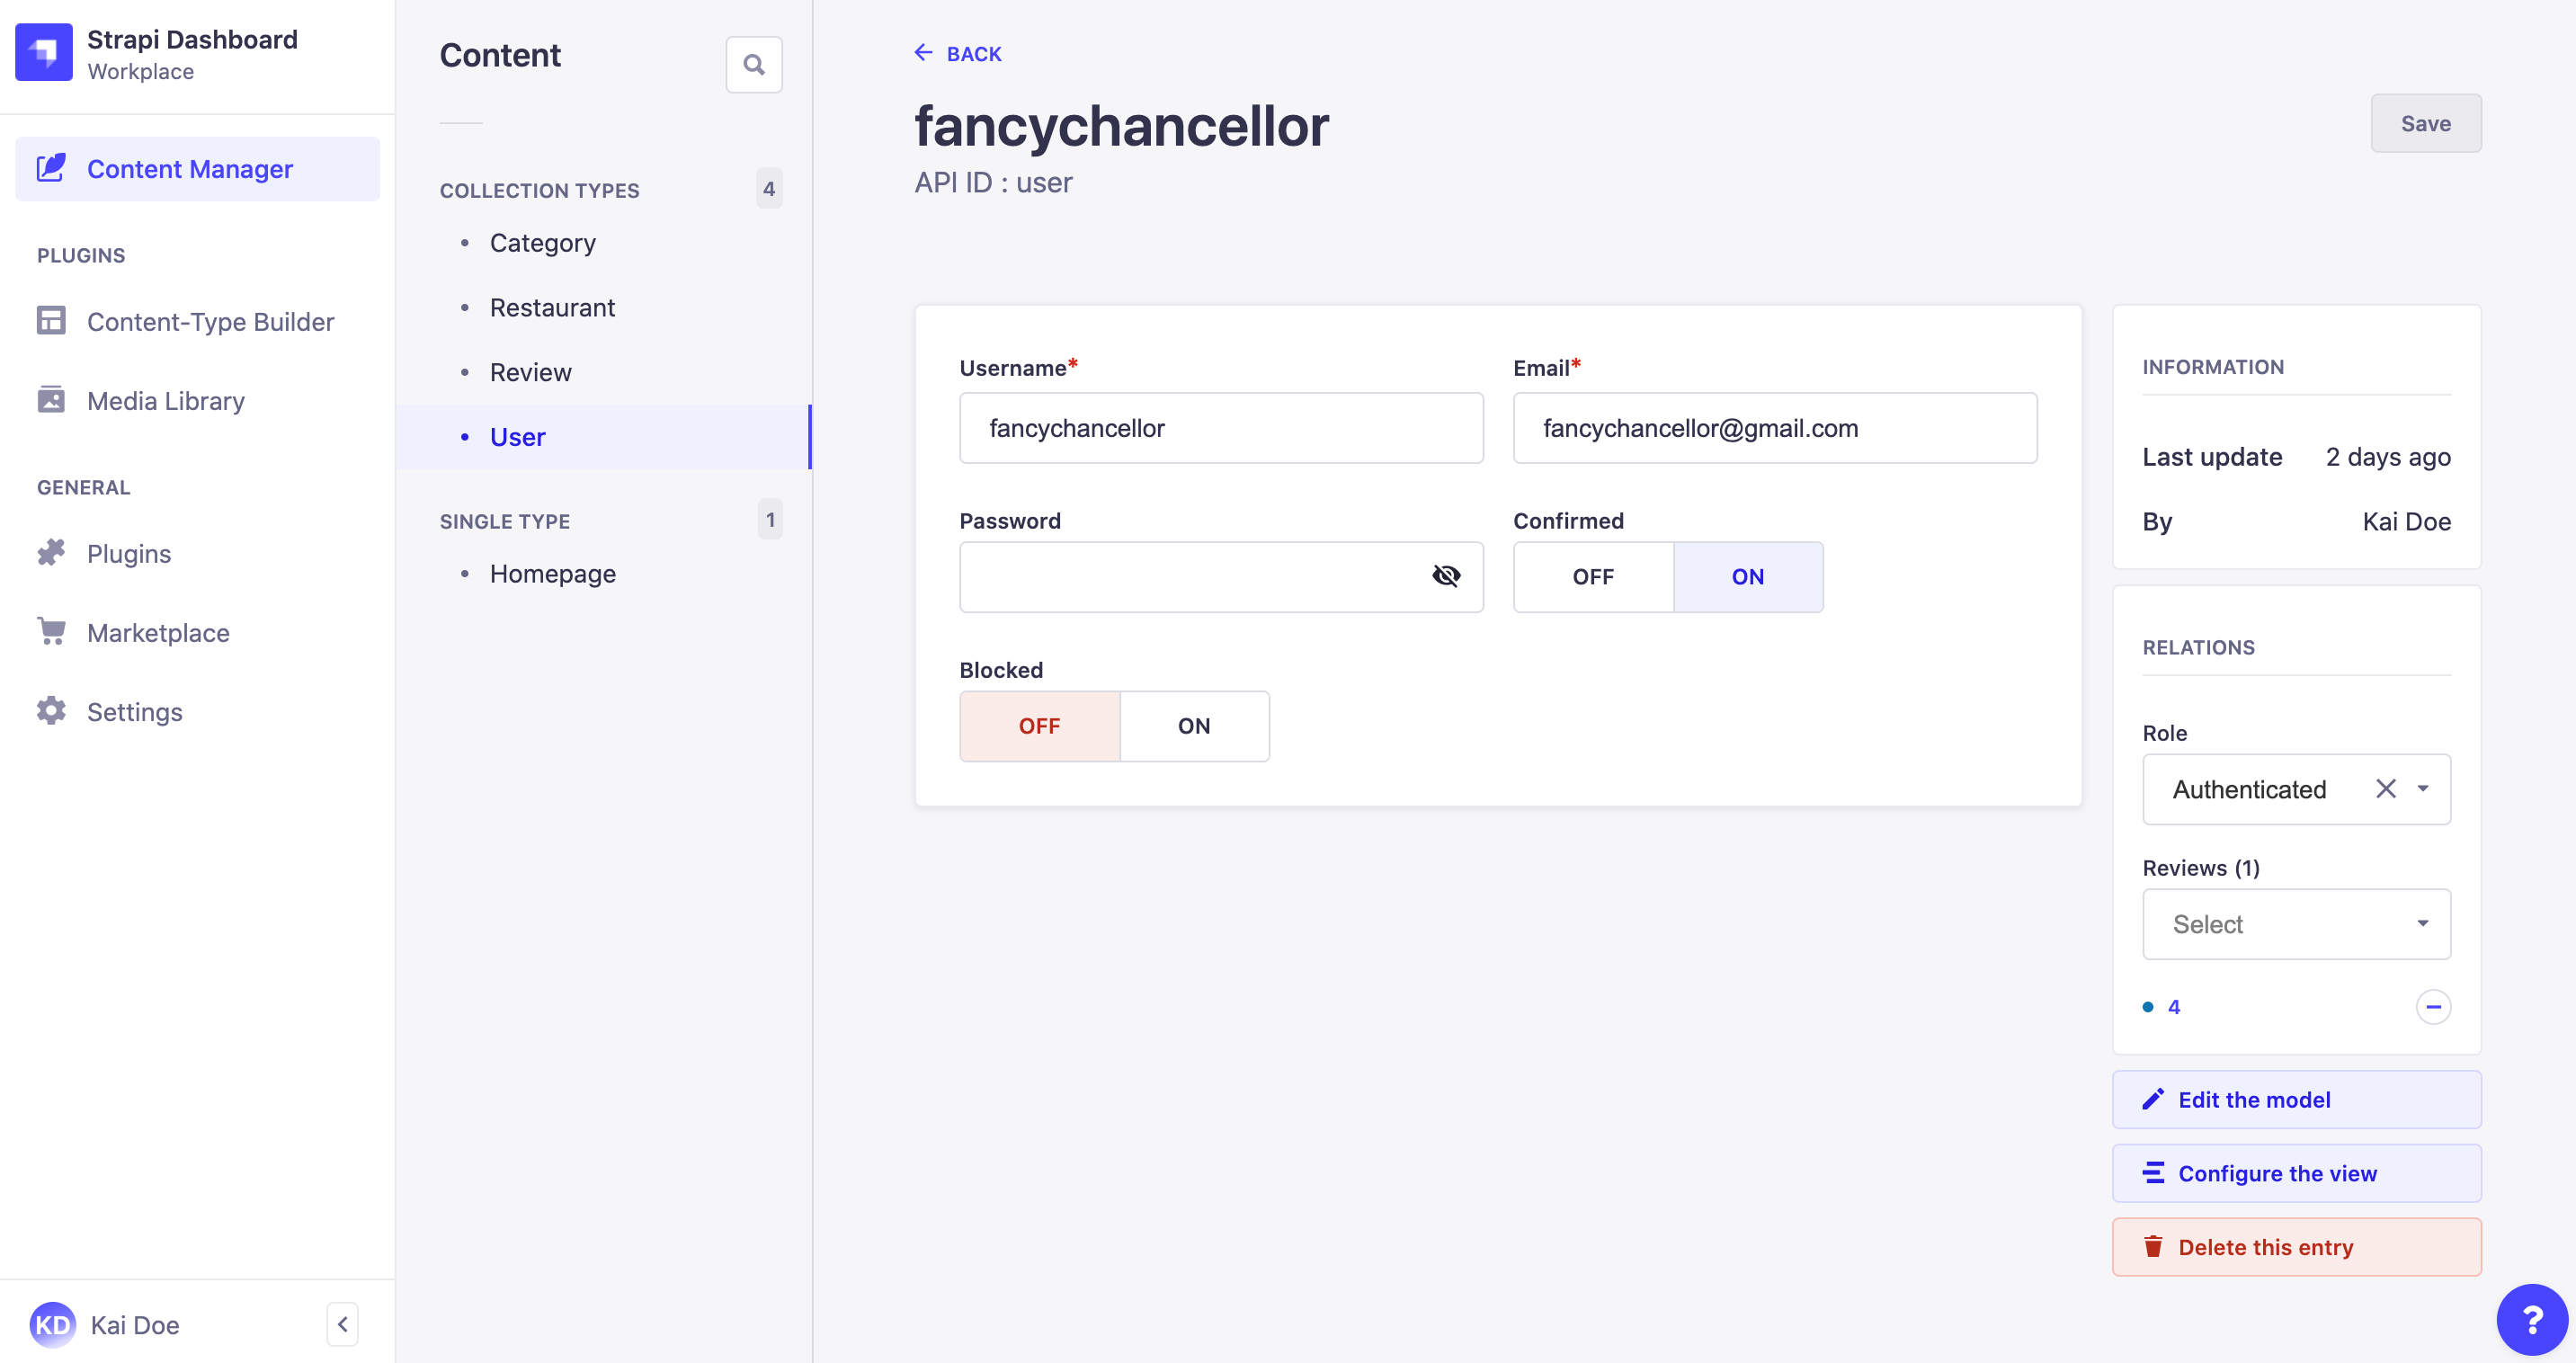
- 在 内容管理器中,转到用户集合类型。
- 点击右上角的创建新条目按钮。
- 填写条目的默认字段。管理员为你的 Strapi 应用专门添加的附加字段也可能会显示。 | 字段 | 说明 | |-----------|--------------------------------------------------------------------|| 用户名 | 填写终端用户的用户名。 || 电子邮件 | 在文本框中填写终端用户的完整电子邮件地址。 || 密码 | (可选)在文本框中输入新密码。你可以点击 图标以显示密码。 || 已确认 | (可选)点击 开启 �以确认终端用户账户。 || 已封锁 | (可选)点击 开启 以封锁终端用户账户,防止其访问内容。 || 角色 | (可选)指明应授予新终端用户的角色。如果未填写此字段,终端用户将被分配为默认角色(请参见高级设置中的 "默认角色" 选项)。 |
- 点击 保存 按钮。
如果终端用户可以在你的前端应用上自行注册(请参阅高级设置中的“启用注册”选项),将会自动创建一个新条目,并且该条目的字段将会填充终端用户提供的信息。然而,Strapi 应用的管理员可以编辑所有字段。
🌐 If end users can register themselves on your front-end application (see "Enable signups" option in advanced settings), a new entry will automatically be created and the fields of that entry will be filled up with the information indicated by the end user. All fields can however be edited by an administrator of the Strapi application.
API 使用
🌐 API usage
每当发送 API 请求时,服务器会检查是否存在 Authorization 头,并验证发出请求的用户是否有权访问该资源。
🌐 Each time an API request is sent the server checks if an Authorization header is present and verifies if the user making the request has access to the resource.
当你创建一个没有角色的用户,或者如果你使用 /api/auth/local/register 路由,authenticated 角色将被赋予该用户。
🌐 When you create a user without a role, or if you use the /api/auth/local/register route, the authenticated role is given to the user.
基本身份验证端点
🌐 Basic authentication endpoints
“用户与权限”功能提供了以下用于用户管理和内容 API访问的身份验证端点:
🌐 The Users & Permissions feature provides the following authentication endpoints for user management and Content API access:
| 方法 | URL | 描述 || --- | --- | --- || POST | /api/auth/local | 使用电子邮件/用户名和密码登录
(参见 identifier 参数) || POST | /api/auth/local/register | 用户注册 || POST | /api/auth/forgot-password | 请求密码重置 || POST | /api/auth/reset-password | 使用令牌重置密码 || GET | /api/auth/email-confirmation | 确认用户电子邮箱地址 |
会话管理端点
🌐 Session management endpoints
当启用会话管理 (jwtManagement: 'refresh')时,可用的额外端点如下:
🌐 When session management is enabled (jwtManagement: 'refresh'), additional endpoints are available:
| 方法 | URL | 描述 || --- | --- | --- || POST | /api/auth/refresh | 使用刷新令牌刷新访问令牌 || POST | /api/auth/logout | 撤销用户会话(支持特定设备注销) |
要刷新身份验证令牌,你可以发送以下请求:
🌐 To refresh your authentication token you could for instance send the following request:
curl -X POST http://localhost:1337/api/auth/refresh \
  -H "Content-Type: application/json" \
  -d '{
    "refreshToken": "your-refresh-token"
  }'
{
  "jwt": "your-new-access-token"
}
要退出所有会话,请发送以下请求:
🌐 To log out of all sessions, send the following request:
curl -X POST http://localhost:1337/api/auth/logout \
  -H "Authorization: Bearer your-access-token"
标识符
🌐 Identifier
随请求发送的 identifier 参数可以是电子邮件或用户名,如以下示例所示:
🌐 The identifier parameter sent with requests can be an email or username, as in the following examples:
- Axios
- 邮递员
import axios from 'axios';

// Request API.
axios
  .post('http://localhost:1337/api/auth/local', {
    identifier: 'user@strapi.io',
    password: 'strapiPassword',
  })
  .then(response => {
    // Handle success.
    console.log('Well done!');
    console.log('User profile', response.data.user);
    console.log('User token', response.data.jwt);
  })
  .catch(error => {
    // Handle error.
    console.log('An error occurred:', error.response);
  });
如果你使用 Postman,将 body 设置为 raw 并选择 JSON 作为你的数据格式:
🌐 If you use Postman, set the body to raw and select JSON as your data format:
{
  "identifier": "user@strapi.io",
  "password": "strapiPassword"
}
如果请求成功,你将会在 jwt 键中收到 用户的 JWT:
🌐 If the request is successful you will receive the user's JWT in the jwt key:
传统模式响应:
{
    "jwt": "eyJhbGciOiJIUzI1NiIsInR5cCI6IkpXVCJ9.eyJpZCI6MSwiaWF0IjoxNTc2OTM4MTUwLCJleHAiOjE1Nzk1MzAxNTB9.UgsjjXkAZ-anD257BF7y1hbjuY3ogNceKfTAQtzDEsU",
    "user": {
        "id": 1,
        "username": "user",
        ...
    }
}
会话管理模式响应:
{
    "jwt": "eyJhbGciOiJIUzI1NiIsInR5cCI6IkpXVCJ9...", // Short-lived access token
    "refreshToken": "eyJhbGciOiJIUzI1NiIsInR5cCI6IkpXVCJ9...", // Long-lived refresh token
    "user": {
        "id": 1,
        "username": "user",
        ...
    }
}
令牌使用
🌐 Token usage
jwt 然后可以用来进行受权限限制的 API 请求。要以用户身份进行 API 请求,请将 JWT 放入 GET 请求的 Authorization 头中。
🌐 The jwt may then be used for making permission-restricted API requests. To make an API request as a user place the JWT into an Authorization header of the GET request.
任何没有令牌的请求将默认假定 public 角色权限。在管理面板中修改每个用户角色的权限。
🌐 Any request without a token will assume the public role permissions by default. Modify the permissions of each user's role in the admin dashboard.
身份验证失败会返回 401 (unauthorized) 错误。
🌐 Authentication failures return a 401 (unauthorized) error.
token 变量是登录或注册时接收到的 data.jwt。
🌐 The token variable is the data.jwt received when logging in or registering.
import axios from 'axios';

const token = 'YOUR_TOKEN_HERE';

// Request API.
axios
  .get('http://localhost:1337/posts', {
    headers: {
      Authorization: `Bearer ${token}`,
    },
  })
  .then(response => {
    // Handle success.
    console.log('Data: ', response.data);
  })
  .catch(error => {
    // Handle error.
    console.log('An error occurred:', error.response);
  });
用户注册
🌐 User registration
在数据库中创建一个新的用户,并将默认角色设置为“注册用户”,可以像以下示例一样进行:
🌐 Creating a new user in the database with a default role as 'registered' can be done like in the following example:
import axios from 'axios';

// Request API.
// Add your own code here to customize or restrict how the public can register new users.
axios
  .post('http://localhost:1337/api/auth/local/register', {
    username: 'Strapi user',
    email: 'user@strapi.io',
    password: 'strapiPassword',
  })
  .then(response => {
    // Handle success.
    console.log('Well done!');
    console.log('User profile', response.data.user);
    console.log('User token', response.data.jwt);
  })
  .catch(error => {
    // Handle error.
    console.log('An error occurred:', error.response);
  });
Strapi 上下文中的用户对象
🌐 User object in Strapi context
user 对象可供成功认证的请求使用。
🌐 The user object is available to successfully authenticated requests.
经过验证的 user 对象是 ctx.state 的一个属性。
🌐 The authenticated user object is a property of ctx.state.
create: async ctx => {
  const { id } = ctx.state.user;

  const depositObj = {
    ...ctx.request.body,
    depositor: id,
  };

  const data = await strapi.services.deposit.add(depositObj);

  // Send 201 `created`
  ctx.created(data);
};