快速入门指南
🌐 Quick Start Guide
Strapi 提供了很大的灵活性。无论你是想快速行动并迅速看到最终结果,还是更愿意深入研究产品,我们都能满足你的需求。在本教程中,我们将采用 DIY 方法,从零开始构建一个项目和内容结构,然后将你的项目部署到 Strapi Cloud,从那里添加数据。
🌐 Strapi offers a lot of flexibility. Whether you want to go fast and quickly see the final result, or would rather dive deeper into the product, we got you covered. For this tutorial, we'll go for the DIY approach and build a project and content structure from scratch, then deploy your project to Strapi Cloud to add data from there.
有三种方式可以了解 Strapi。选择最适合你的方式:
🌐 There are 3 options to discover Strapi. Choose what best suits you:
在安装 Strapi 之前,你的计算机上必须安装以下要求:
🌐 Before installing Strapi, the following requirements must be installed on your computer:
- Node.js:仅支持 Active LTS or Maintenance LTS versions (目前为
v20、v22和v24)。Node 的奇数版本发布,称为 Node.js 的“当前”版本,不受支持(例如 v23��、v25)。 - 你首选的 Node.js 包管理器:
- Python (如果使用 SQLite 数据库)
你还需要 install git 并且拥有一个 GitHub 账户,以将你的项目部署到 Strapi 云。
第 A 部分:使用 Strapi 创建一个新项目
我们将首先通过在终端中运行命令在你的计算机上创建一个新的 Strapi 项目,然后注册我们的第一个本地管理员用户。
🌐 We will first create a new Strapi project on your machine by running a command in the terminal, and then register our first local administrator user.
按照以下步骤操作,单击可切换的内容以阅读更多说明。
🌐 Follow the steps below by clicking on the togglable content to read more instructions.
步骤 1:运行安装脚本并创建 Strapi Cloud 账户
步骤 1:运行安装脚本并创建一个Strapi Cloud账户
🌐 Step 1: Run the installation script and create a Strapi Cloud account
-
在终端中运行以下命令:
npx create-strapi@latest my-strapi-project -
终端会提示你登录或注册。一旦完成,你的项目将自动获得 GrowthThe CMS Growth plan includes the Live Preview, Releases, and Content History features. 计划的30天试用。为了本教程的目的,请确保在终端中选择了
Login/Sign up,或者使用箭头键选择它,然后按回车键。Info如果你选择跳过登录,你将无法完成本教程的 C 部分和 D 部分,但仍然可以在本地进行测试。
-
在打开的新浏览器标签中,确保确认码与终端中的相同,然后点击 确认。
-
仍然在浏览器标签页中,点击 Continue with GitHub(使用 GitHub 继续)。如果你当前的浏览器会话尚未登录 GitHub,你可能会被重定向到 GitHub 登录页面。
-
一旦登录,浏览器会显示“恭喜,你已准备就绪!”的消息,你可以安全地关闭浏览器标签页并返回终端。
-
终端现在将问你几个问题。按
Enter接受所有问题的默认答案。
正如你在终端中看到的,你的项目现在正在本地构建。
🌐 As you will see in the terminal, your project is now building locally.
- 你项目的文件夹将包含一个
.strapi-cloud.json文件,用于将你机器上的本地 Strapi 项目链接到 Strapi 服务器。 - 还有更多安装选项可用。详情请参阅安装文档。
步骤 2:注册第一个本地管理员用户
步骤2:注册第一个本地管理员用户
🌐 Step 2: Register the first local administrator user
安装完成后,你需要启动服务器。在终端中,输入或复制粘贴以下内容:
🌐 Once the installation is complete, you need to start the server. In the terminal, type or copy and paste the following:
cd my-strapi-project && npm run develop
你的浏览器会自动打开一个新标签页。
🌐 Your browser automatically opens a new tab.
只要你待在 my-strapi-project 文件夹中,每当你想再次启动 Strapi 服务器时,只需运行 npm run develop 就可以了。
🌐 As long as you stay in the my-strapi-project folder, you will just need to run npm run develop any time you want to start the Strapi server again.
通过填写表格,你将创建自己的账户。完成后,你将成为此 Strapi 应用的第一位管理员用户。欢迎加入,命令器!
🌐 By completing the form, you create your own account. Once done, you become the first administrator user of this Strapi application. Welcome aboard, commander!
你现在可以访问 admin panel:
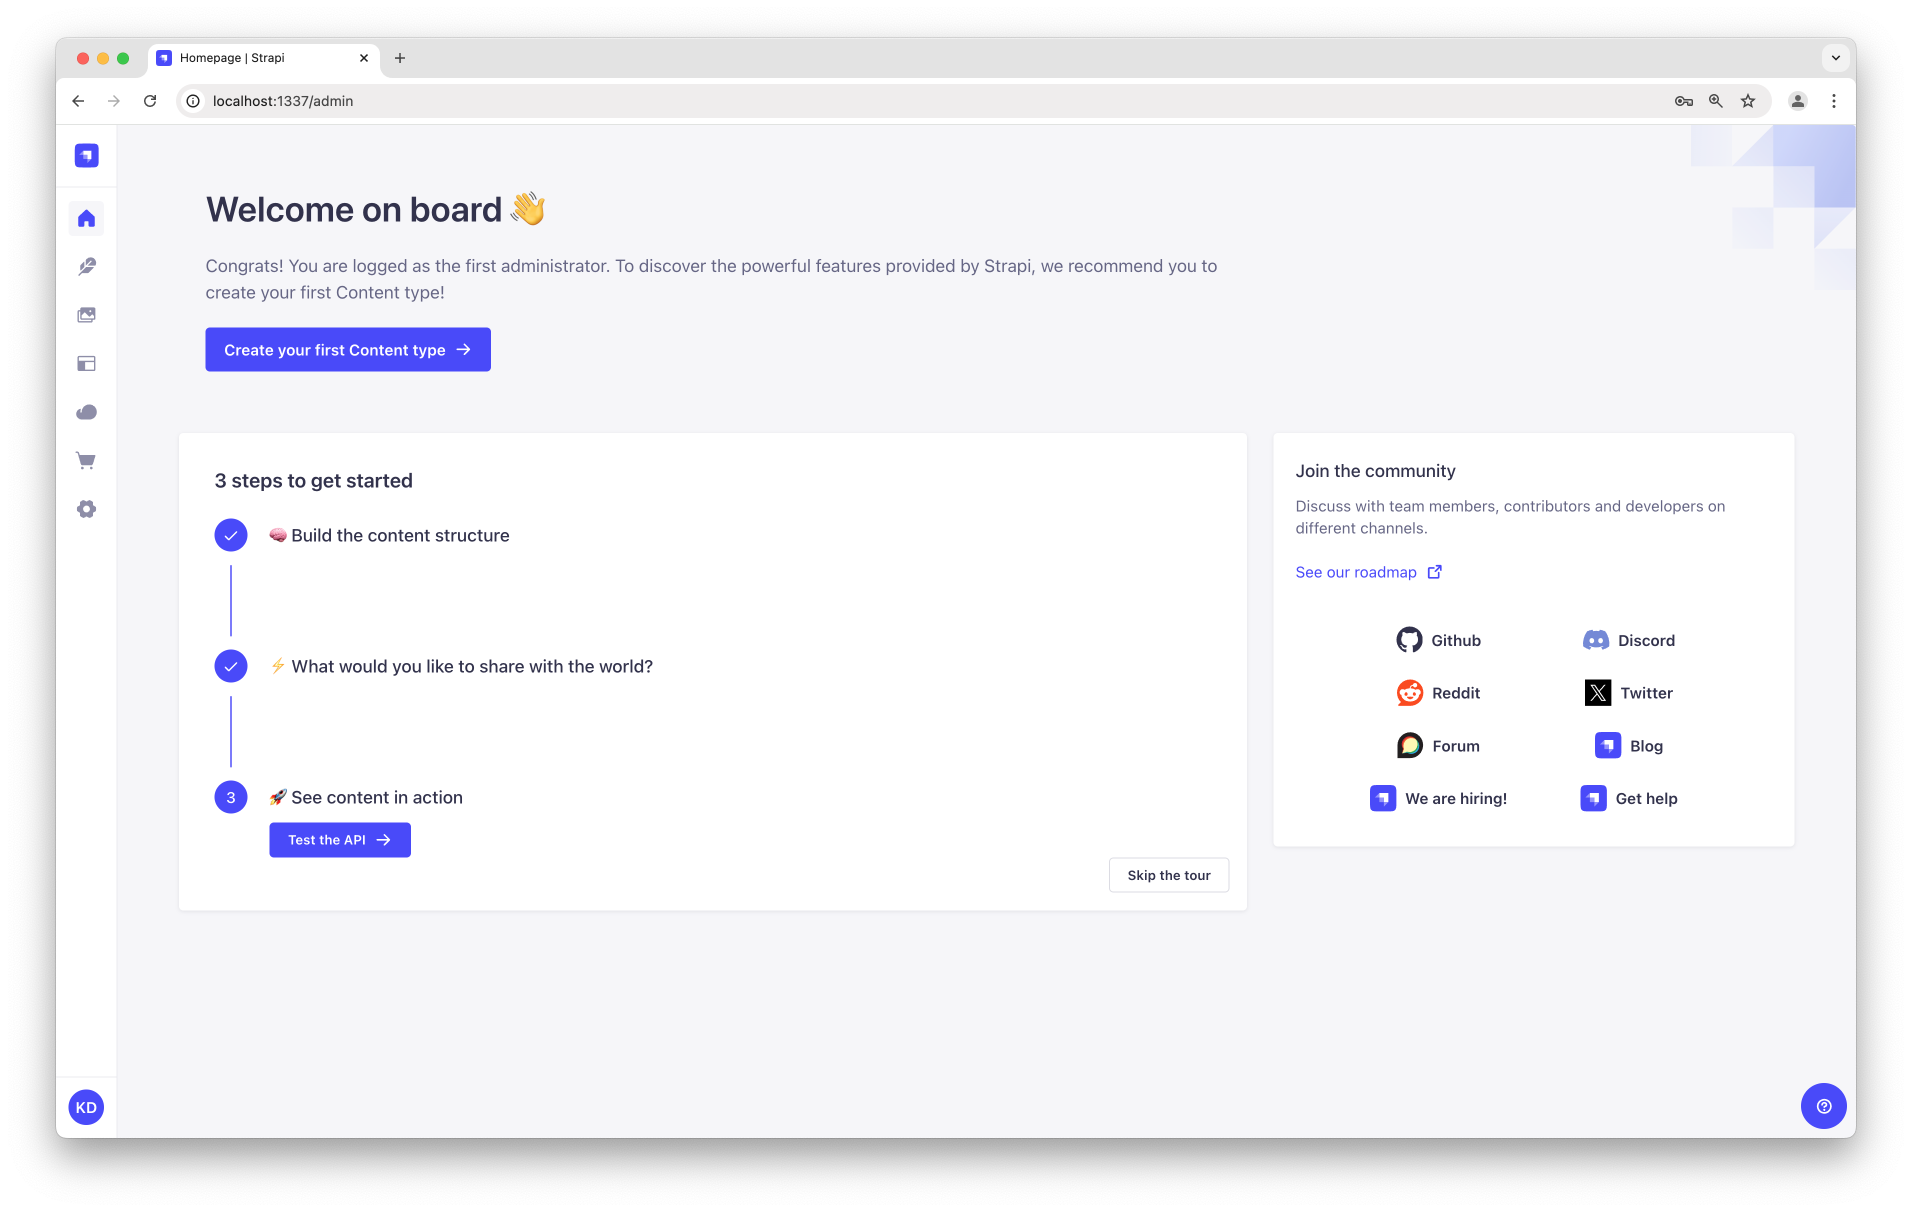
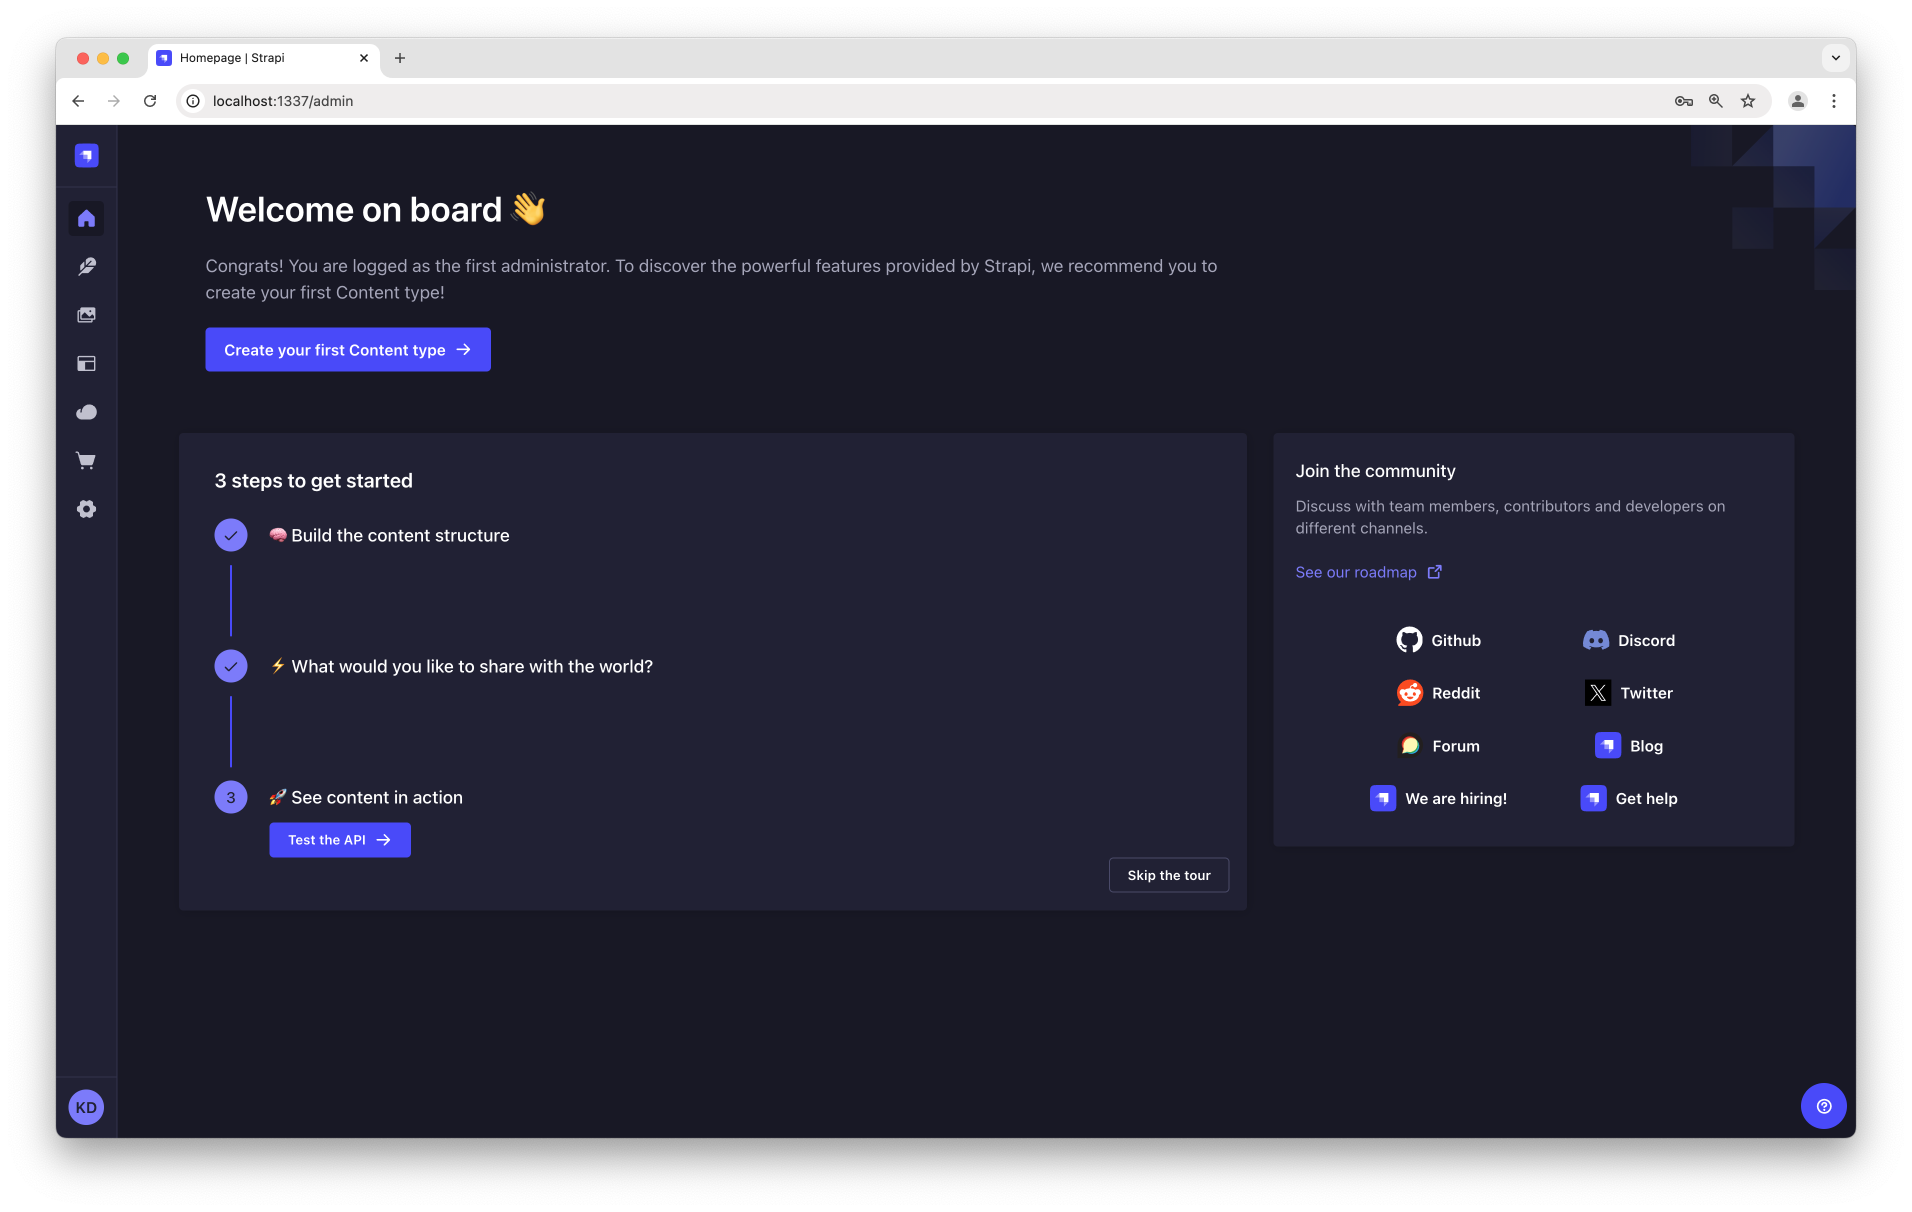
你刚刚创建了一个新的 Strapi 项目!你可以开始使用 Strapi 并自行探索内容管理器,或继续下面的 B 部分。
🌐 You have just created a new Strapi project! You can start playing with Strapi and discover the Content Manager by yourself, or proceed to part B below.
第 B 部分:使用内容类型构建器构建你的内容结构
安装脚本刚刚创建了一个空项目。我们现在将指导你创建一个小型餐厅目录。
🌐 The installation script has just created an empty project. We will now guide you through creating a small restaurants directory.
本地 Strapi 项目的管理面板运行在 http://localhost:1337/admin。这里是你大部分时间将用于创建和更新内容的地方。
首先,我们将为你的内容构建一个内容结构。这只能在开发模式下完成,而开发模式是本地创建的项目的默认模式。
🌐 First we will build a content structure for your content. This can only be done while in development mode, which is the default mode for projects that are created locally.
如果服务器尚未运行,在你的终端中,进入 my-strapi-project 文件夹并运行 npm run develop(或 yarn develop)来启动它。
🌐 If the server is not already running, in your terminal, cd into the my-strapi-project folder and run npm run develop (or yarn develop) to launch it.
在运行 develop 命令之前,你可能还需要先运行 npm run build 或 yarn build,尤其是在构建网站很重要的情况下,例如 TypeScript 项目。
🌐 You might also need to run npm run build or yarn build prior to the develop command, especially in cases where building the website is important, such as for TypeScript projects for instance.
内容类型构建器帮助你创建内容结构。在使用 Strapi 创建空项目时,这里是开始派对的地方!
🌐 The Content-Type Builder helps you create your content structure. When creating an empty project with Strapi, this is where to get the party started!
步骤1:创建一个“餐厅”集合类型
步骤 1:创建一个“餐厅”集合类型
🌐 Step 1: Create a "Restaurant" collection type
你的餐厅目录最终会包括许多餐厅,所以我们需要创建一个“餐厅”集合类型。然后我们可以描述在添加新餐厅条目时要显示的字段:
🌐 Your restaurants directory will eventually include many restaurants, so we need to create a "Restaurant" collection type. Then we can describe the fields to display when adding a new restaurant entry:
- 在管理面板左侧的主导航中,转到 Content-Type Builder 。
- 点击 Collection types 旁边的 加号图标。
- 在“显示名称”中输入
Restaurant,然后点击继续。 - 点击 添加新字段按钮,然后选择文本字段。
- 在 名称 字段中输入
Name。 - 切换到_高级设置_标签,并检查必填字段和唯一字段设置。
- 点击 添加另�一个字段。
- 选择列表中的富文本(块)字段。
- 在 Name 字段下输入
Description,然后点击 Finish。10. 最后,点击 Save 并等待 Strapi 重启。


一旦 Strapi 重启后,“Restaurant” 会列在导航栏的 内容管理器 > 集合类型 下。哇,你刚刚创建了你的第一个内容类型!太酷了,让我们现在再创建一个,只是为了好玩。
步骤 2:创建一个“类别”集合类型
步骤 2:创建一个“分类”集合类型
🌐 Step 2: Create a "Category" collection type
如果我们的餐厅目录有一些分类,会有助于让我们更加有条理。让我们创建一个“分类”集合类型:
🌐 It would help getting a bit more organized if our restaurants directory had some categories. Let's create a "Category" collection type:
- 在主导航中转到 Content-type Builder 。
- 点击 Collection types 旁边的 加号图标。
- 在“显示名称”中输入
Category,然后点击继续。 - 点击 添加新字段按钮,然后选择文本字段。
- 在 名称 字段中输入
Name。 - 切换到_高级设置_标签,并检查必填字段和唯一字段设置。
- 点击 添加另一个字段。
- 选择关系字段。
- 在中心,选择表示“多对多”的图标
 。10. 在右侧,点击 Category 下拉菜单,并在列表中选择 Restaurant。文本应显示为
 Categories has and belongs to many Restaurants。

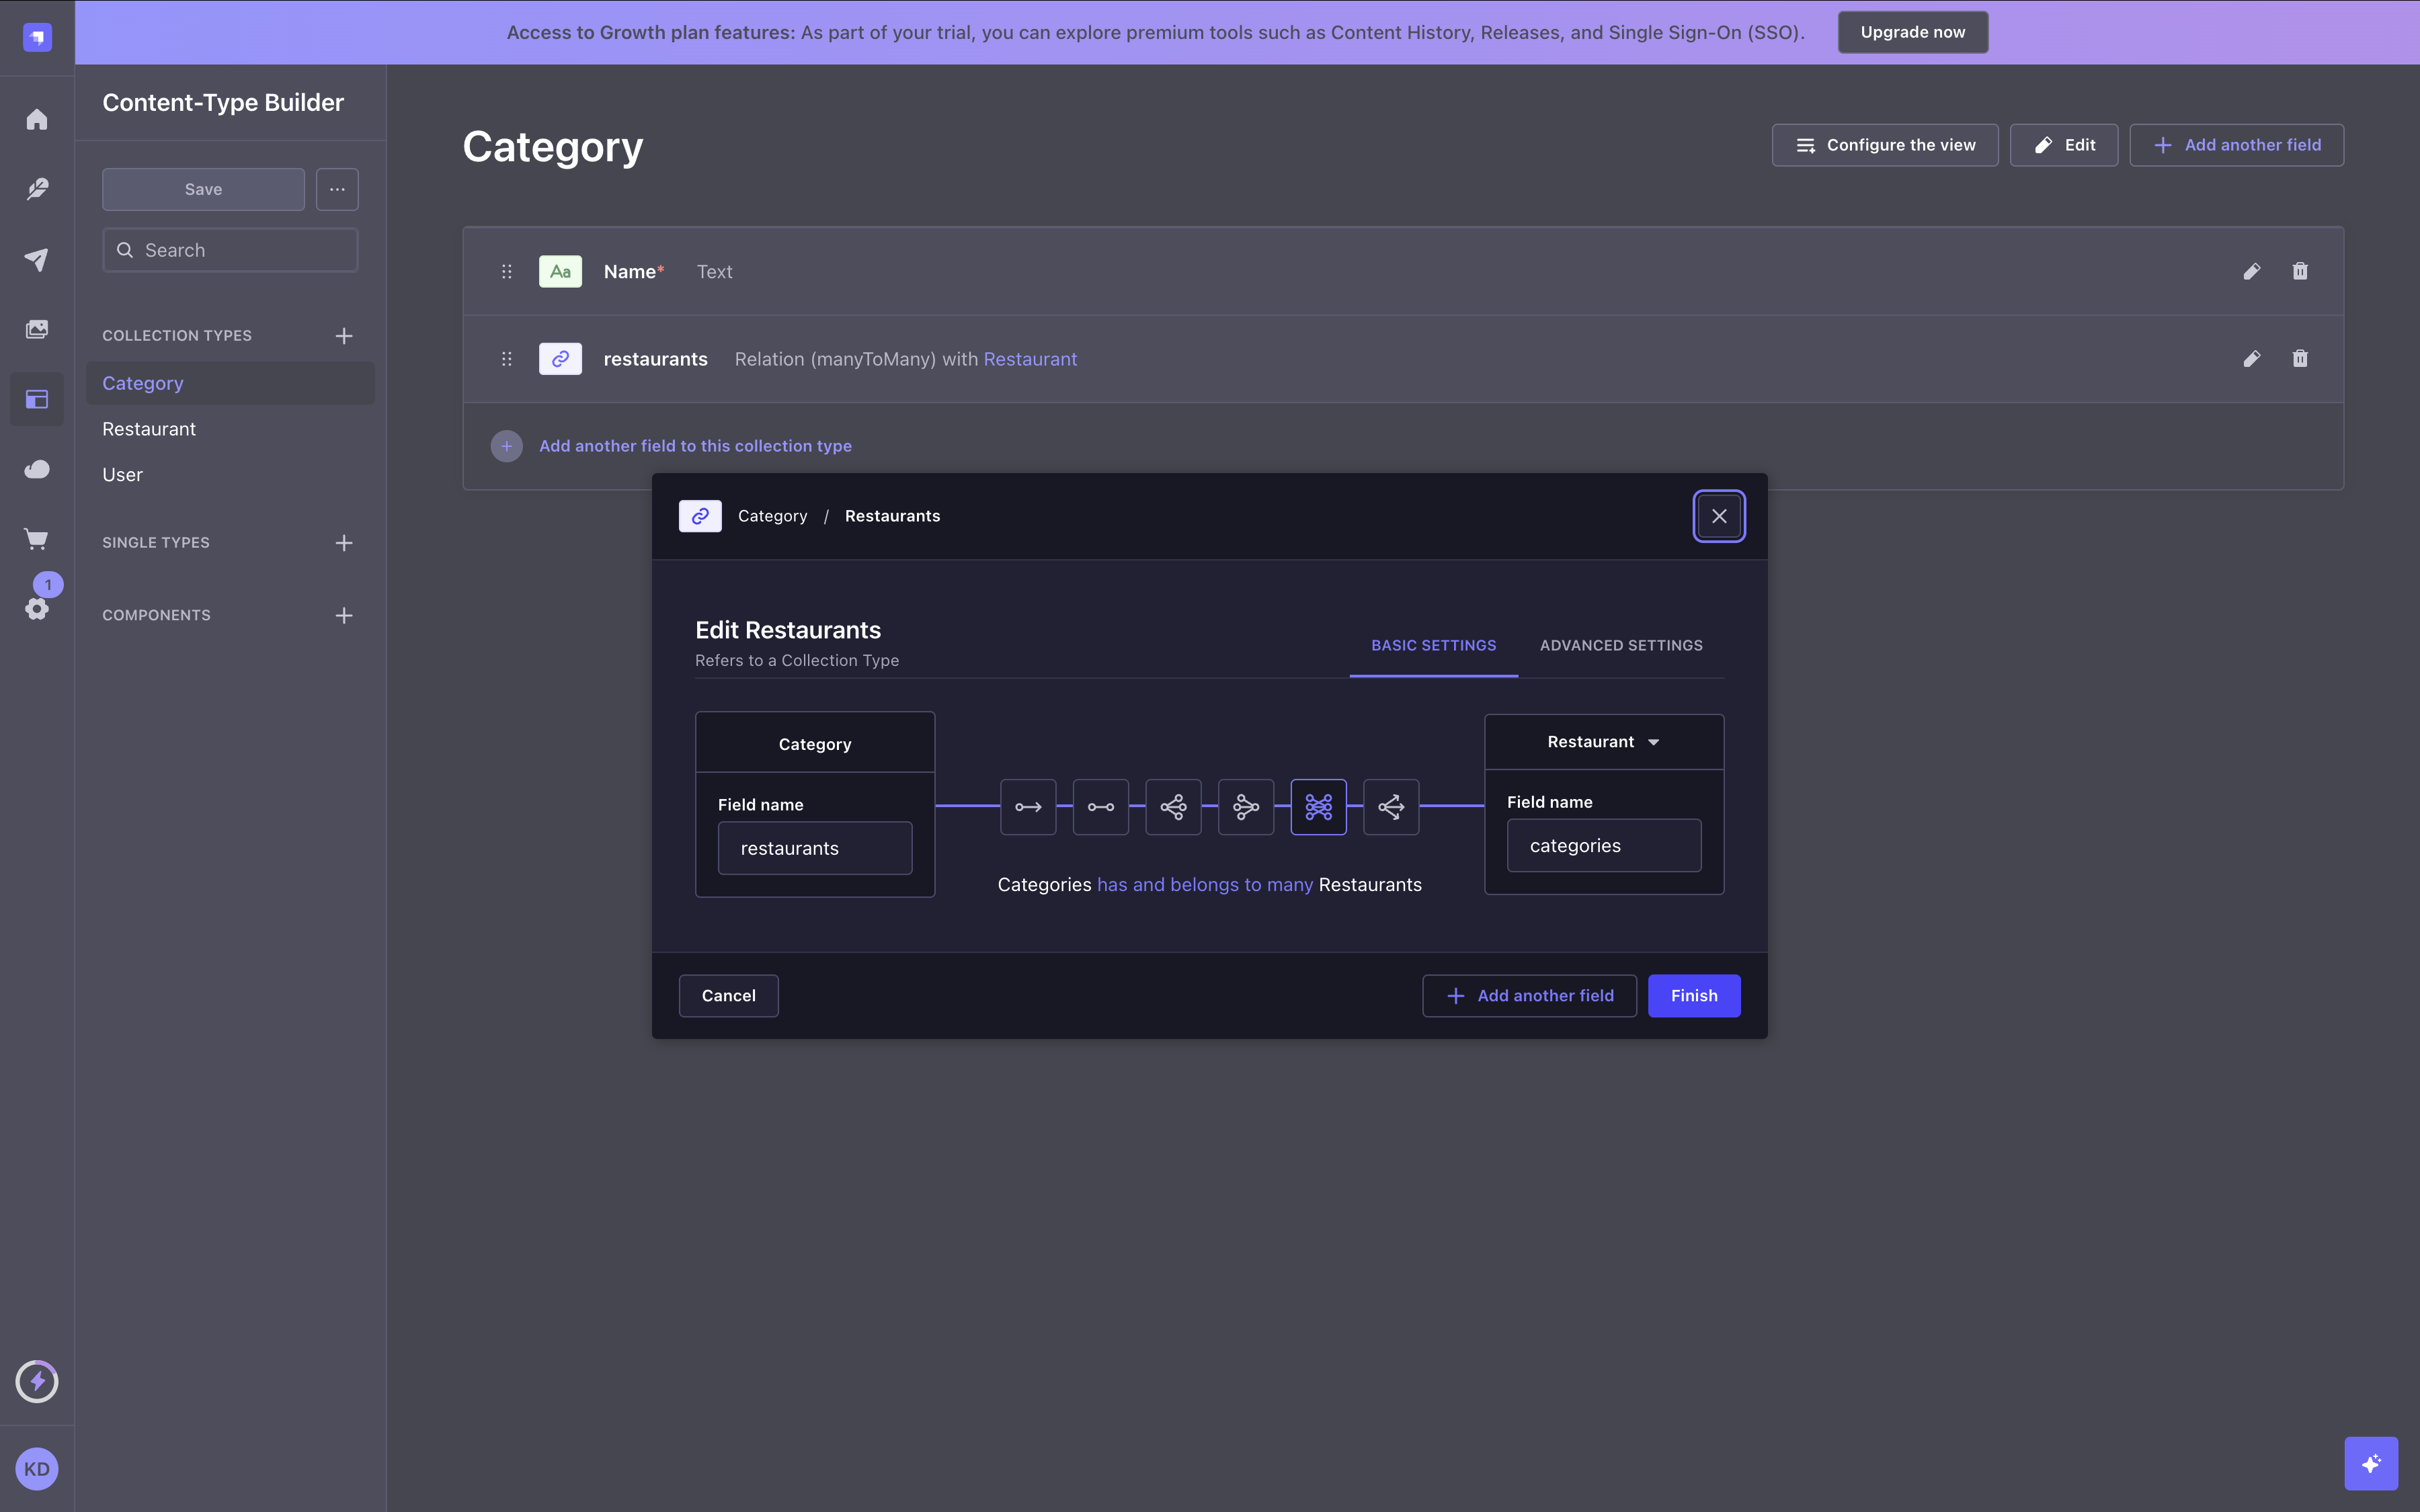
- 最后,点击 完成,然后点击 保存 按钮,等待 Strapi 重启。
你刚刚为你的 Strapi 项目创建了一个基本的内容结构!你可以继续使用 内容类型构建器 进行操作,或者继续下面的 C 部分和 D 部分,以了解 Strapi 云并向你的项目添加实际内容。
🌐 You have just created a basic content structure for your Strapi project! You can keep on playing with the Content-Type Builder, or proceed to parts C and D below to discover Strapi Cloud and add actual content to your project.
虽然我们在这里展示了如何手动创建内容结构,但你还可以探索其他选项:你可以导入 Figma 原型,从电脑导入一些文件,甚至可以开始用自然语言提示 Strapi AI GrowthThis feature is available with a Growth plan. 来为你创建内容。随意尝试它们吧!
️ 第 C 部分:部署到Strapi云
现在你美丽的第一个 Strapi 项目已经在本地运行,是时候让全世界看到它上线了!托管你的项目最直接的方法是使用 Strapi Cloud:在 Strapi Cloud 上部署你的项目只需一条命令!🚀
🌐 Now that your beautiful first Strapi project is working locally, it's time for the world to see it live! The most straightforward way to host your project is to use Strapi Cloud: Deploying your project on Strapi Cloud is done with a single command! 🚀
要将你的项目免费部署到 Strapi Cloud,请在你的终端中执行以下操作:
🌐 To deploy your project for free to Strapi Cloud, in your terminal:
-
如果本地 Strapi 项目的服务器正在运行(如果你按照本教程操作到现在,应该是这样),按
Ctrl-C停止服务器。 -
确保你位于你的 Strapi 项目的文件夹中(如果需要,例如运行
cd my-strapi-project来进入此文件夹),然后运行以下命令:- Yarn
- NPM
yarn strapi deploynpm run strapi deploy -
在终端中回答问题,为你的项目命名(你可以按 Enter 保留默认名称),选择推荐的 NodeJS 版本,并选择更接近你当前位置的区域:
s th

几分钟内,你的本地项目将托管在 Strapi 云上。🚀
🌐 Within a few moments, your local project will be hosted on Strapi Cloud. 🚀
一旦完成,终端将提供一个以 https://cloud.strapi.io/projects 开头的可点击链接。点击该链接,或将其复制并粘贴到浏览器地址栏中,以访问该页面。
🌐 Once it's done, the terminal will provide you a clickable link that starts with https://cloud.strapi.io/projects. Click on the link, or copy and paste it in your browser address bar, to visit the page.
你将在 Strapi Cloud 仪表板中看到我们刚创建的 Strapi Cloud 项目 my-strapi-project。点击右上角的 访问应用 按钮以访问你已部署的 Strapi 项目。
🌐 You will see the Strapi Cloud project we've just created, my-strapi-project, visible in the Strapi Cloud dashboard. Click the Visit app button in the top right corner to access your deployed Strapi project.
现在你的项目已托管在 Strapi Cloud 上并可在线访问。你可以通过阅读 其专用文档 来了解有关 Strapi Cloud 的更多信息,或者继续到 D 部分登录你的在线 Strapi 项目并从那里添加你的第一个数据。
🌐 Now your project is hosted on Strapi Cloud and accessible online. You can learn more about Strapi Cloud by reading its dedicated documentation or proceed to part D to log in into your online Strapi project and add your first data from there.
尽管随意进一步使用内容类型构建器,为你的内容类型添加更多字段或创建新的内容类型。每当你进行此类更改时,通过运行适当的 deploy 命令再次将其部署到 Strapi Cloud,并在几分钟内看到你的托管项目更新。神奇,不是吗?🪄
🌐 Feel free to play with the Content-Type Builder even further and add more fields to your content-types or create new content-types. Anytime you make such changes, deploy them again on Strapi Cloud, by running the appropriate deploy command, and see your hosted project updated within a few minutes. Magical, isn't it? 🪄
第 D 部分:使用内容管理器向你的 Strapi Cloud 项目添��加内容
现在我们已经创建了一个包含两个集合类型“Restaurant”和“Category”的基本内容结构,并将你的项目部署到了 Strapi Cloud,我们来使用 Cloud 实际添加内容,通过创建新的条目。
🌐 Now that we have created a basic content structure with 2 collection types, "Restaurant" and "Category", and deployed your project to Strapi Cloud, let's use the Cloud to actually add content by creating new entries.
步骤 1:登录到你新的 Strapi Cloud 项目的管理面板
步骤 1:登录到你新的 Strapi Cloud 项目的管理面板
🌐 Step 1: Log in to the admin panel of your new Strapi Cloud project
现在你的 Strapi Cloud 项目已创建,让我们登录该项目:
🌐 Now that your Strapi Cloud project is created, let's log in into the project:
- 在你的 Strapi Cloud dashboard中,点击
my-strapi-project项目。 - 点击 访问应用 按钮。
- 在打开的新页面中,填写表单以创建此 Strapi Cloud 项目的第一个管理员用户。
登录到我们的第一个 Strapi Cloud 项目,我们现在将从那里添加数据。
🌐 Logged in into our first Strapi Cloud project, we will now add data from there.
关于用户和 Strapi Cloud 项目的附加信息和提示:
你的 Strapi Cloud 项目和本地项目的数据库是不同的。这意味着数据不会自动从本地项目传输到 Strapi Cloud。这包括你之前在本地创建的用户。这就是为什么当你第一次登录到 Strapi Cloud 项目时,会被邀请创建一个新的管理员账户的原因。
🌐 The databases for your Strapi Cloud project and your local project are different. This means that data is not automatically transferred from your local project to Strapi Cloud. This includes users that you previously created locally. That's why you are invited to create a new administrator account when logging in to your Strapi Cloud project for the first time.
任何托管在 Strapi Cloud 上的项目都可以通过其自己的网址访问,例如 https://my-strapi-project-name.strapiapp.com。要访问你的在线项目的管理面板,只需在网址后添加 /admin,例如 https://my-strapi-project-name.strapiapp.com/admin。网址可以在你的 Strapi Cloud 仪表板中找到,你也可以直接从那里访问你的 Strapi Cloud 项目,方法是点击项目名称,然后点击 访问应用 按钮。
🌐 Any project hosted on Strapi Cloud is accessible from its own URL, something like https://my-strapi-project-name.strapiapp.com. To access the admin panel of your online project, simply add /admin to the URL, for instance as in https://my-strapi-project-name.strapiapp.com/admin. URLs can be found in your Strapi Cloud dashboard and you can also directly access your Strapi Cloud projects from there by clicking on the name of your project then on the Visit app button.
第2步:为“餐厅”集合类型创建一个条目
步骤 2:为“餐厅”集合类型创建一个条目
🌐 Step 2: Create an entry for the "Restaurant" collection type
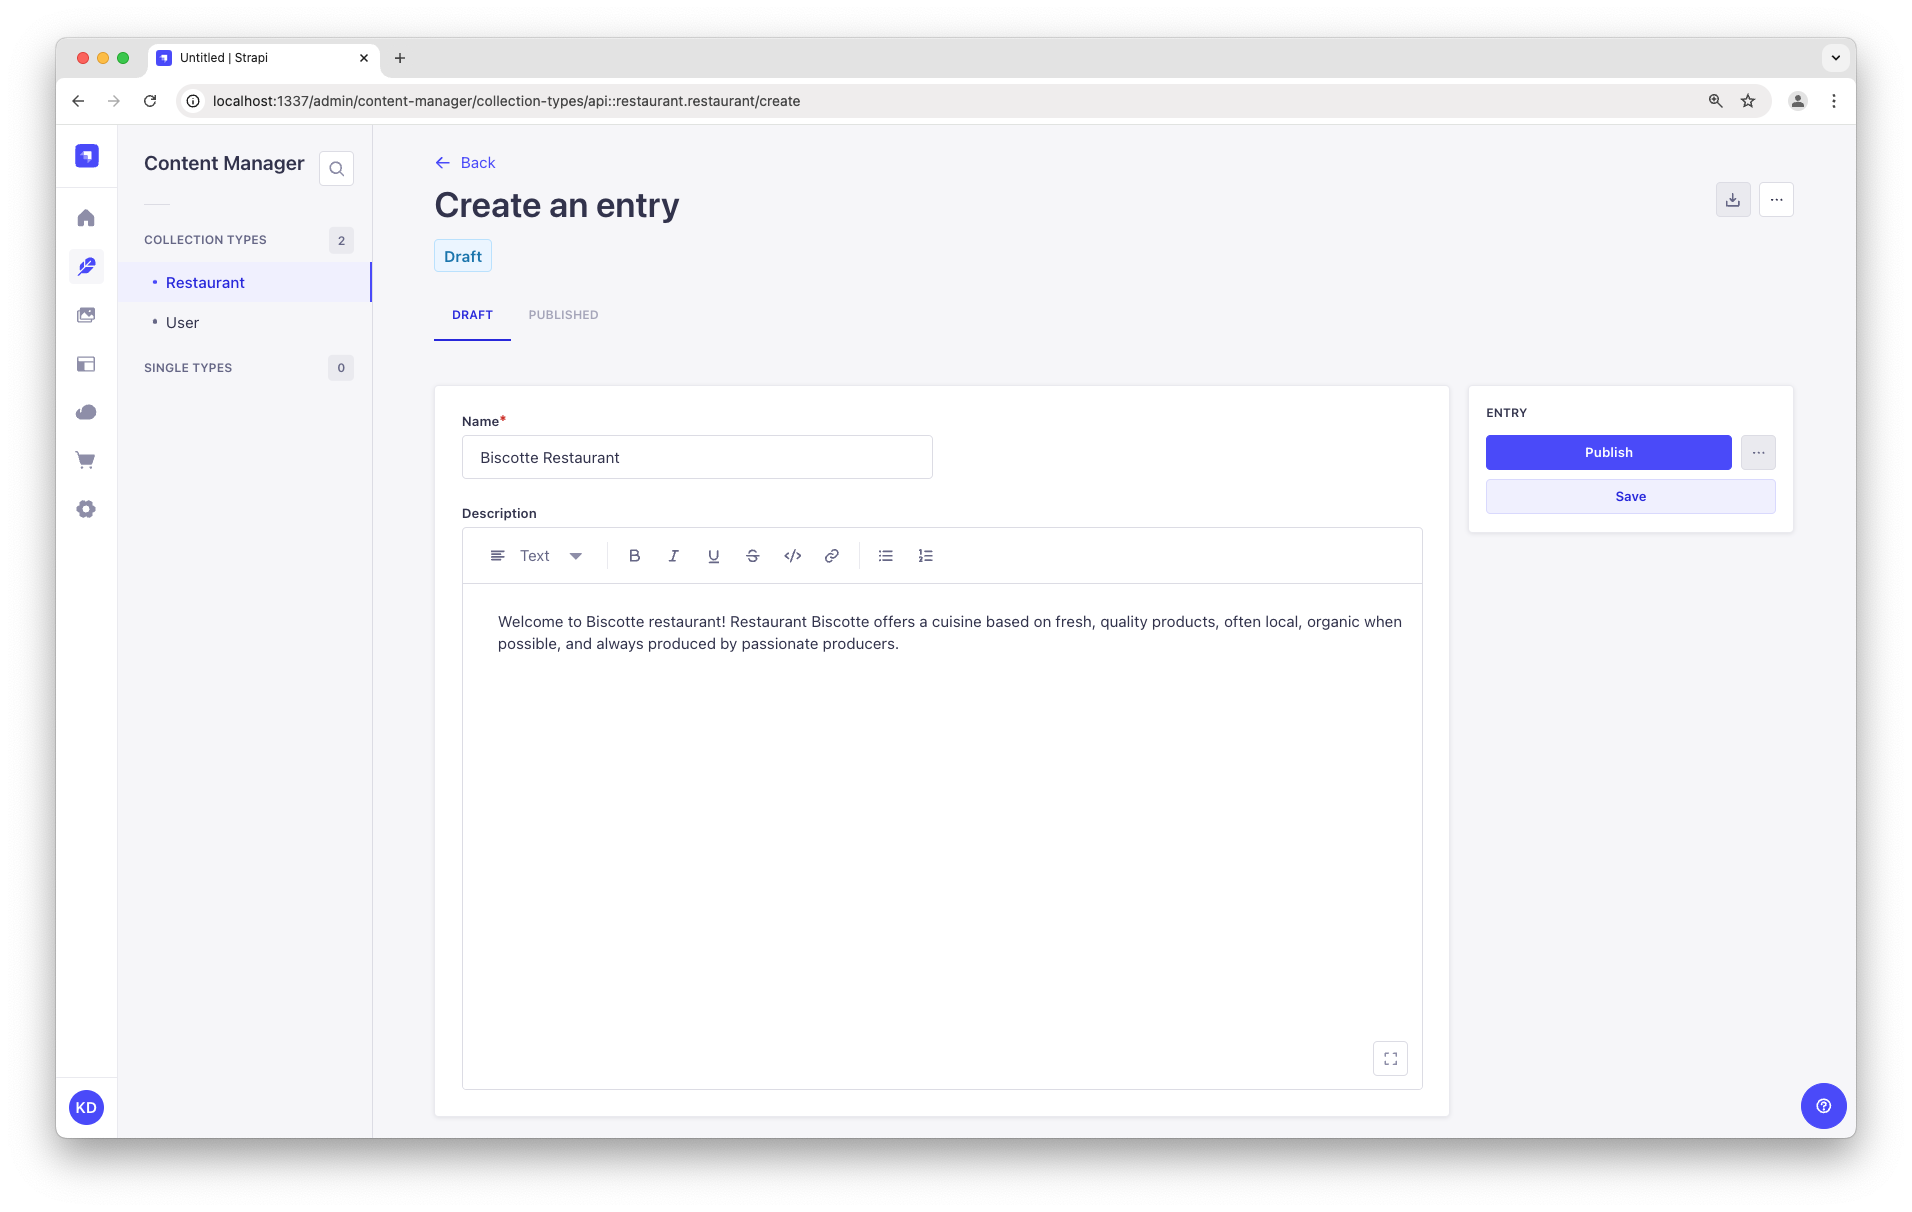
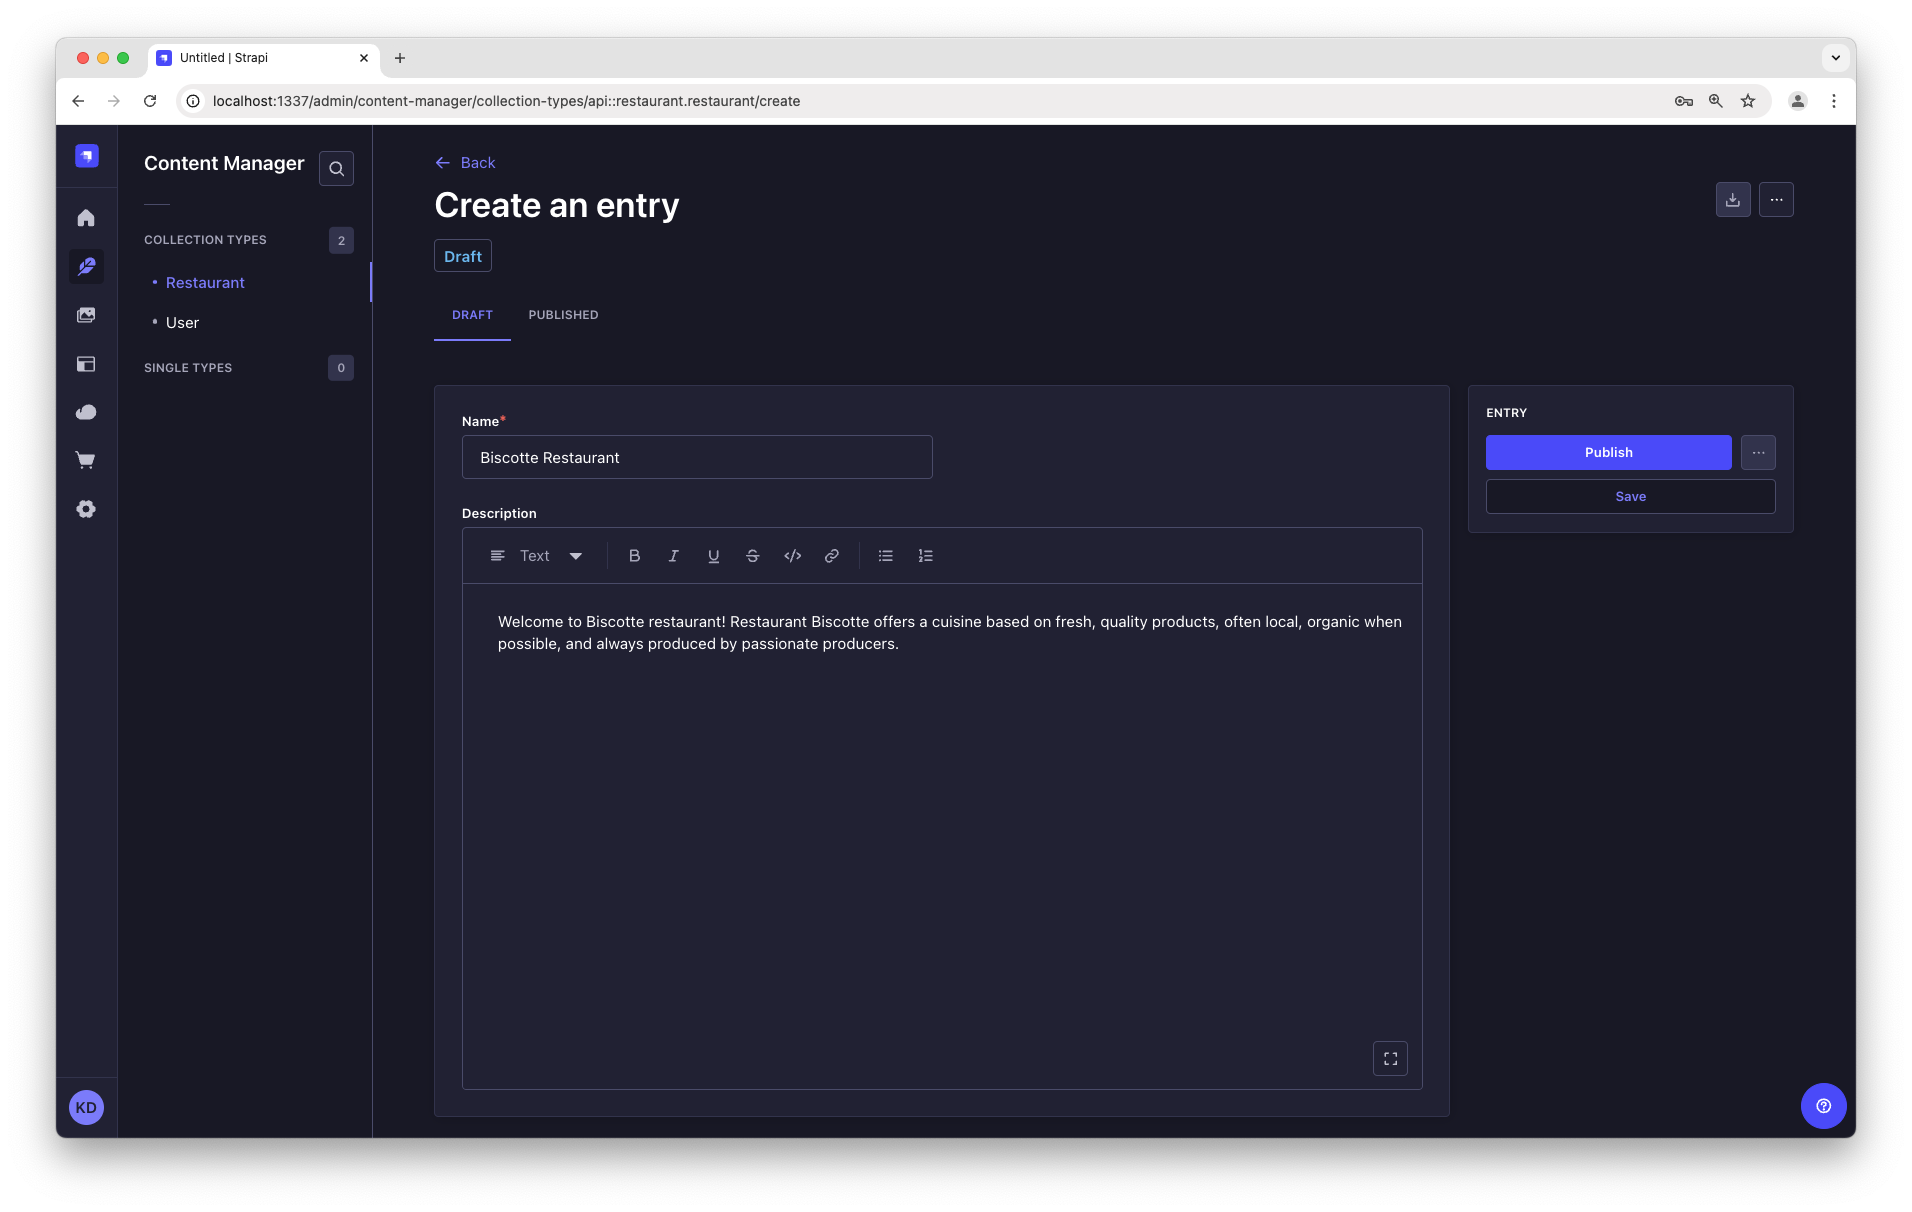
- 在导航中转到 内容管理器 > 集合类��型 - 餐厅。
- 点击 创建新条目。
- 在 Name 字段中输入你最喜欢的本地餐厅的名字。假设是
Biscotte Restaurant。 - 在_描述_字段中,写几句话。如果你缺乏一些灵感,你可以使用
Welcome to Biscotte restaurant! Restaurant Biscotte offers a cuisine based on fresh, quality products, often local, organic when possible, and always produced by passionate producers. - 点击 保存。
该餐厅现在已列在 _内容管理器_的_合集类型 - 餐厅_视图中。
步骤 3:添加类别
步骤 3:添加类别
🌐 Step 3: Add Categories
让我们去 内容管理器 > 集合类型 - 分类 并创建两个分类:
- 点击 创建新条目。
- 在 名称 字段中输入
French Food。 - 点击 保存。
- 返回到 Collection types - Category,然后再次点击 Create new entry。
- 在 Name 字段中输入
Brunch,然后点击 保存。
“French Food”和“Brunch”类别现在在 _内容管理器_的_集合类型 - 类别_视图中列为草稿。
现在,我们将为餐厅添加一个类别:
🌐 Now, we will add a category to a restaurant:
- 在导航中转到 内容管理器 > 集合类型 - 餐厅,然后点击“Biscotte 餐厅”。
- 在页面底部的 类别 下拉列表中,选择“法国美食”。然后滚动回页面顶部,点击 保存。
步骤 4:设置角色和权限
步骤 4:设置角色和权限
🌐 Step 4: Set Roles & Permissions
我们刚刚添加了一家餐厅和两个类别。我们现在有足够的内容可以使用(双关语意在食用)。但首先,我们需要确保这些内容可以通过 API 公开访问:
🌐 We have just added a restaurant and 2 categories. We now have enough content to consume (pun intended). But first, we need to make sure that the content is publicly accessible through the API:
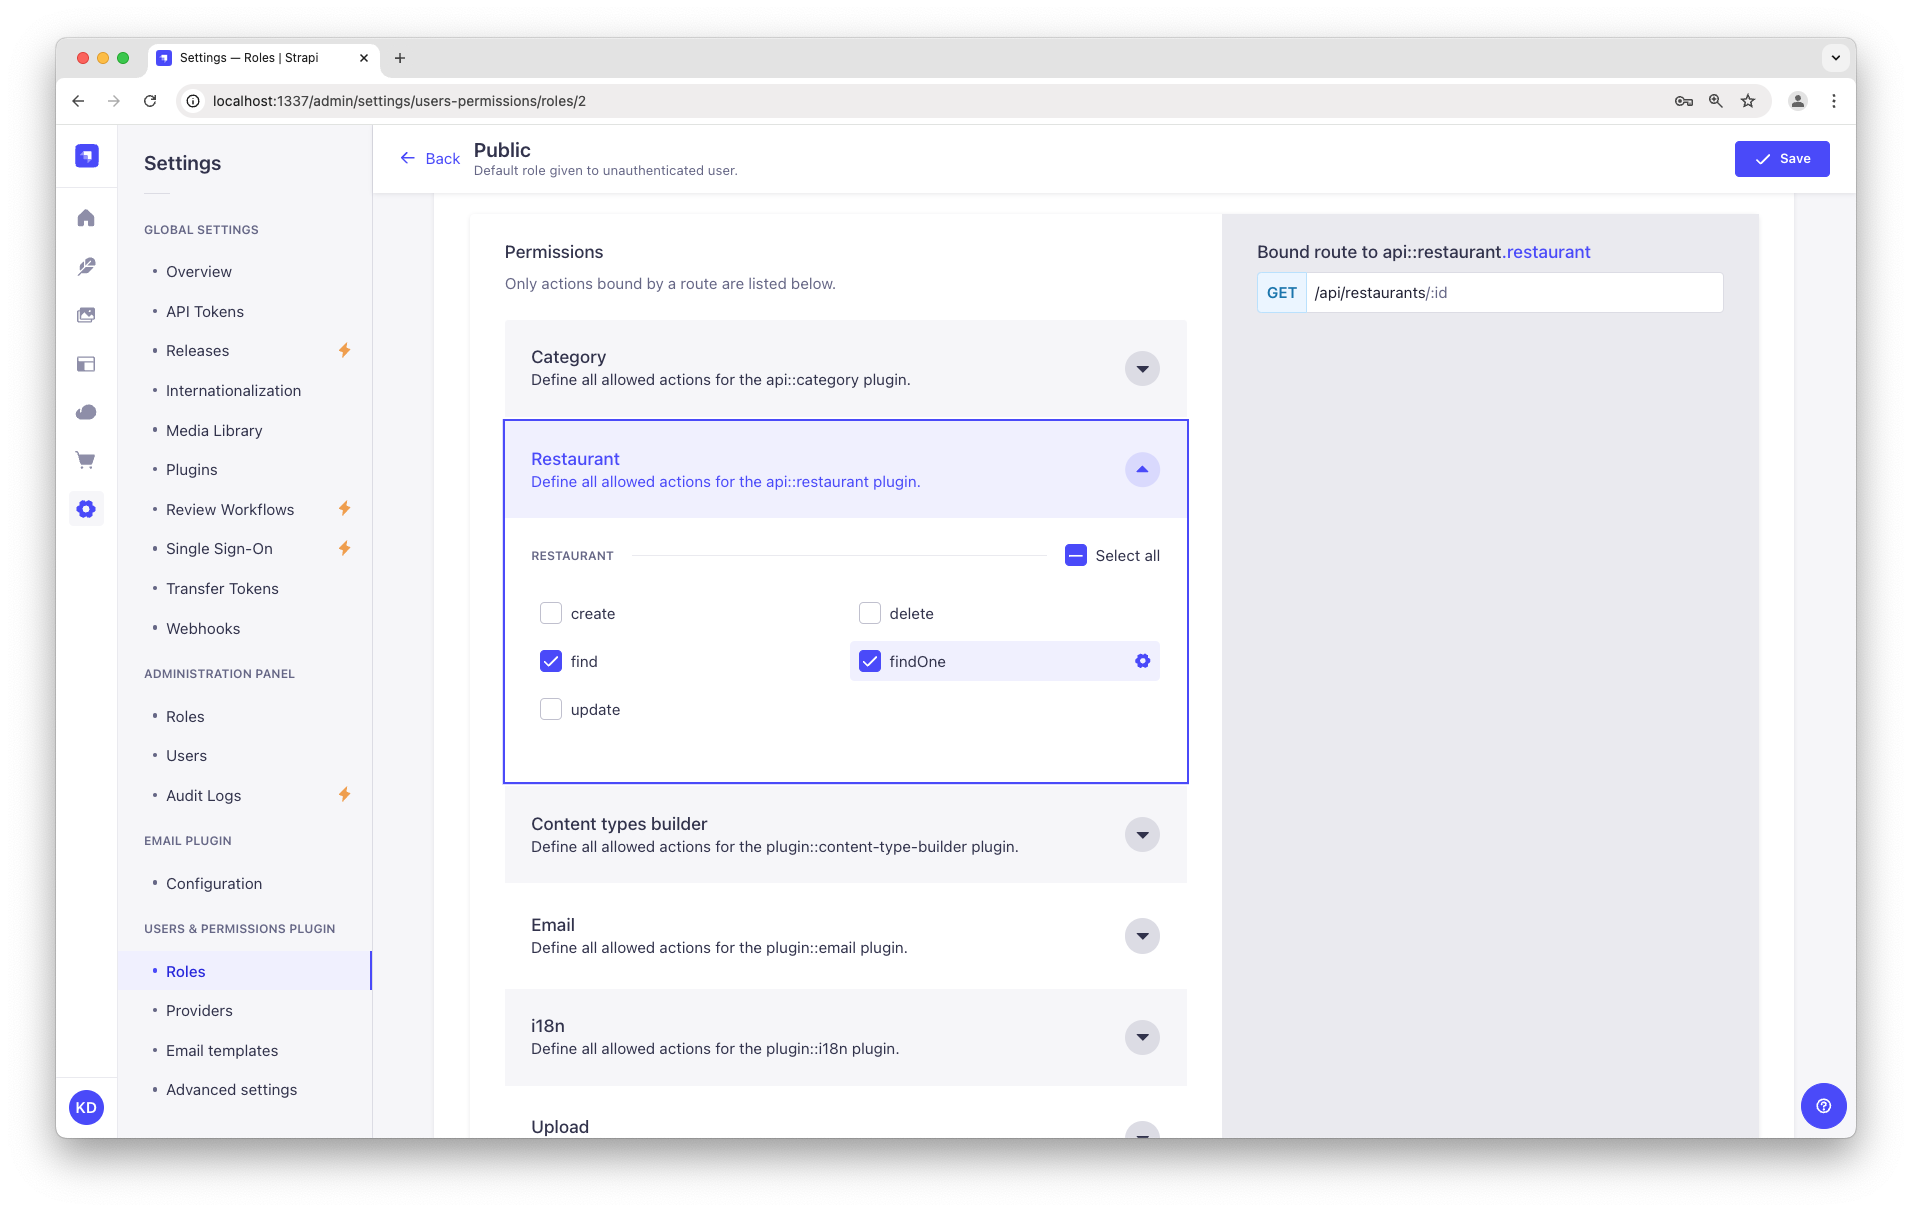
- 点击主�导航底部的 设置。
- 在 用户与权限插件 下,选择 角色。
- 点击 公开 角色。
- 在_权限_下向下滚动。
- 在“权限”选项卡中,找到“餐厅”并点击它。
- 点击 find 和 findOne 旁边的复选框。
- 在 Category 中重复:点击 find 和 findOne 旁边的复选框。
- 最后,点击页面顶部的 保存。

第5步:发布内容
步骤 5:发布内容
🌐 Step 5: Publish the content
默认情况下,你创建的任何内容都会被保存为草稿。让我们发布我们的分类和餐厅。
🌐 By default, any content you create is saved as a draft. Let's publish our categories and restaurant.
首先,导航到 内容管理器 > 集合类型 - 分类。从那里:
- 点击“早午餐”条目。
- 在下一个屏幕上,点击 发布。
然后,回到类别列表,重复操作“法国食品”类别。
🌐 Then, go back to the Categories list and repeat for the "French Food" category.
最后,要发布你最喜欢的餐厅,请前往 内容管理器 > 集合类型 - 餐厅,点击“Biscotte 餐厅”条目,然后发布它。

第6步:使用API
步骤 6:使用API
🌐 Step 6: Use the API
好的,亲爱的美食家,我们刚刚完成了内容的创建,并通过 API 使其可访问。你可以为自己鼓掌——但你还没有看到你辛勤工作的最终成果。
🌐 OK dear gourmet, we have just finished creating our content and making it accessible through the API. You can give yourself a pat on the back — but you have yet to see the final result of your hard work.
就在这里:餐厅列表可以通过访问你的 Strapi Cloud 项目 URL 的 /api/restaurants 路径来访问(例如,https://beautiful-first-strapi-project.strapiapp.com/api/restaurants)。
🌐 There you are: the list of restaurants should be accessible by visting the /api/restaurants path of your Strapi Cloud project URL (e.g., https://beautiful-first-strapi-project.strapiapp.com/api/restaurants).
现在就试试吧!结果应该类似于下面的示例回应 👇。
🌐 Try it now! The result should be similar to the example response below 👇.
点击我查看 API 响应示例:
{
  "data": [
    {
      "id": 3,
      "documentId": "wf7m1n3g8g22yr5k50hsryhk",
      "Name": "Biscotte Restaurant",
      "Description": [
        {
          "type": "paragraph",
          "children": [
            {
              "type": "text",
              "text": "Welcome to Biscotte restaurant! Restaurant Biscotte offers a cuisine based on fresh, quality products, often local, organic when possible, and always produced by passionate producers."
            }
          ]
        }
      ],
      "createdAt": "2024-09-10T12:49:32.350Z",
      "updatedAt": "2024-09-10T13:14:18.275Z",
      "publishedAt": "2024-09-10T13:14:18.280Z",
      "locale": null
    }
  ],
  "meta": {
    "pagination": {
      "page": 1,
      "pageSize": 25,
      "pageCount": 1,
      "total": 1
    }
  }
}
现在你的内容已经创建并发布,并且你有权限通过 API 请求它。继续创作精彩的内容吧!
🌐 Now your content is created, published, and you have permissions to request it through the API. Keep on creating amazing content!
你的 Strapi Cloud 项目和本地项目的数据库是不同的。这意味着数据不会在你的 Strapi Cloud 和本地项目之间自动同步。你可以使用 数据管理系统 在项目之间传输数据。
🌐 The databases for your Strapi Cloud project and your local project are different. This means that data is not automatically synchronized between your Strapi Cloud and local projects. You can use the data management system to transfer data between projects.
接下来做什么?
现在你已经了解了使用 Strapi 创建和发布内容的基础知识,我们鼓励你更深入地探索和挖掘 Strapi 的一些功能:
🌐 Now that you know the basics of creating and publishing content with Strapi, we encourage you to explore and dig deeper into some Strapi features:
学习如何使用 Strapi 的 REST API 查询内容,
通过浏览 功能 类别了解更多 Strapi 功能,
通过阅读 云文档 了解更多 Strapi Cloud 项目,
并为高级用例 自定义你的 Strapi 后端 和 管理面板。