OpenAPI 规范生成
🌐 OpenAPI specification generation
Strapi 提供了一个命令行工具来为你的应用生成 OpenAPI 规范。
CLI 工具会自动创建全面的 API 文档,描述你 Strapi 应用的内容 API 中所有可用的端点、参数和响应格式。在可能的用例中,生成的规范可以轻松集成到像 Swagger UI 这样的文档工具中。
OpenAPI 生成特性目前处于实验阶段。其行为和输出在未来版本中可能会发生变化,且不遵循语义化版本控制。如需更多信息和背景,请参阅 Strapi Contributor Docs 。
生成 OpenAPI 规范
🌐 Generating an OpenAPI specification
OpenAPI 生成工具包含在 Strapi 核心中,无需额外安装。你可以在任何 Strapi 项目中直接从命令行使用它来生成全面的 API 文档。
🌐 The OpenAPI generation tool is included with Strapi core and doesn't require additional installation. You can use it directly from the command line in any Strapi project to generate comprehensive API documentation.
命令行接口使用
🌐 CLI usage
在不带任何参数的情况下执行该命令将在你的 Strapi 项目文件夹根目录下生成一个 specification.json 文件:
🌐 Executing the command without any arguments will generate a specification.json file at the root of your Strapi folder project:
- Yarn
- NPM
yarn strapi openapi generate
npm run strapi openapi generate
你还可以传递一个可选的 --output 参数来指定路径和文件名,如下面的示例所示:
🌐 You can also path an optional --output argument to specify the path and filename, as in the following example:
- Yarn
- NPM
yarn strapi openapi generate --output ./docs/api-spec.json
npm run strapi openapi generate -- --output ./docs/api-spec.json
规范结构和内容
🌐 Specification structure and content
生成的 OpenAPI 规范遵循 OpenAPI 3.1.0 standard ,并可能在以下简化示例中显示如下:
生成的 OpenAPI 规范包含 Strapi 应用中所有可用的 API 端点,以及有关这些端点的信息,例如:
🌐 The generated OpenAPI specification includes all available API endpoints in your Strapi application, and information about these endpoints, such as the following:
- 适用于所有内容类型的 CRUD 操作
- 应用中定义的自定义 API 路由
- 用于用户管理的身份验证端点
- 用于媒体处理的文件上传端点
- 已安装插件的插件端点
与 Swagger UI 集成
🌐 Integrating with Swagger UI
通过以下步骤,你可以快速生成一个与 Swagger UI 兼容的页面:
🌐 With the following steps you can quickly generate a Swagger UI-compatible page:
-
生成规范:
- Yarn
- NPM
yarn strapi openapi generate --output ./public/swagger-spec.jsonnpm run strapi openapi generate -- --output ./public/swagger-spec.json -
使用以下代码更新
/config/middlewares.js配置文件:- JavaScript
- TypeScript
/config/middlewares.jsmodule.exports = [
'strapi::logger',
'strapi::errors',
{
name: 'strapi::security',
config: {
contentSecurityPolicy: {
useDefaults: true,
directives: {
'script-src': ["'self'", "'unsafe-inline'", 'https://unpkg.com'],
'style-src': ["'self'", "'unsafe-inline'", 'https://unpkg.com'],
'connect-src': ["'self'", 'https:'],
'img-src': ["'self'", 'data:', 'blob:', 'https:'],
'media-src': ["'self'", 'data:', 'blob:'],
upgradeInsecureRequests: null,
},
},
},
},
'strapi::cors',
'strapi::poweredBy',
'strapi::query',
'strapi::body',
'strapi::session',
'strapi::favicon',
'strapi::public',
];/config/middlewares.tsexport default [
'strapi::logger',
'strapi::errors',
{
name: 'strapi::security',
config: {
contentSecurityPolicy: {
useDefaults: true,
directives: {
'script-src': ["'self'", "'unsafe-inline'", 'https://unpkg.com'],
'style-src': ["'self'", "'unsafe-inline'", 'https://unpkg.com'],
'connect-src': ["'self'", 'https:'],
'img-src': ["'self'", 'data:', 'blob:', 'https:'],
'media-src': ["'self'", 'data:', 'blob:'],
upgradeInsecureRequests: null,
},
},
},
},
'strapi::cors',
'strapi::poweredBy',
'strapi::query',
'strapi::body',
'strapi::session',
'strapi::favicon',
'strapi::public',
];这将确保来自 unpkg.com 的 Swagger UI 显示不会被由安全中间件处理的 Strapi CSP 策略阻止。
-
在你的 Strapi 项目中创建一个
public/openapi.html文件来显示 Swagger UI,代码如下:<!DOCTYPE html>
<html>
<head>
<title>API Documentation</title>
<link
rel="stylesheet"
type="text/css"
href="https://unpkg.com/swagger-ui-dist@5.0.0/swagger-ui.css"
/>
</head>
<body>
<div id="swagger-ui"></div>
<script src="https://unpkg.com/swagger-ui-dist@5.0.0/swagger-ui-bundle.js"></script>
<script src="https://unpkg.com/swagger-ui-dist@5.0.0/swagger-ui-standalone-preset.js"></script>
<script>
window.onload = function () {
SwaggerUIBundle({
url: './swagger-spec.json',
dom_id: '#swagger-ui',
presets: [
SwaggerUIBundle.presets.apis,
SwaggerUIStandalonePreset
],
layout: 'StandaloneLayout',
});
};
</script>
</body>
</html> -
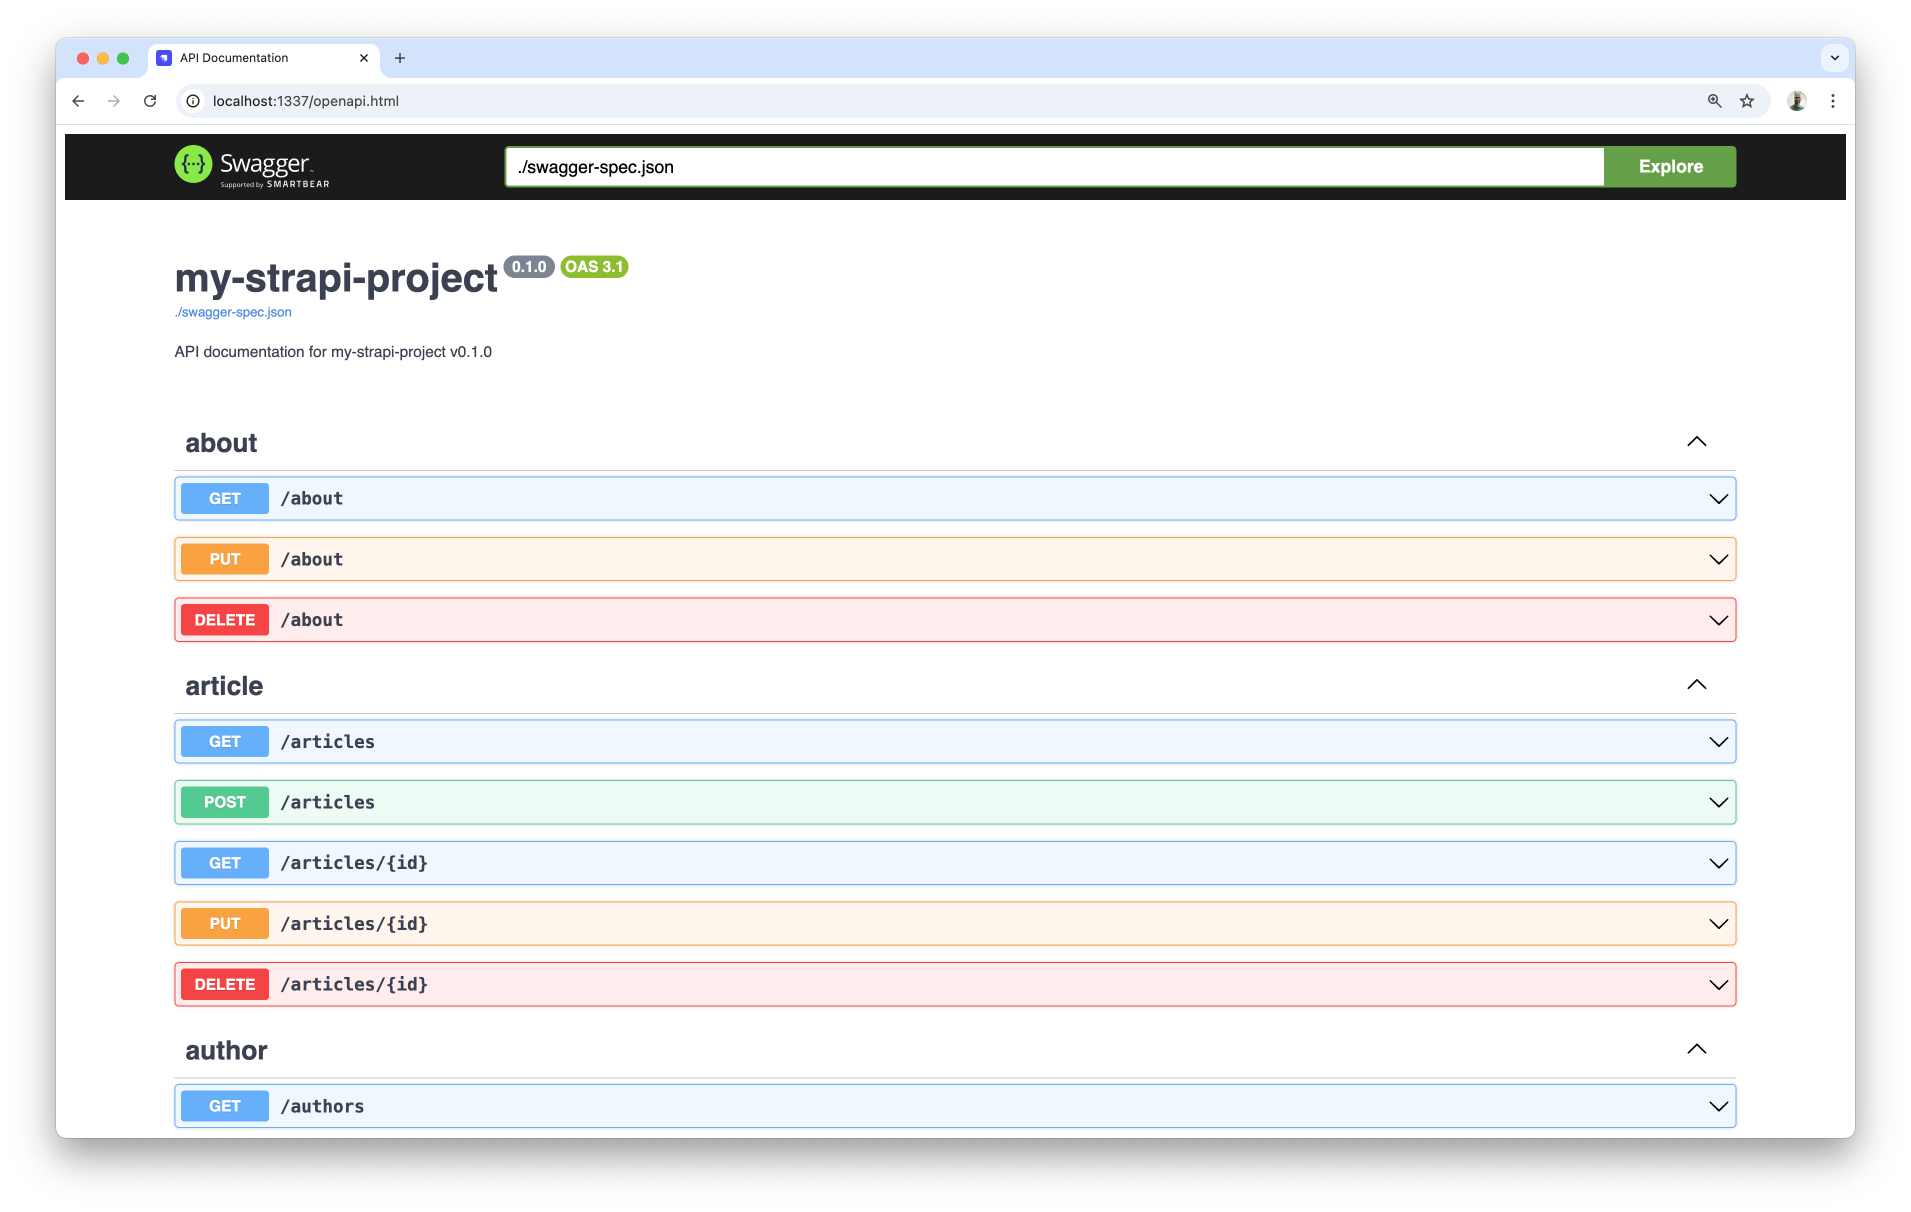
使用
yarn develop或npm run develop重新启动 Strapi 服务器,然后访问/openapi.html页面。应该会显示 Swagger UI: