使用云仪表板进行项目部署
🌐 Project deployment with the Cloud dashboard
这是一个使用云仪表板首次在 Strapi Cloud 部署你的项目的逐步指南。
🌐 This is a step-by-step guide for deploying your project on Strapi Cloud for the first time, using the Cloud dashboard.
在你可以使用 Cloud 仪表板将 Strapi 应用部署到 Strapi Cloud 之前,你需要具备以下先决条件:
🌐 Before you can deploy your Strapi application on Strapi Cloud using the Cloud dashboard, you need to have the following prerequisites:
- Strapi 版本
4.8.2或更高 - 项目数据库必须与 PostgreSQL 兼容。Strapi 不支持也不推荐使用任何外部数据库,尽管可以配置一个(参见 高级数据库配置)。
- 项目源代码托管在 GitHub 或 GitLab。所连接的仓库可以包含多个 Strapi 应用。每个 Strapi 应用必须位于单独的目录中。
- 专门针对 GitLab:至少需要对项目拥有“Maintainer”权限,才能在 Strapi Cloud 上导入。
登录 Strapi 云
🌐 Logging in to Strapi Cloud
-
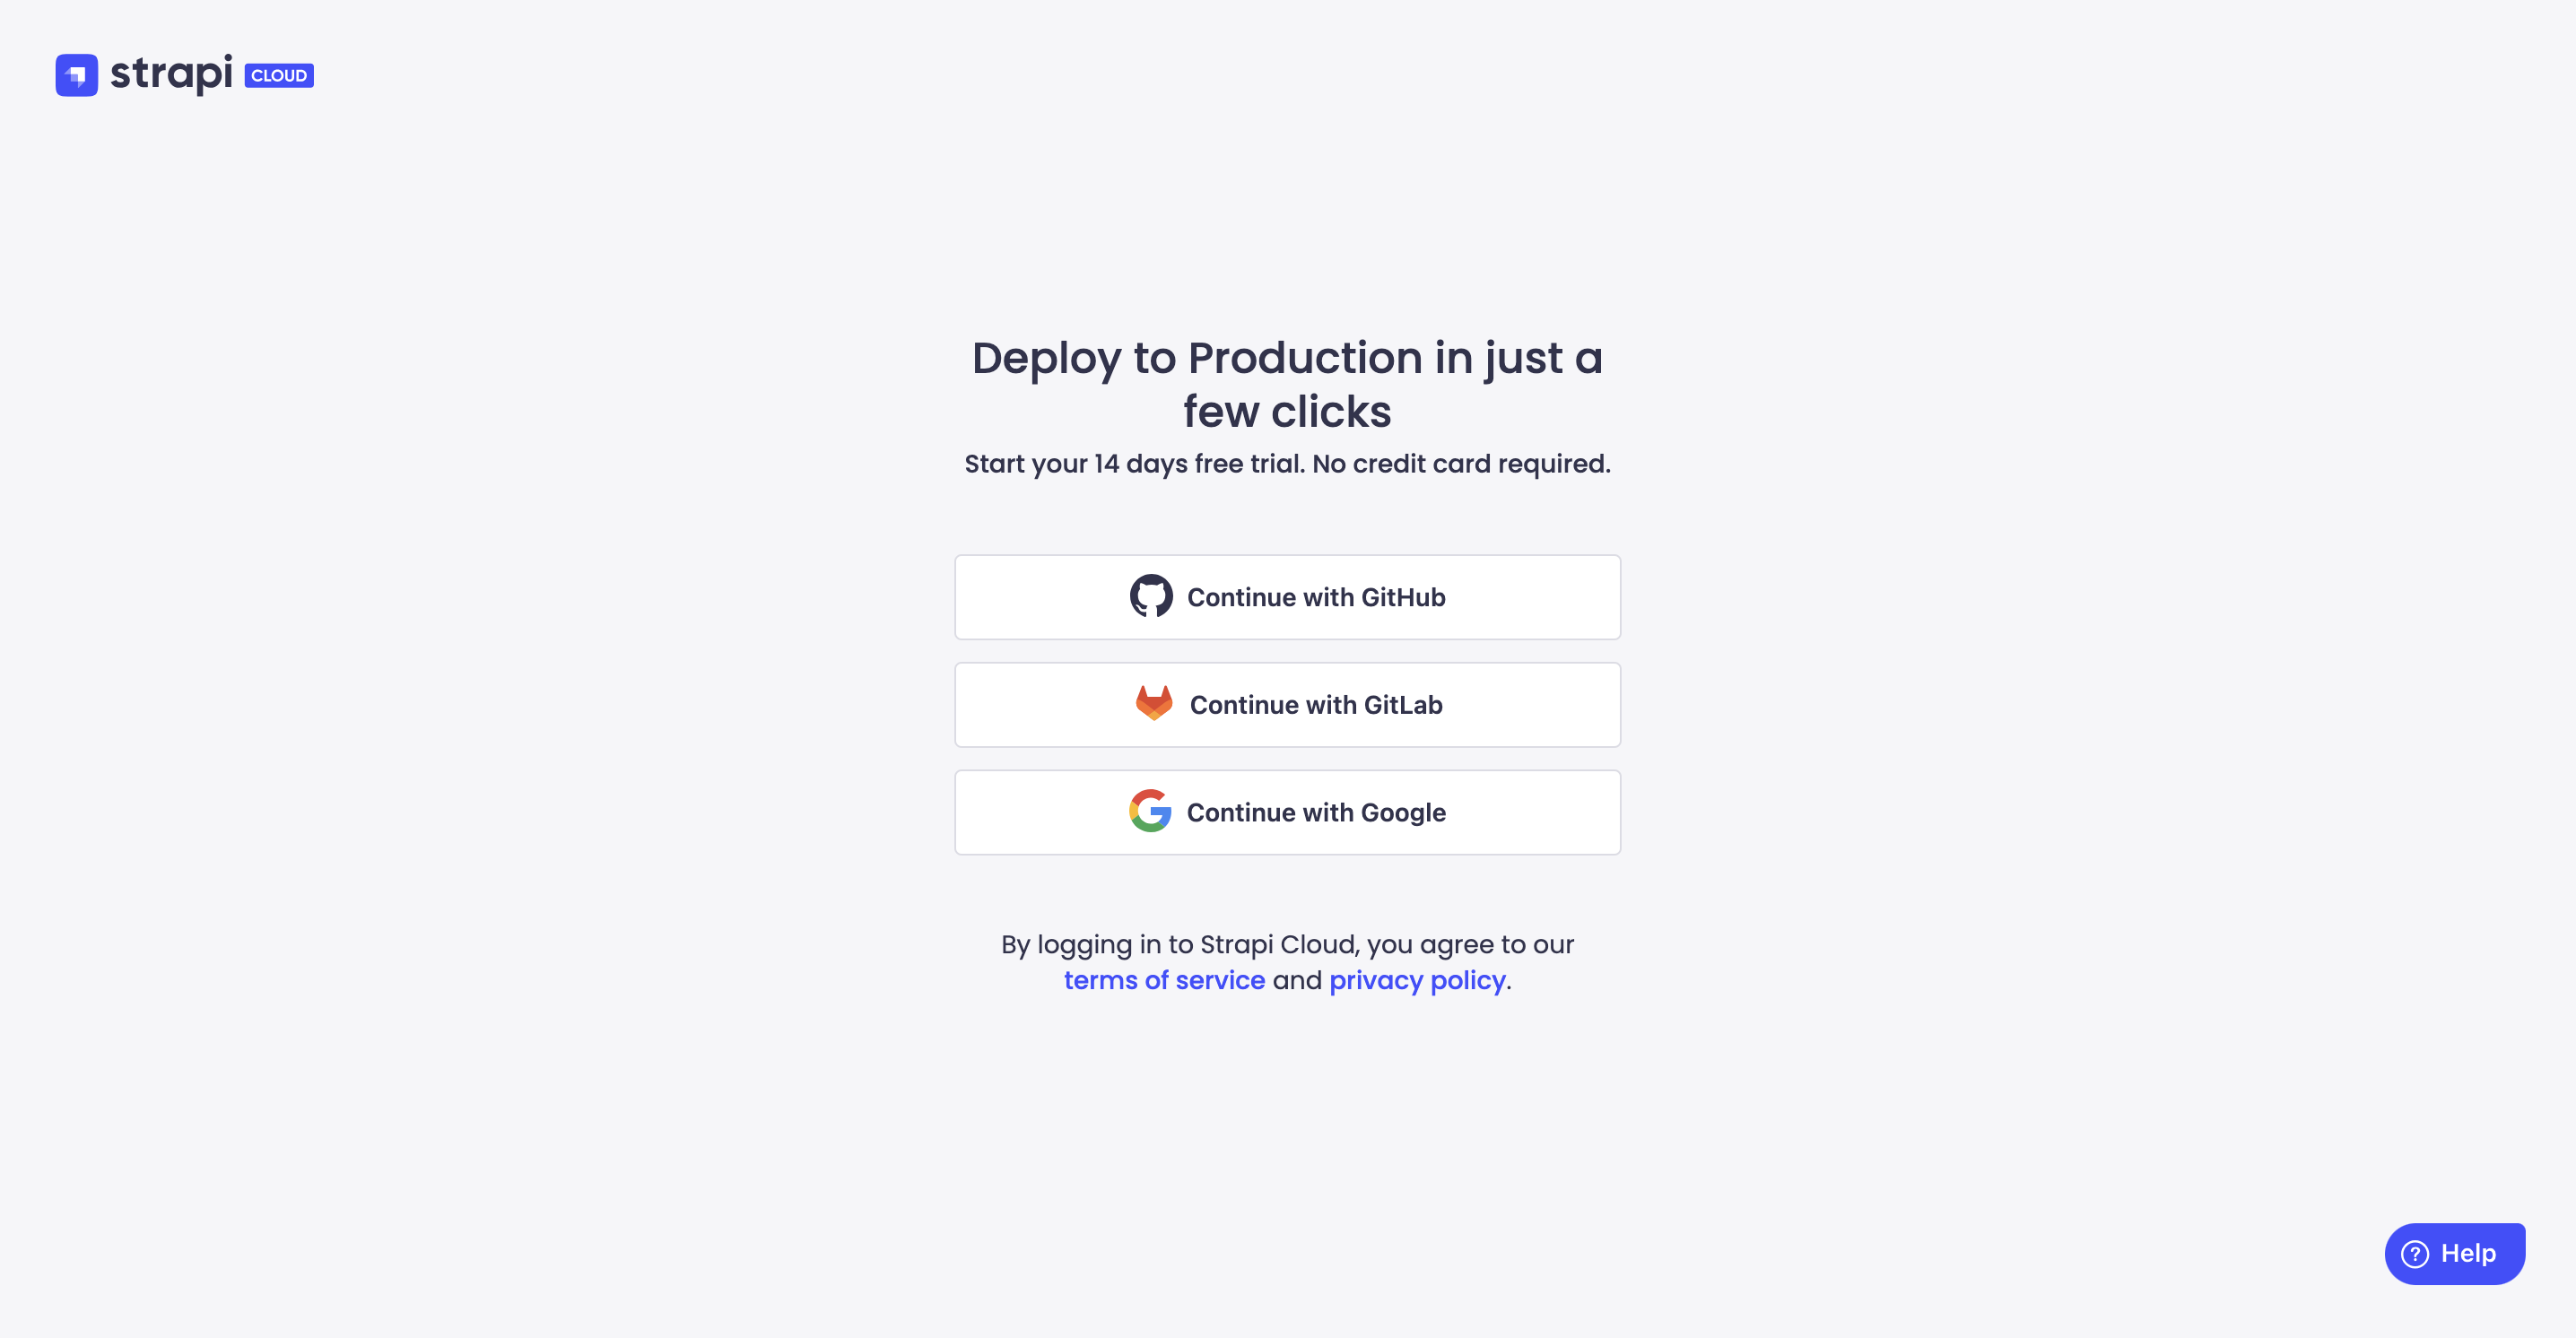
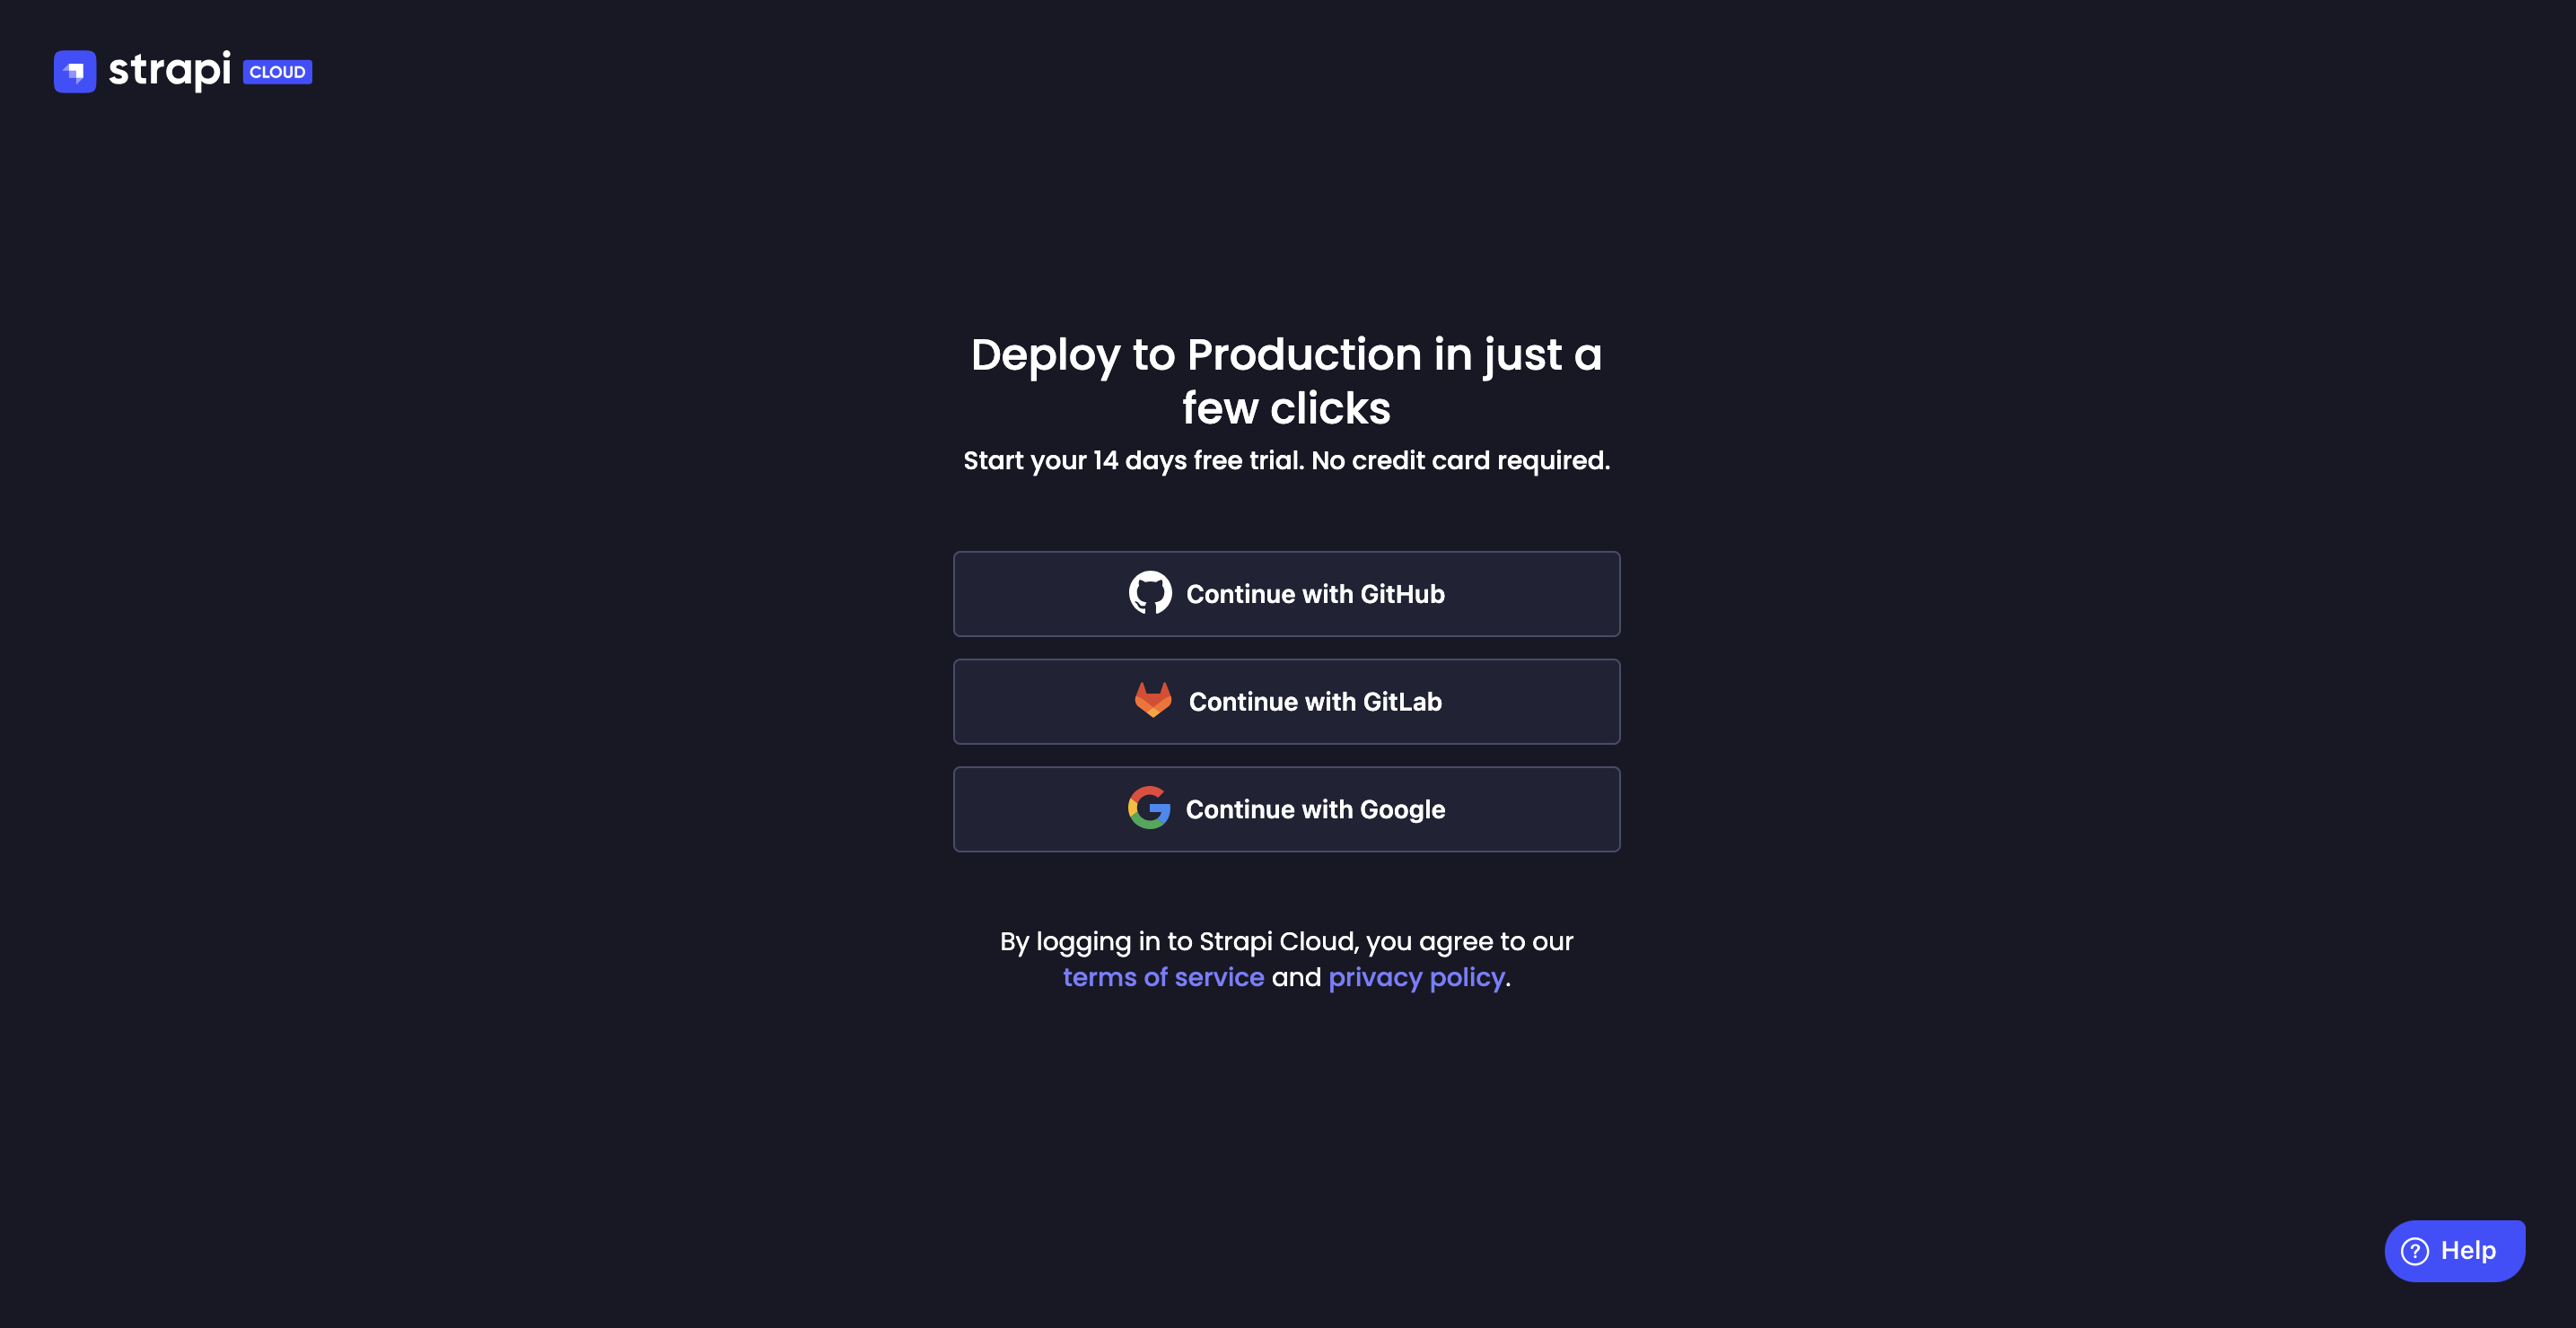
导航到 Strapi Cloud 登录页面。
-
你可以选择使用 GitHub、Google、GitLab 登录,或通过 Magic 链接 登录。请选择你偏好的选项并登录。首次登录将创建你的 Strapi Cloud 账户。登录后,你将被重定向到 Strapi Cloud 的 项目 页面,在那里你可以创建你的第一个 Strapi Cloud 项目。
创建一个项目
🌐 Creating a project
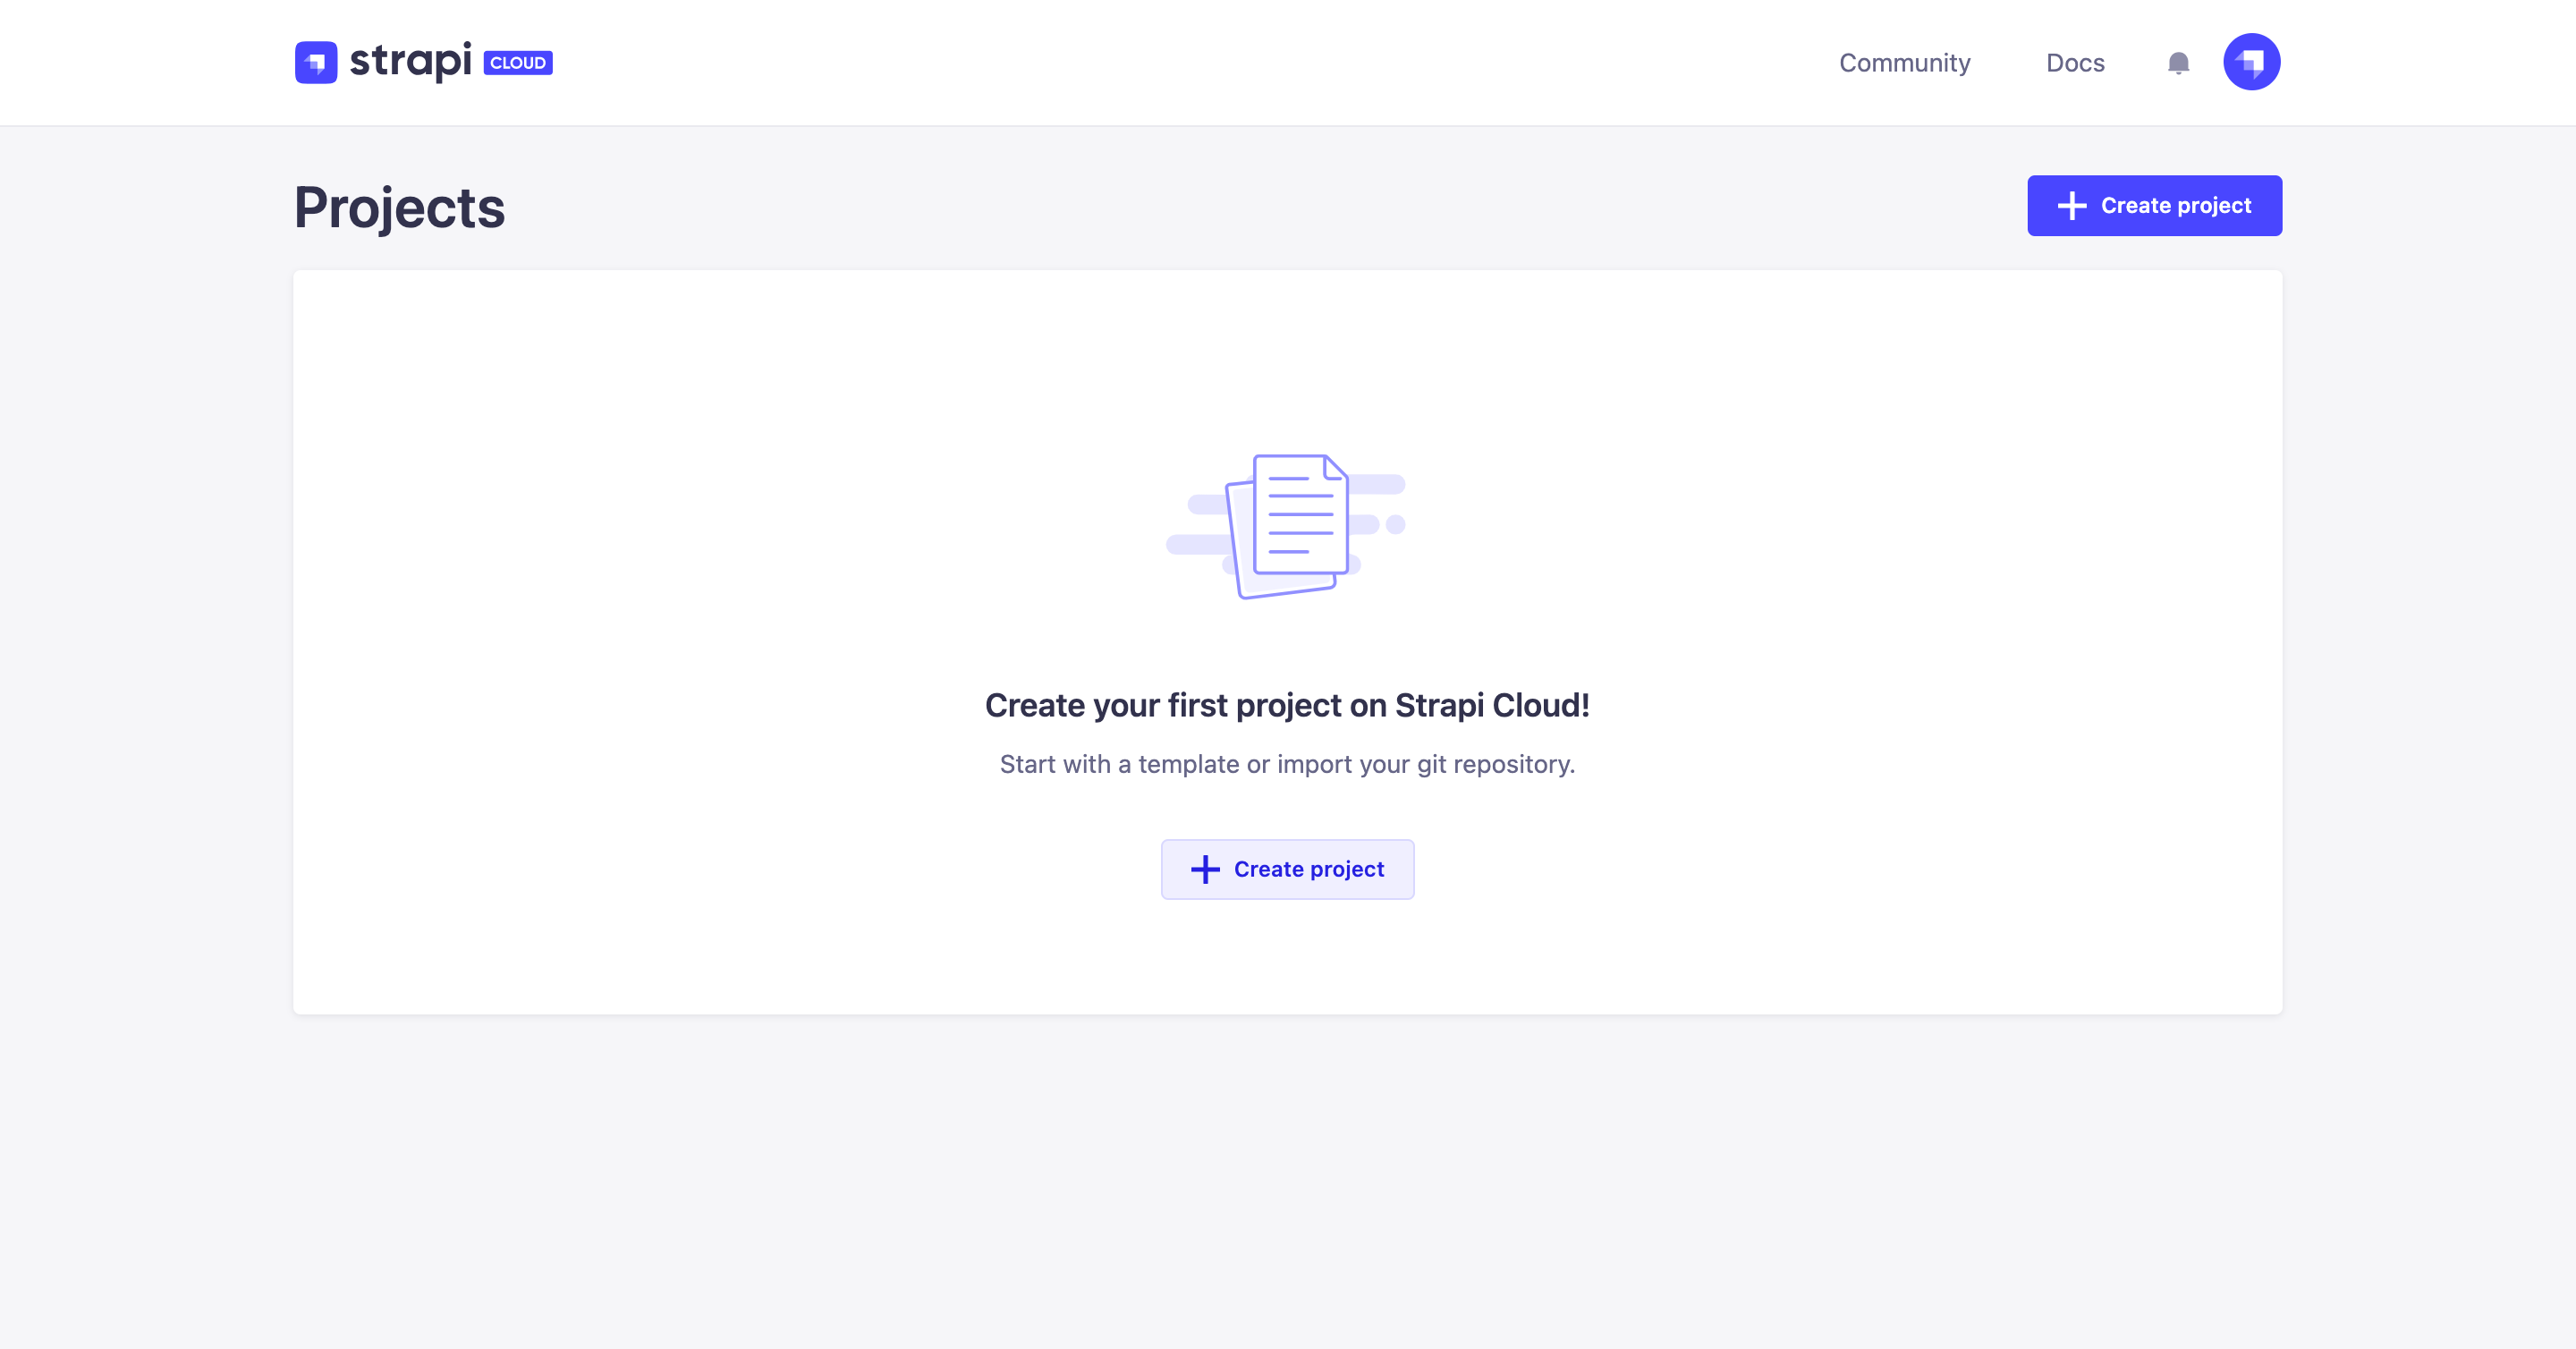
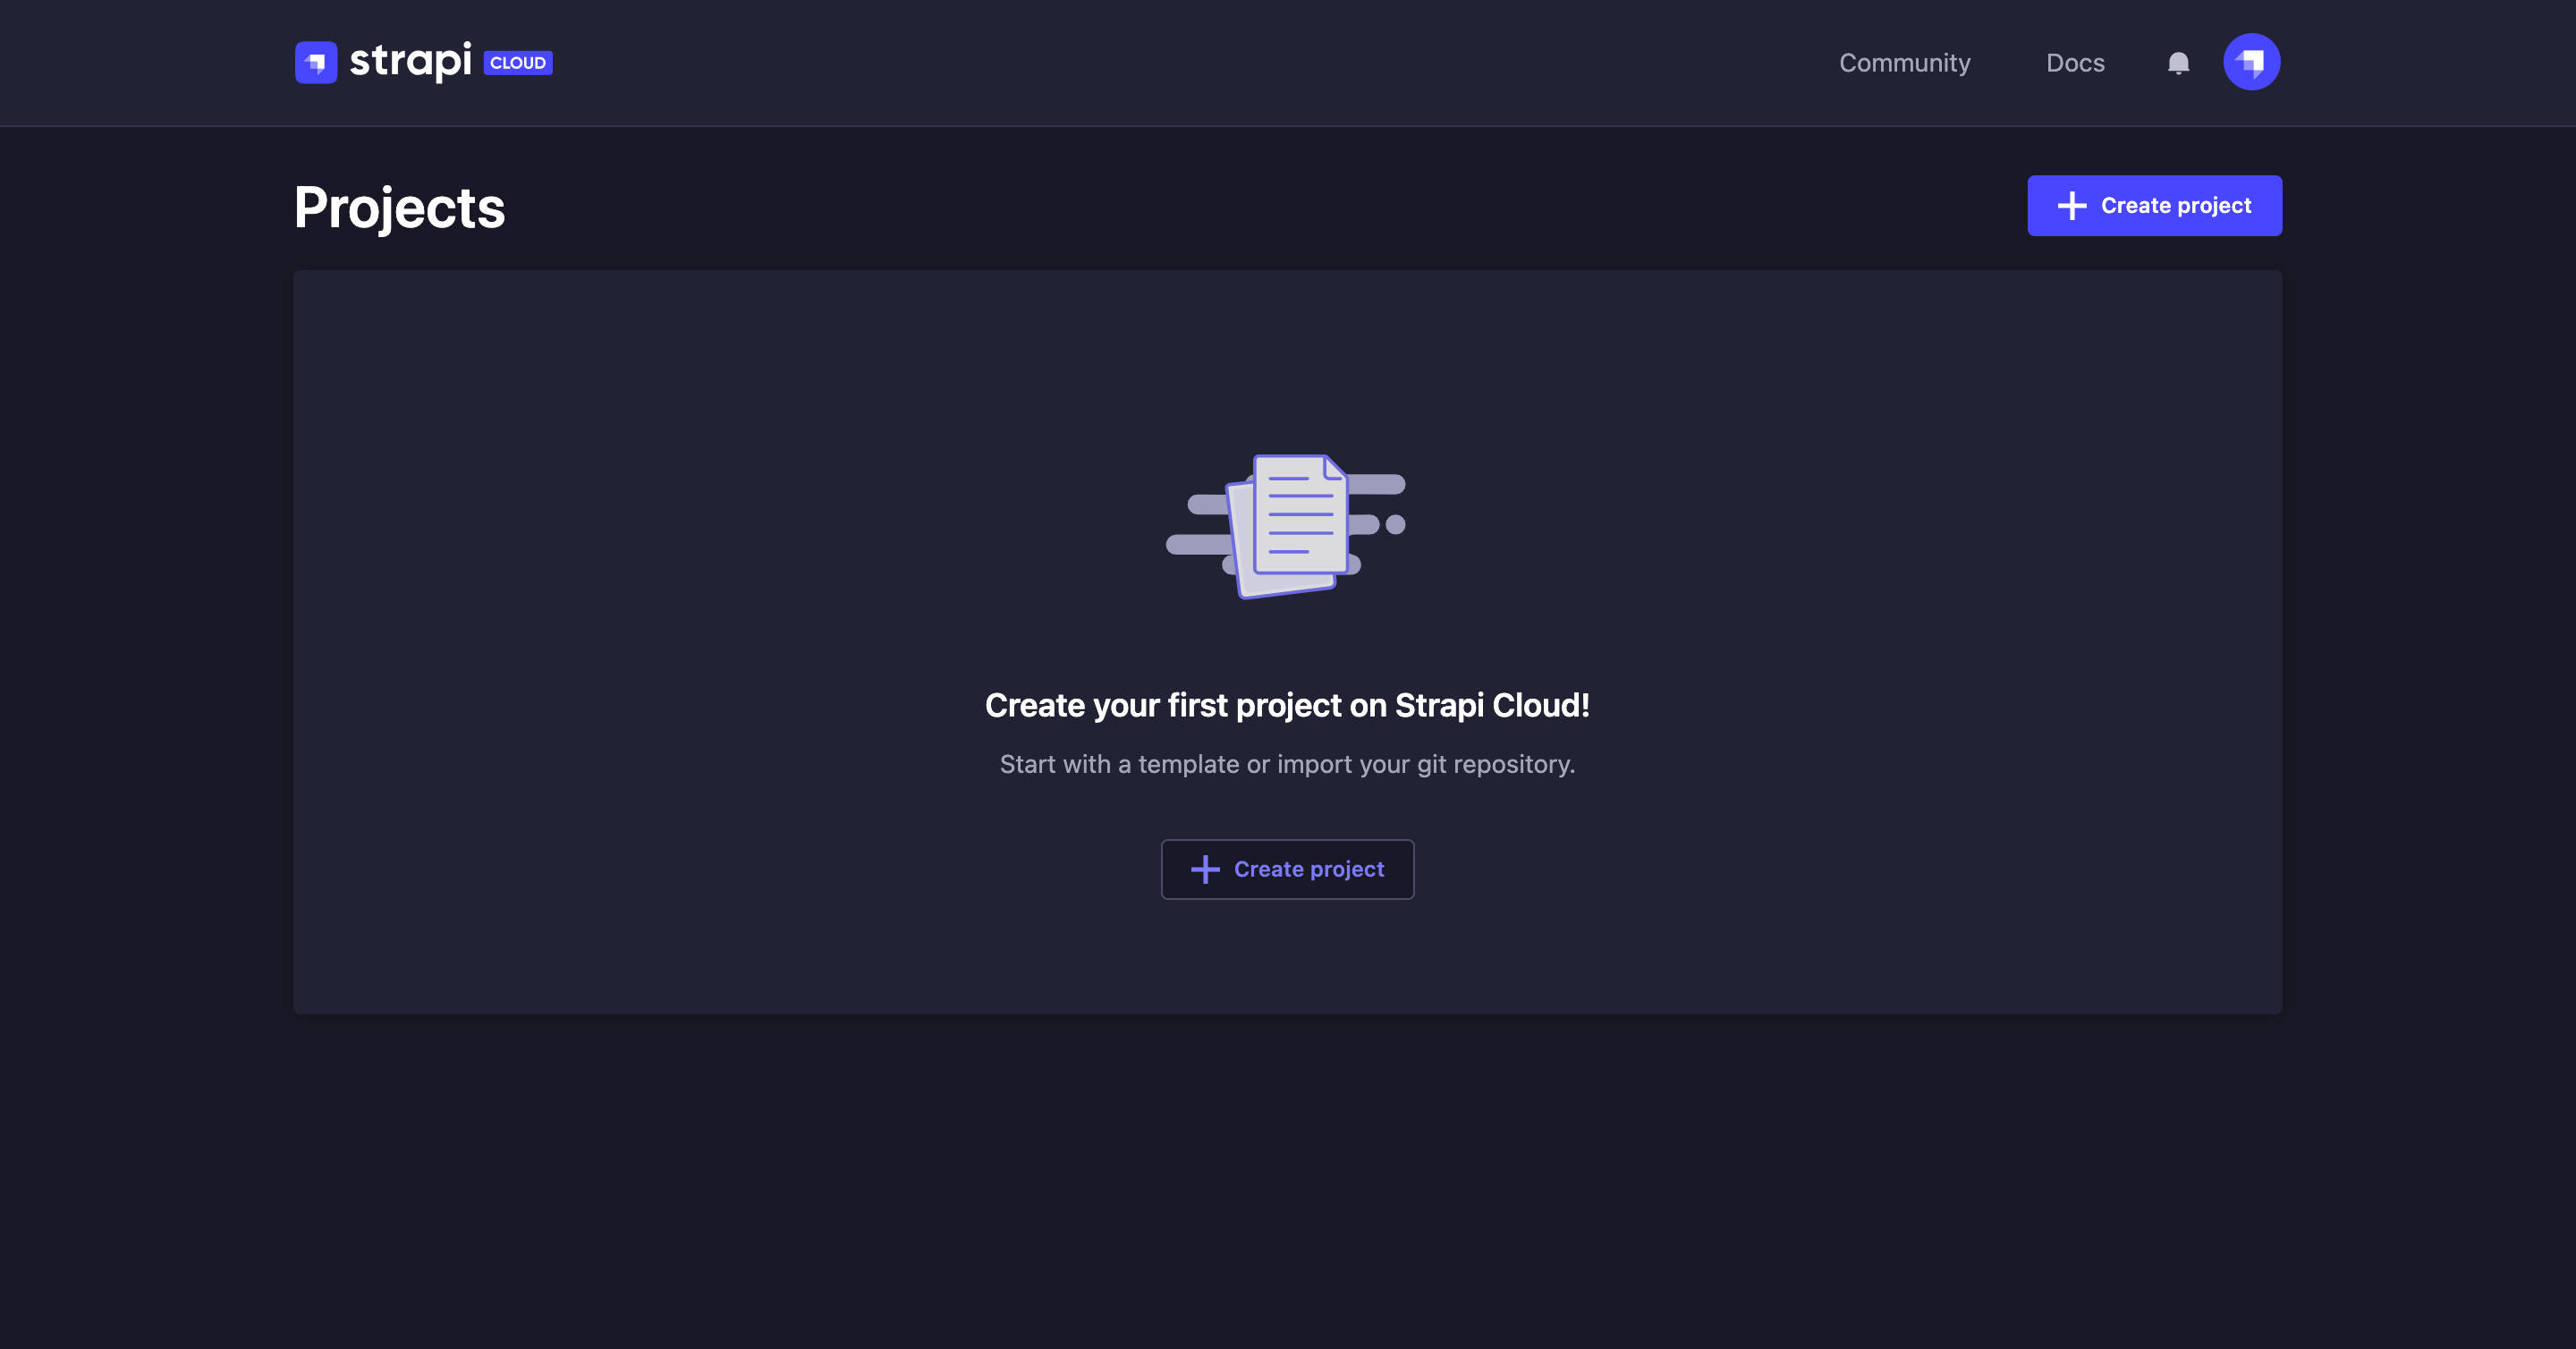
-
在 Projects 页面,点击 Create project 按钮。
-
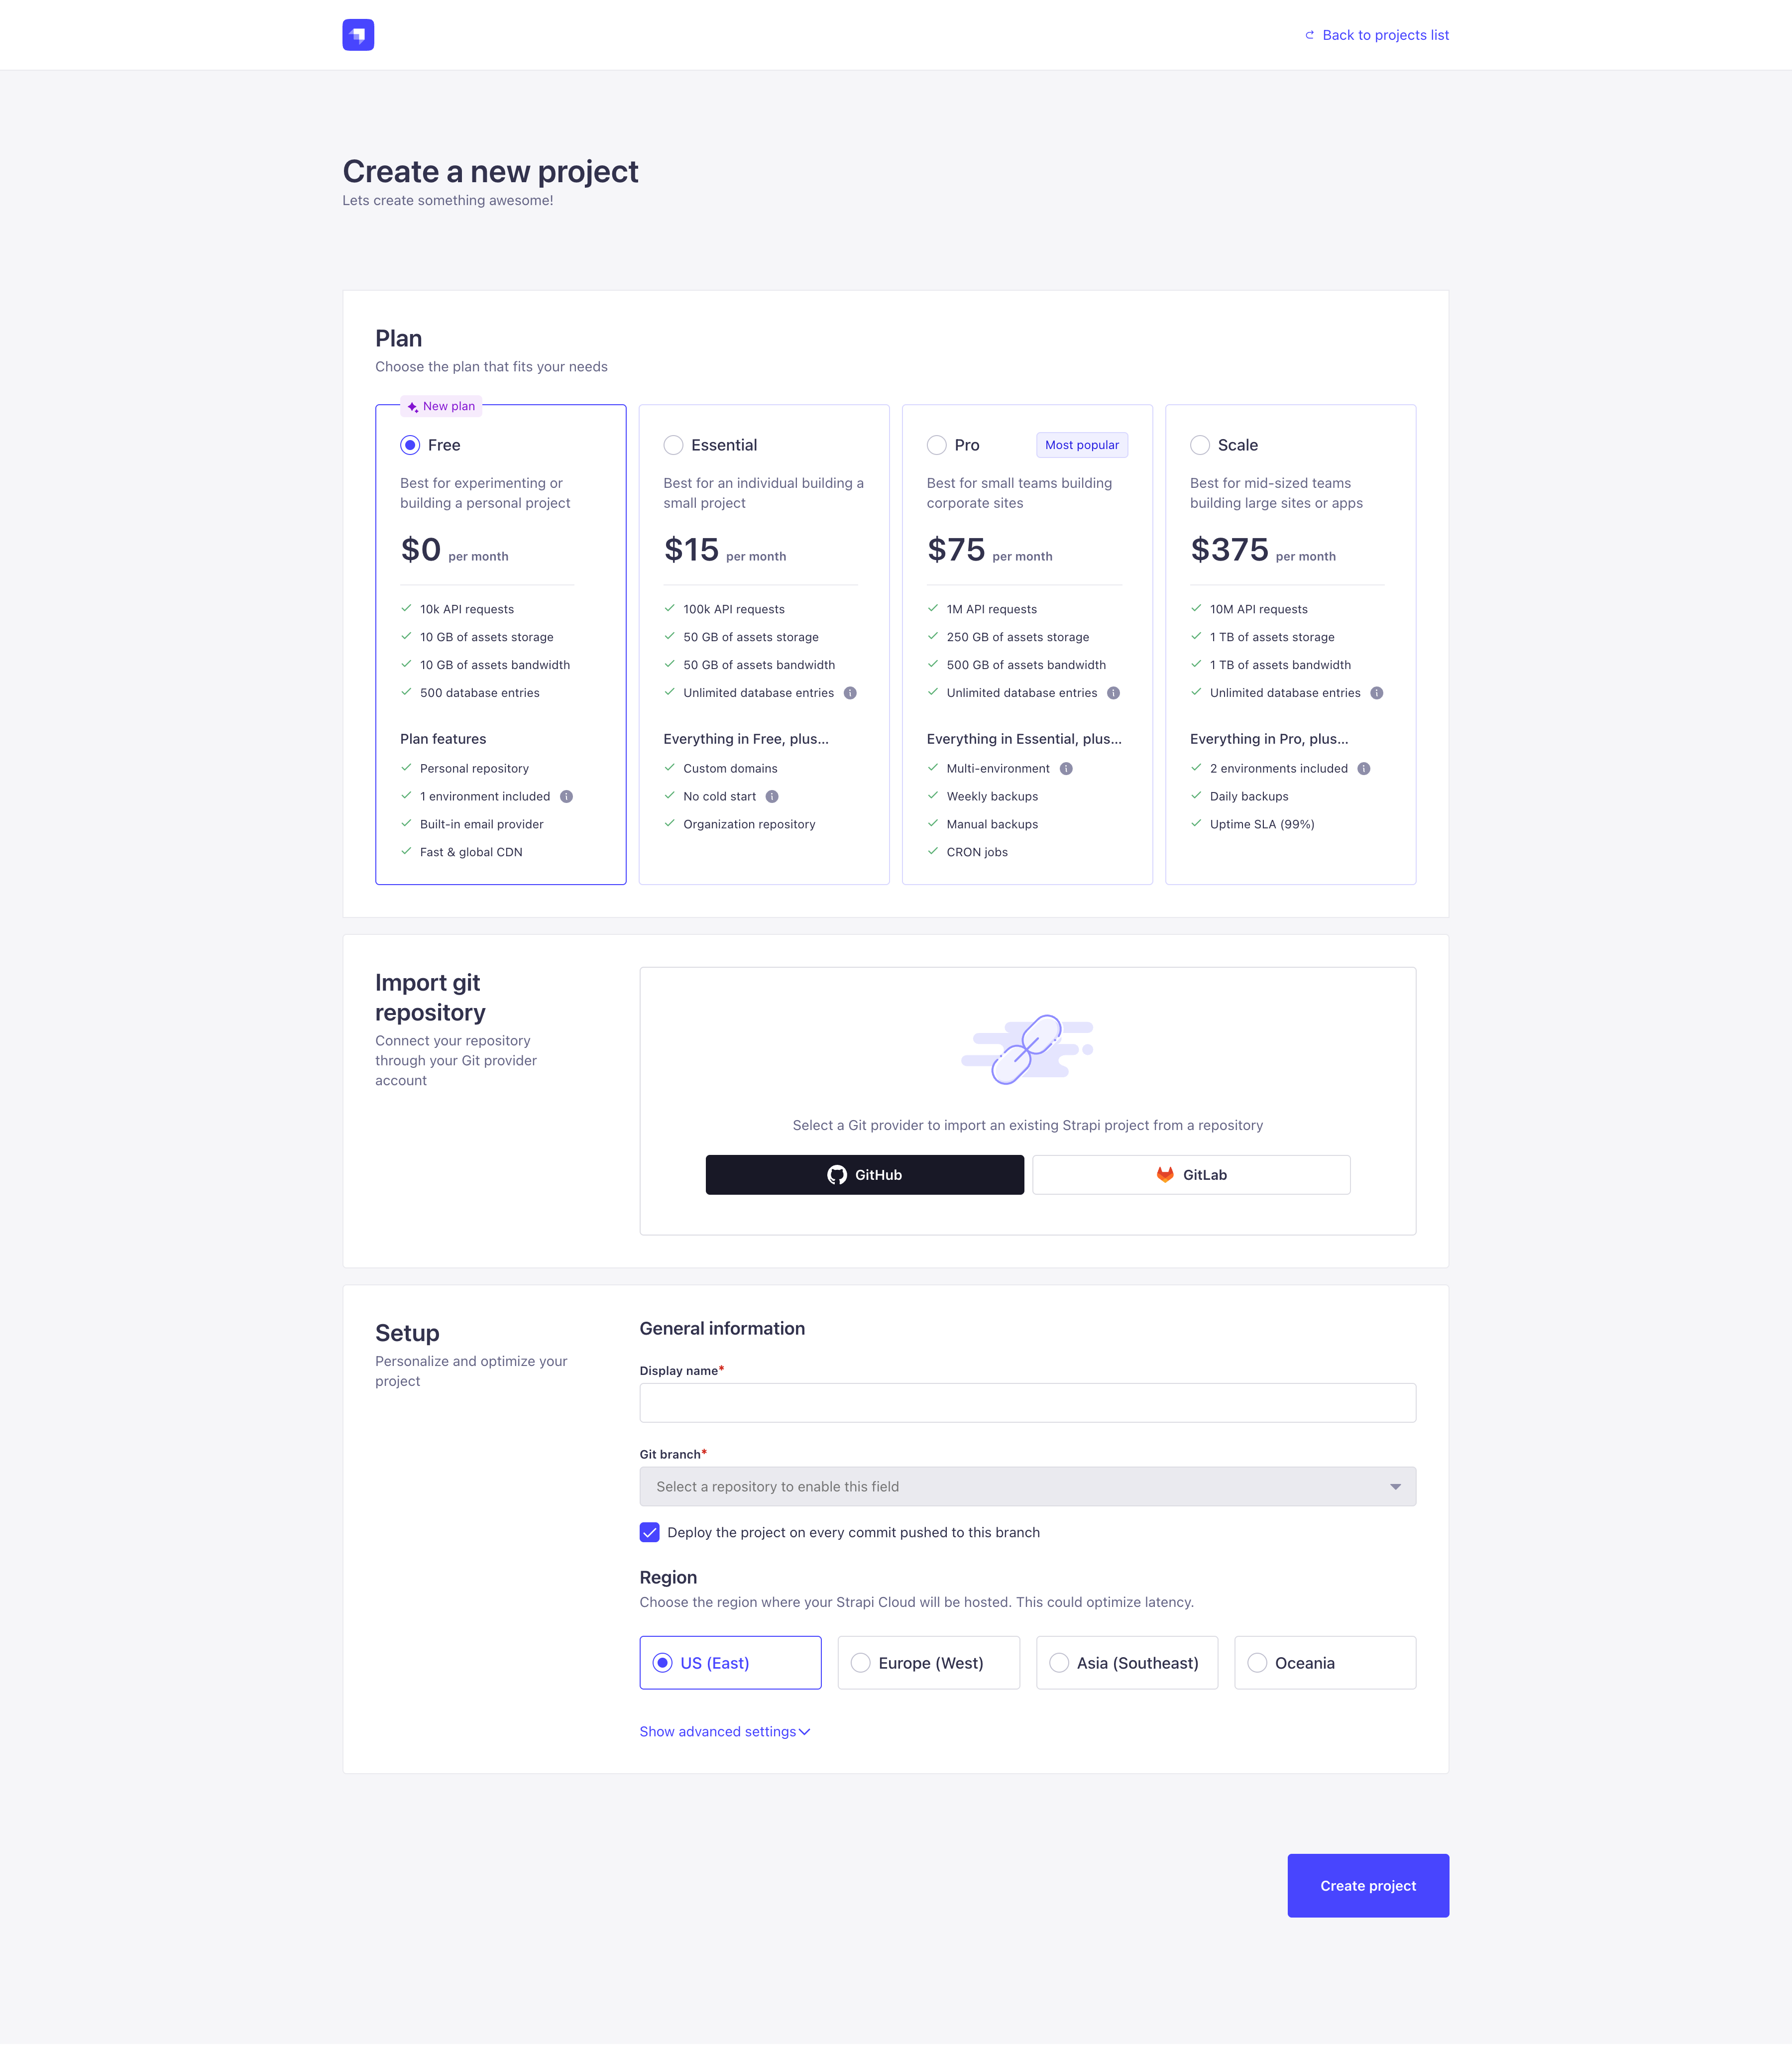
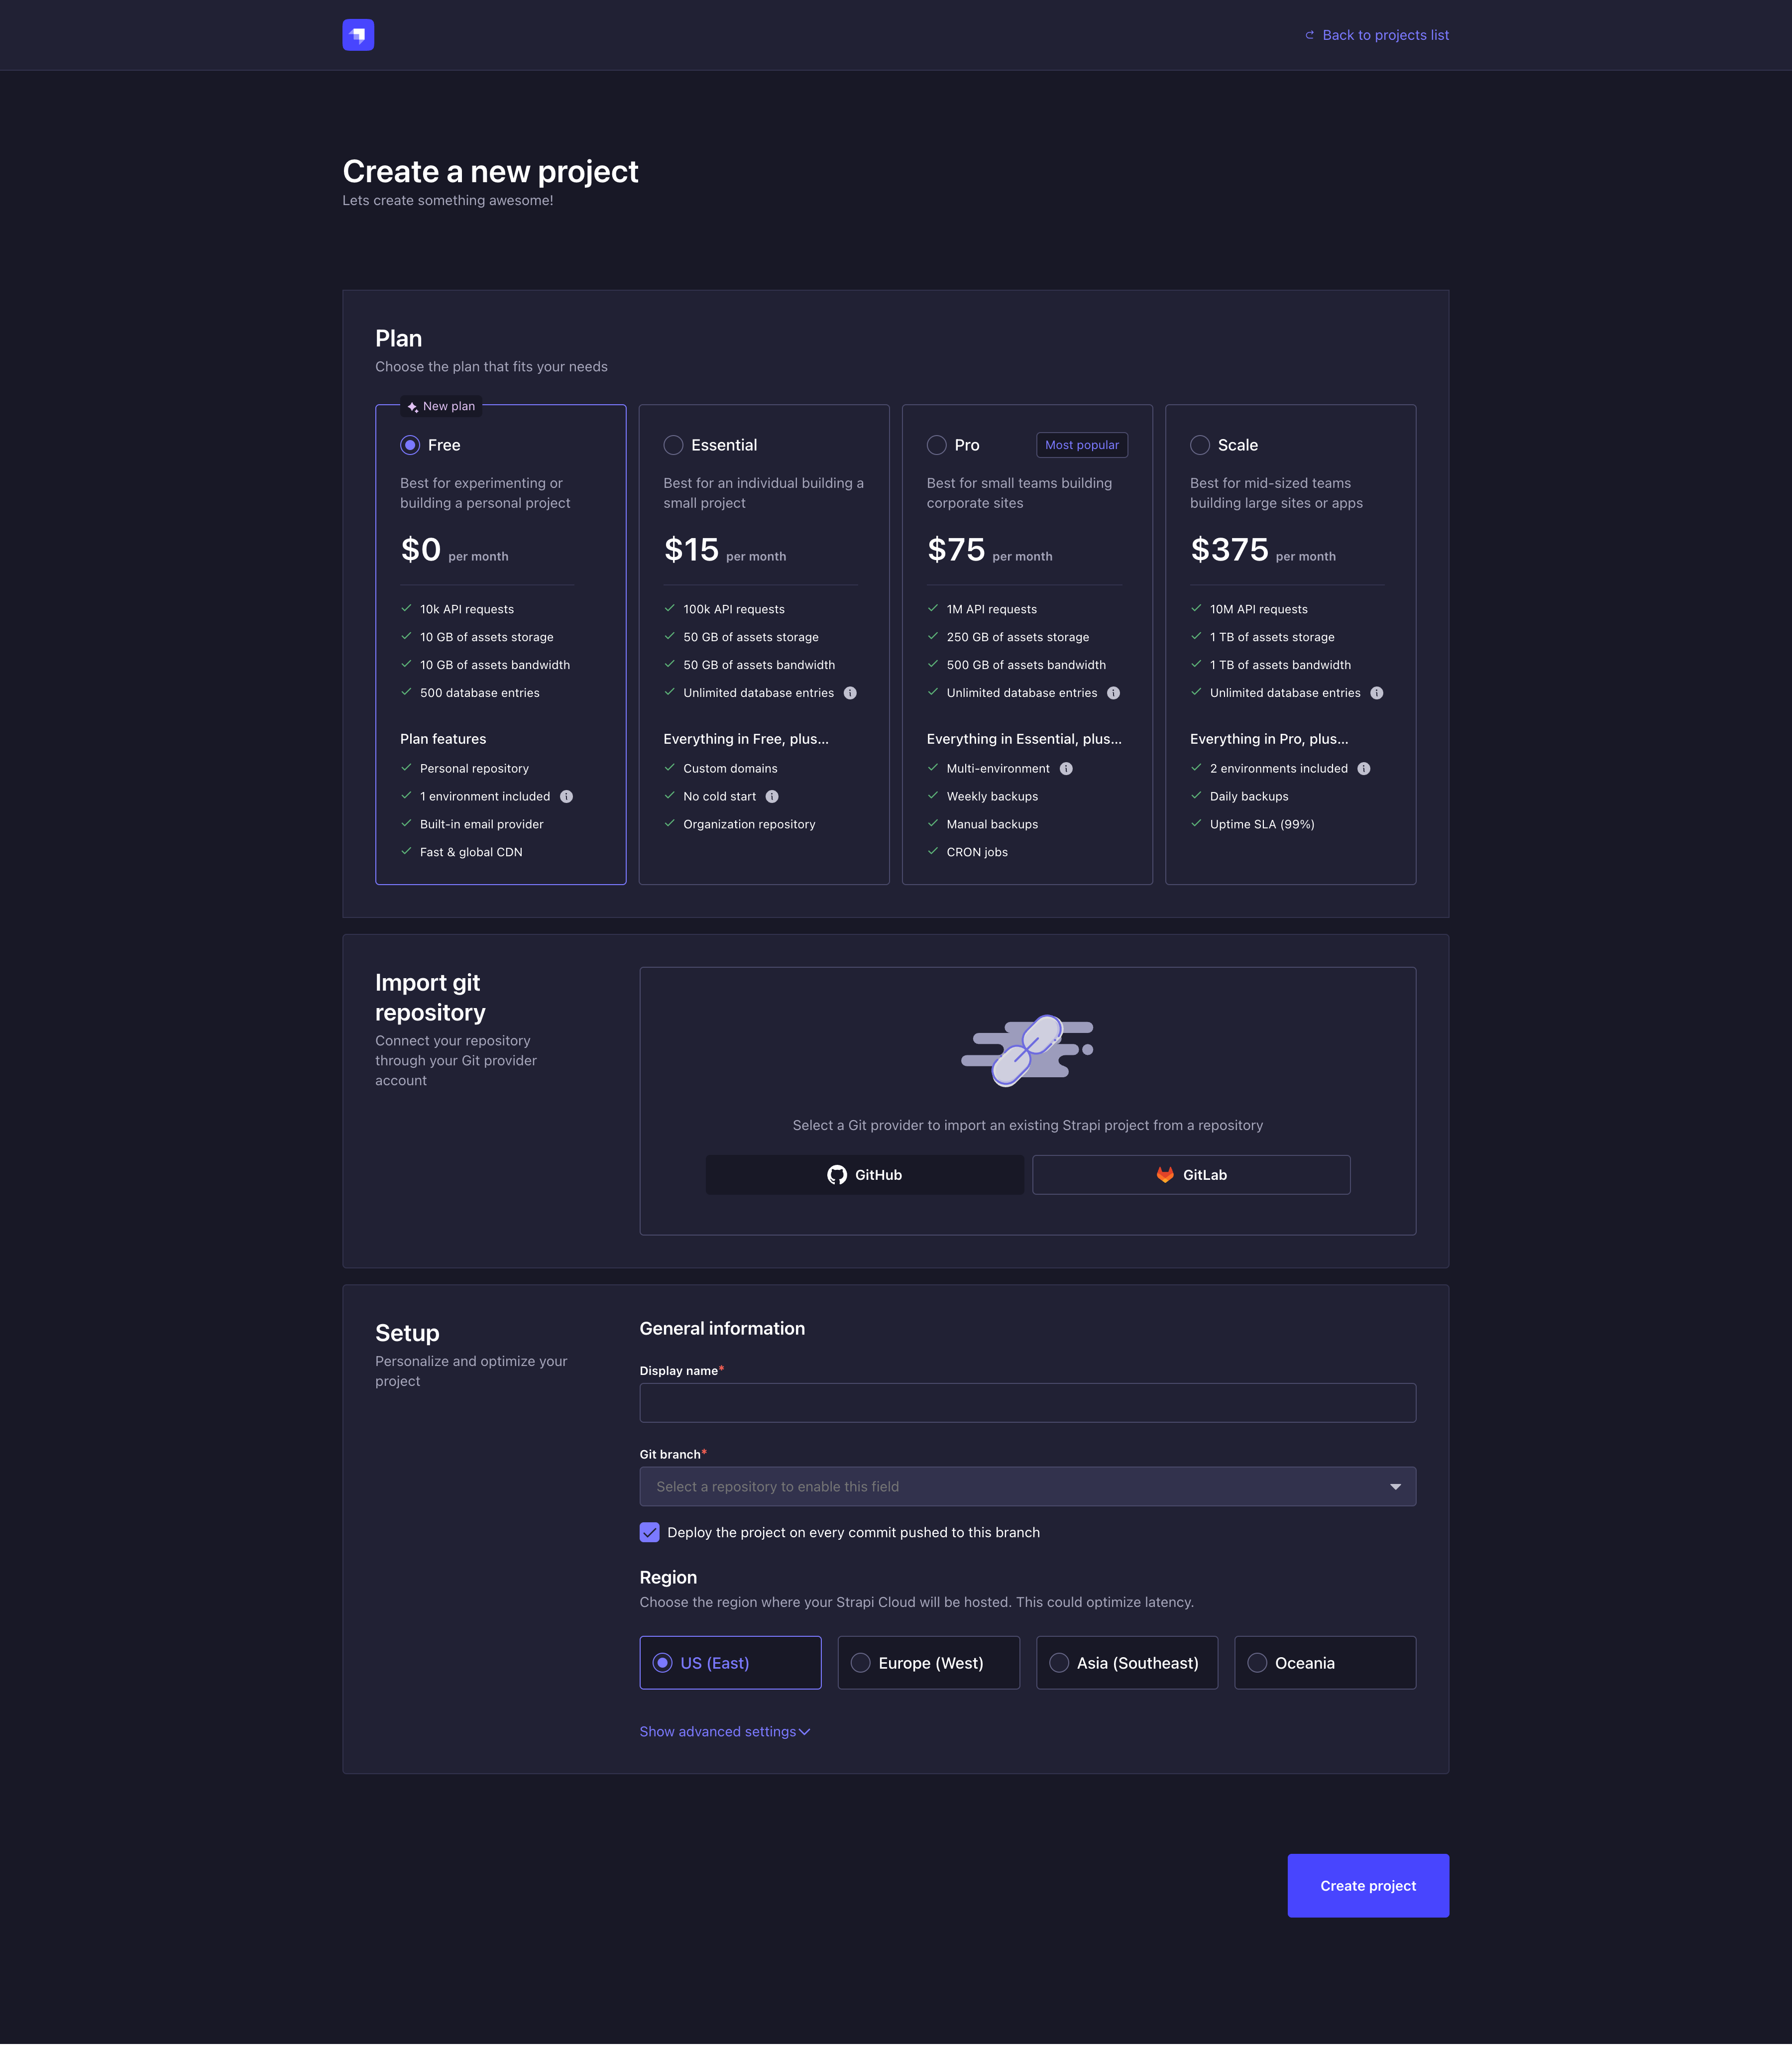
你将被重定向到项目创建界面。此界面包含三个步骤:选择计划、连接远程 Git 仓库,以及设置项目。
-
为你的 Strapi Cloud 项目选择一个计划和计费周期(详情请参见 定价)。
-
将 git 仓库连接到你的新 Strapi Cloud 项目。你可能首先需要选择一个 git 提供商。如果你已经使用一个 git 提供商部署了项目,之后可以通过点击 切换 git 提供商 按钮并选择 GitHub 或 GitLab 来使用另一个提供商部署另一个项目。
Choose your path for your new Strapi Cloud project!根据你的操作方式选择下面的一个选项卡:
- 通过部署预先构建的 Strapi 模板 (推荐给新用户和初学者 — 仅在 GitHub 上可用),
- 或者通过部署你现有的 Strapi 项目。
- Prebuilt Strapi template ✨
- Existing Strapi project
4.a. 在连接你的 GitHub 账户后,点击 使用模板 按钮。
4.b. 在 使用模板创建仓库 模态框中,选择将要创建仓库的 GitHub 账户


4.c. 点击 Create repository 按钮。弹出窗口将确认仓库的创建。
4.d. 如果你已经授予 Strapi Cloud 访问你 GitHub 账户中所有仓库的权限,请直接进入下一步。如果没有,你将被重定向到 GitHub 弹出窗口,在那里你需要允许 Strapi Cloud 访问新创建的仓库(更多信息请参见 GitHub documentation)。
4.e. 回到项目创建界面,账户 和 仓库 字段现在与新创建的模板匹配。
Tip连接拥有你想要部署的存储库的 GitHub 或 GitLab 账户。这可以与你登录 Strapi Cloud 账户时使用的账户不同。
Note你只能在付费计划上连接 GitHub 组织仓库。在免费计划中,你只能连接个人仓库。
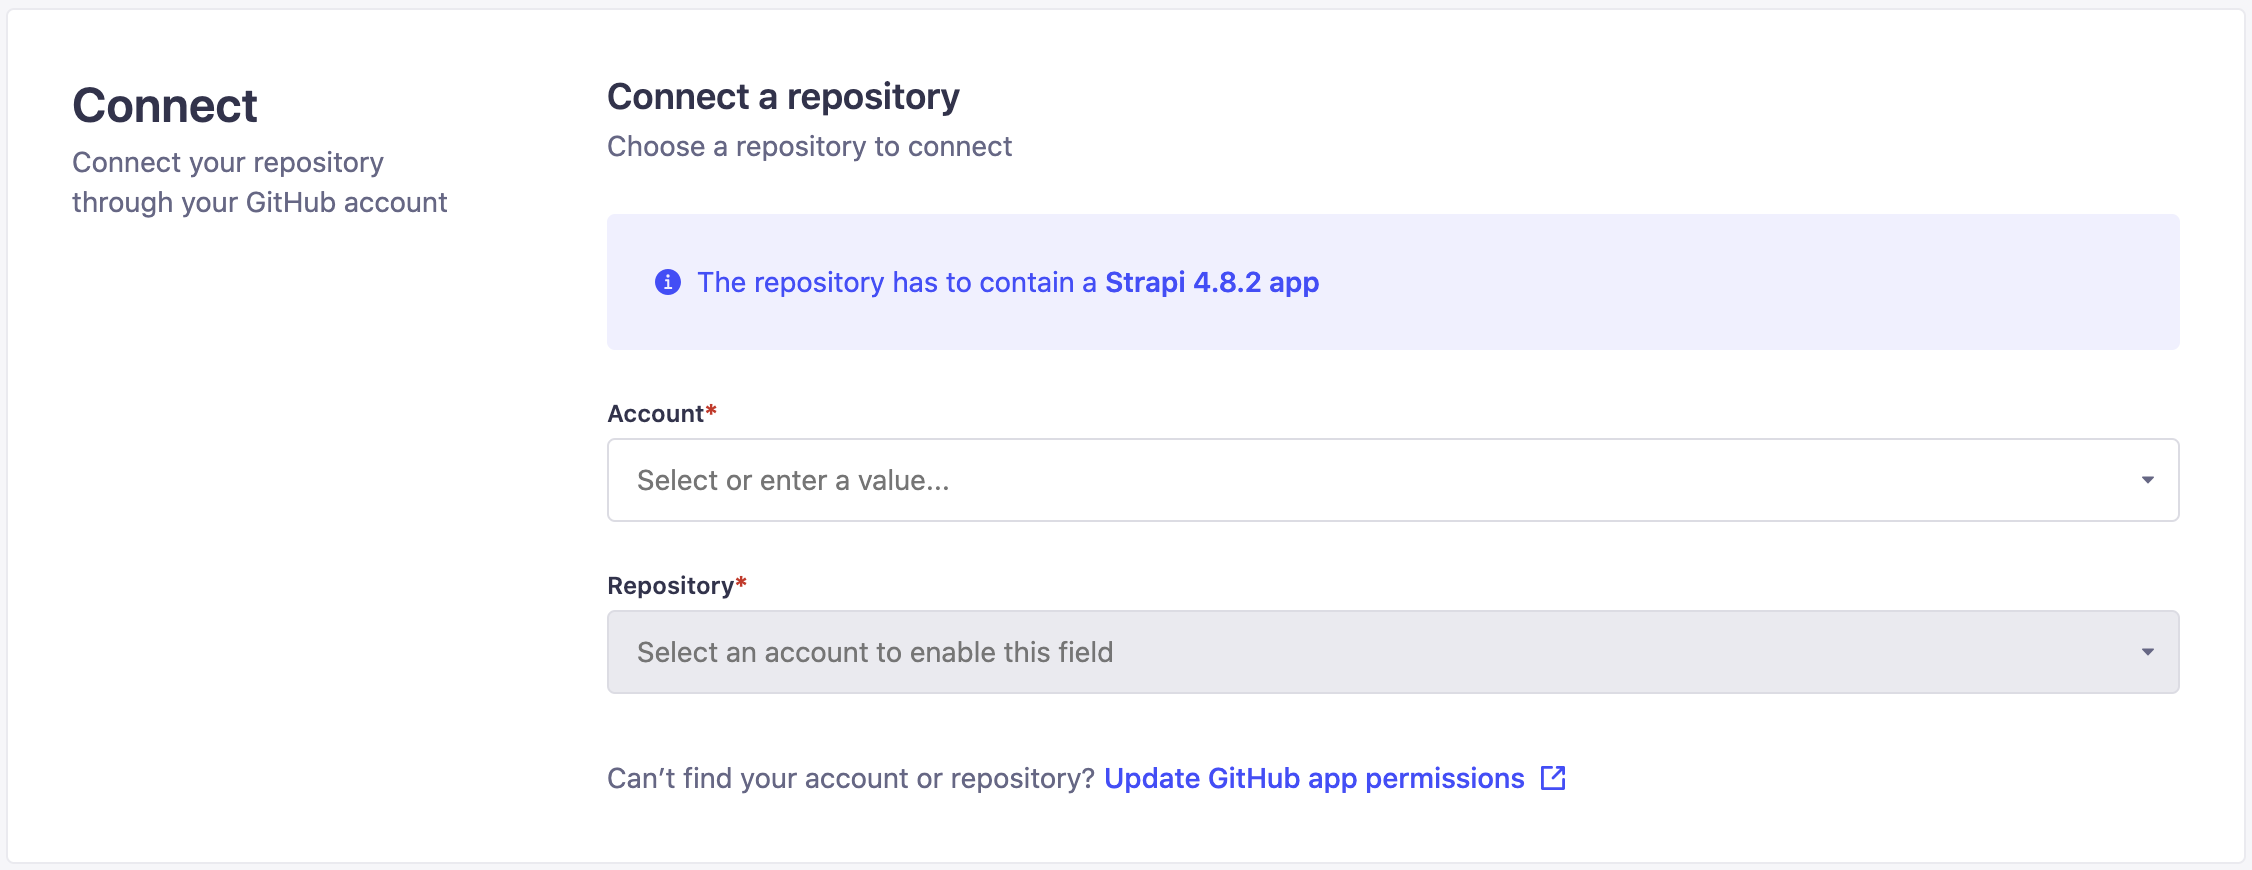
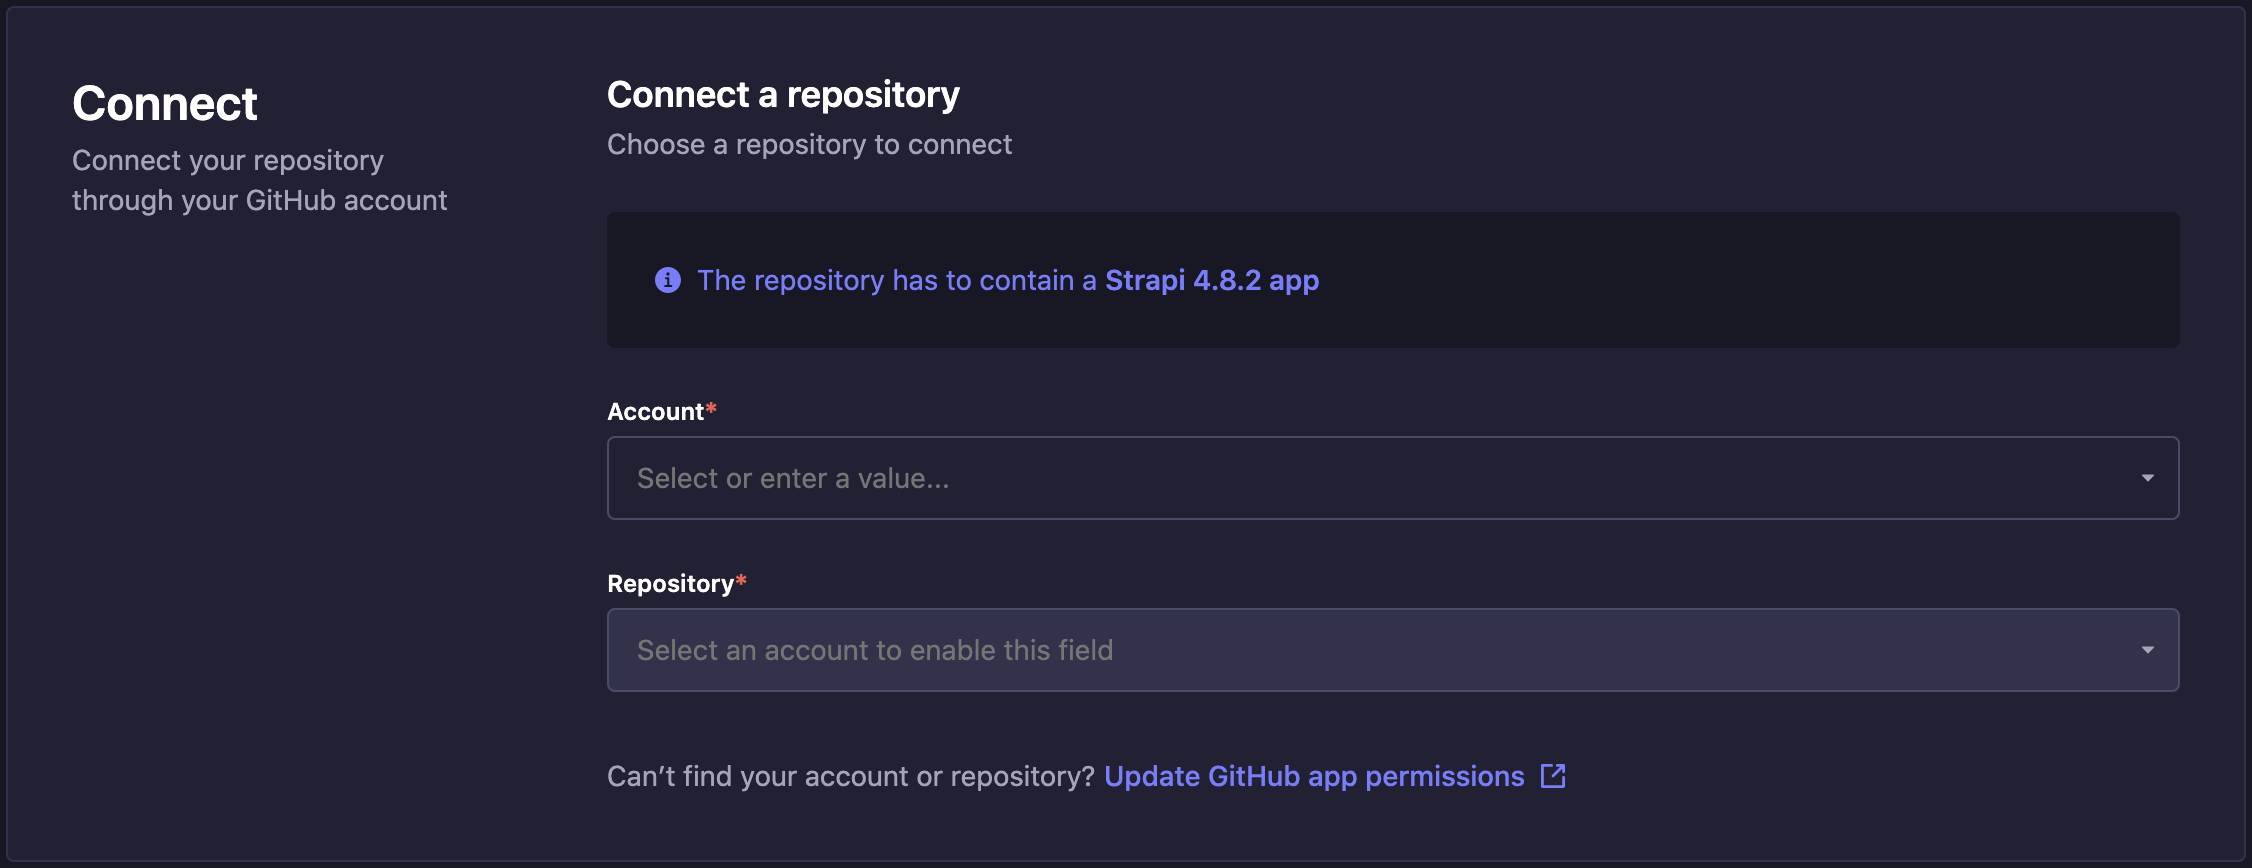
4.a. 如果你已经向 Strapi Cloud 授予了访问你 GitHub 或 GitLab 账户下所有仓库的权限,请直接进入下一步。如果没有,你将被重定向到一个弹出窗口,在那里你需要允许 Strapi Cloud 访问你在 GitHub/GitLab 上的部分或所有仓库的权限(更多信息请参见 GitHub 和 GitLab 文档)。
4.c. 回到项目创建界面,选择要部署的账户和代码库。
-
设置你的 Strapi Cloud 项目。
5.a. 填写以下信息:
| 设置名称 | 说明 ||--------------|--------------------------------------------------------------------------------------------------|| 显示名称 | 名称会根据你选择的仓库自动填充,但你可以根据需要编辑它。 || Git 分支 | 从下拉菜单中选择你想要部署的分支。 || 推送时部署 | 勾选此框将在向所选分支推送更改时自动触发部署。禁用时,你需要手动部署最新的更改。 || 地区 | 选择托管你的 Strapi 应用的服务器地理位置。可选地区包括美国(东部)、欧洲(西部)或亚洲(东南部)。 |
NoteGit 分支和“在推送时部署”设置可以随后通过项目设置进行修改。然而,托管区域只能在创建项目时选择(参见 项目设置)。
5.b.(可选)点击 显示高级设置 来填写以下选项:
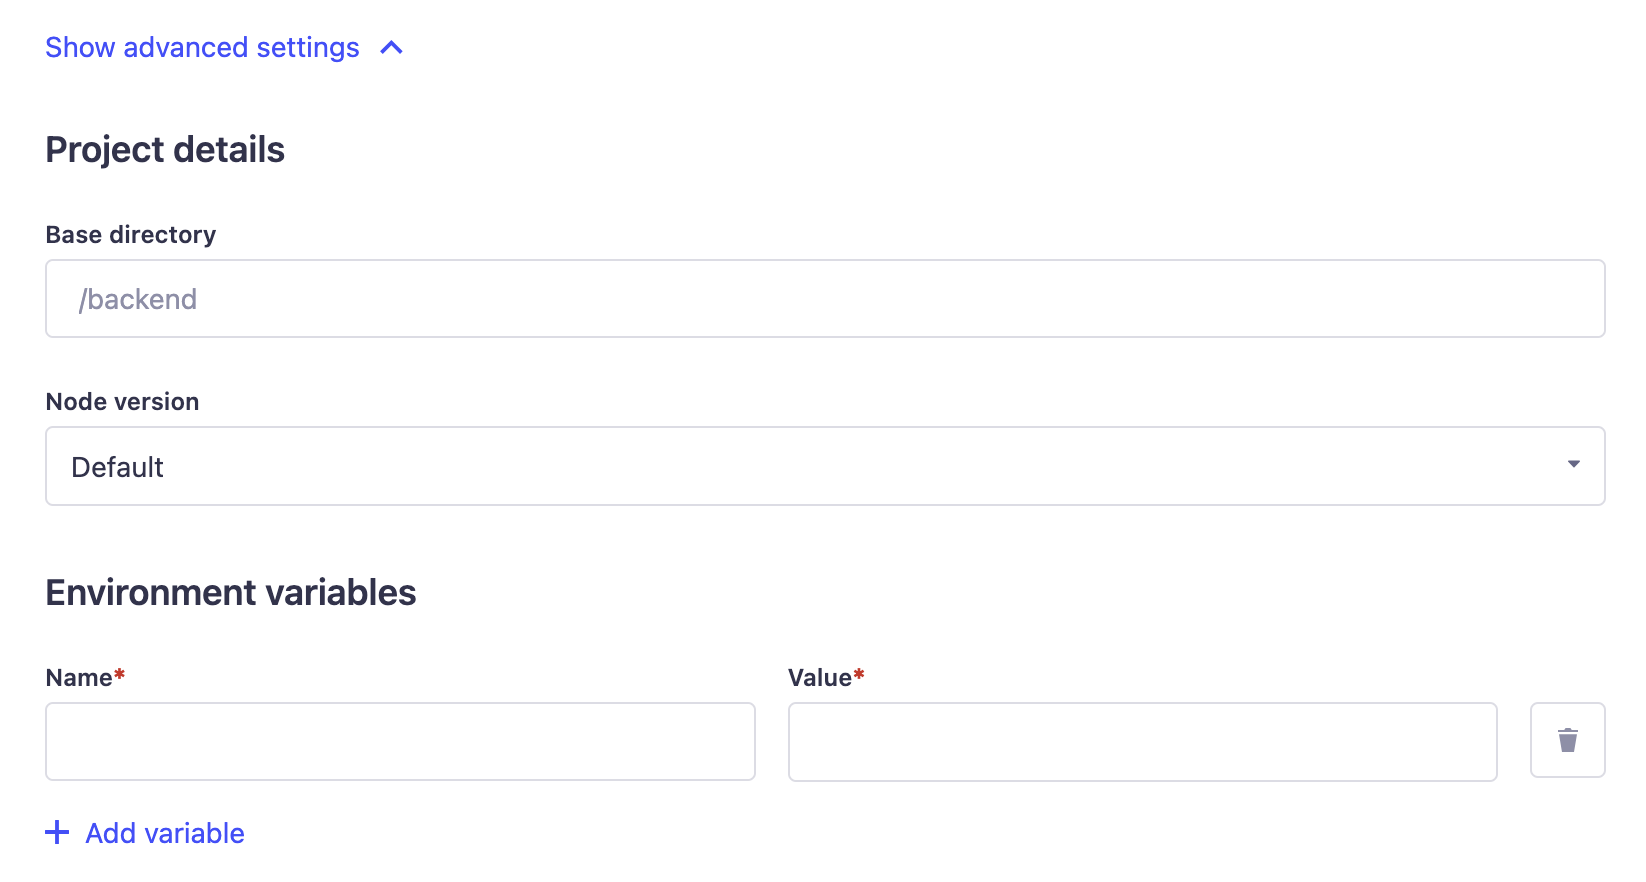
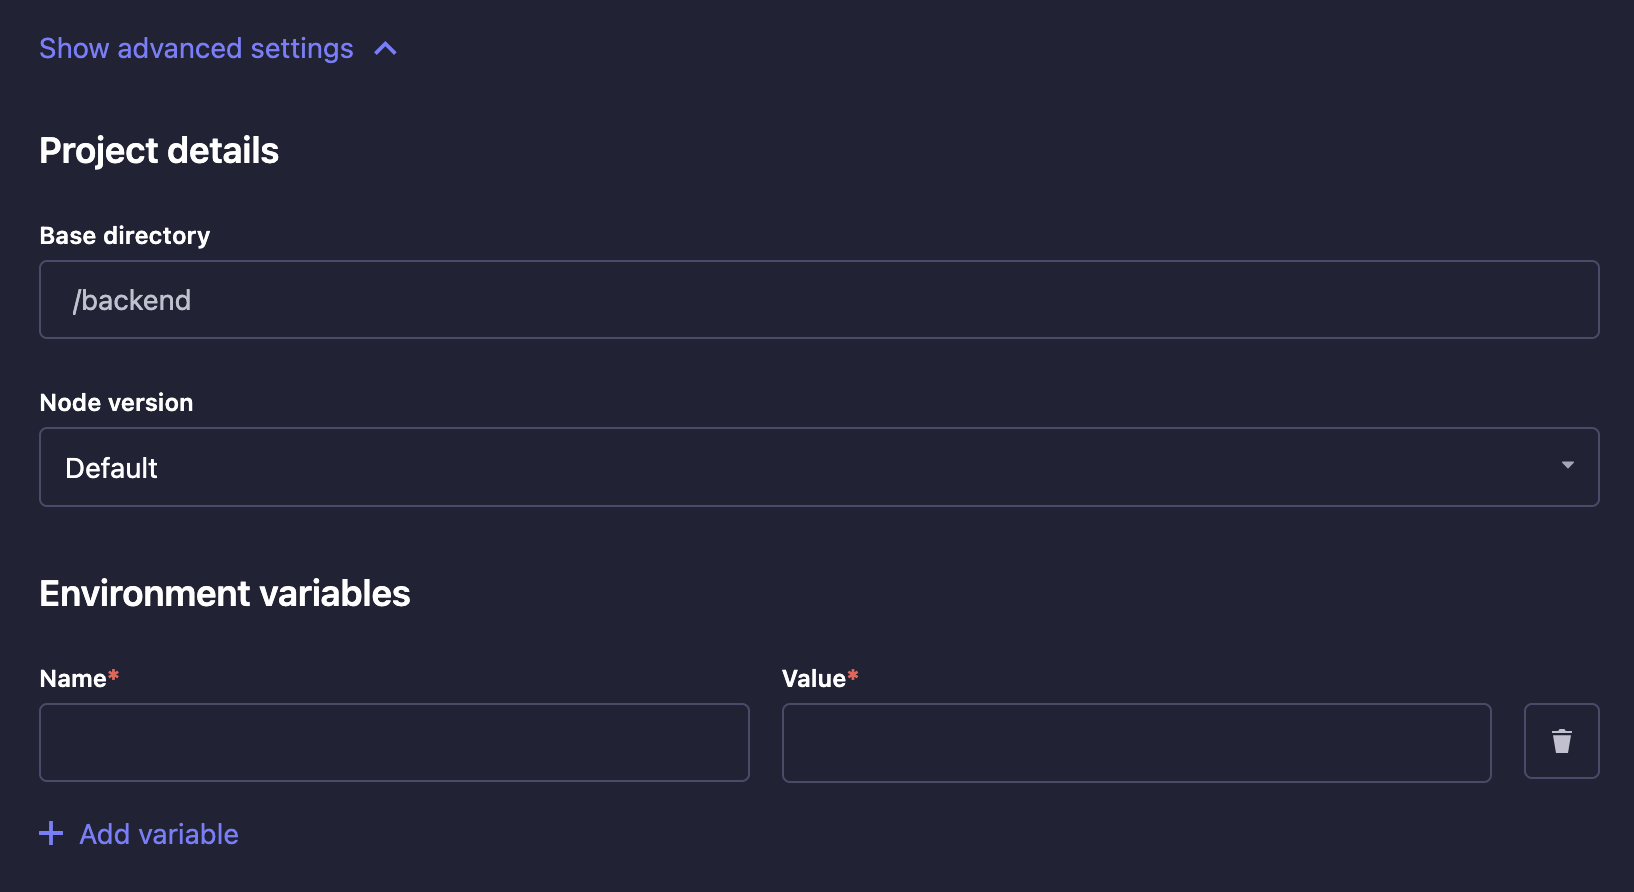
Setting name Instructions Base directory Write the name of the directory where your Strapi app is located in the repository. This is useful if you have multiple Strapi apps in the same repository or if you have a monorepo. Environment variables Click on Add variable to add environment variables used to configure your Strapi app (see Environment variables for more information). You can also add environment variables to your Strapi application by adding a .envfile to the root of your Strapi app directory. The environment variables defined in the.envfile will be used by Strapi Cloud.Node version Choose a Node version from the drop-down. The default Node version will automatically be chosen to best match the version of your Strapi project. If you manually choose a version that doesn't match with your Strapi project, the build will fail but the explanation will be displayed in the build logs. Using Environment Variables你可以使用环境变量将你的项目连接到外部数据库,而不是 Strapi Cloud 使用的默认数据库(更多详情请参见 数据库配置)。如果��你想回退并再次使用 Strapi 的默认数据库,请删除你的
DATABASE_环境变量(不涉及自动迁移)。你也可以在这里设置自定义电子邮件提供商。Sendgrid 被设置为在 Strapi Cloud 上托管的 Strapi 应用的默认提供商(更多详情请参见 providers configuration)。
设置账单详情
🌐 Setting up billing details
如果你选择免费计划,此结算步骤将被跳过,因为在创建项目时你不会被要求提供信用卡信息。
🌐 If you chose the free plan, this billing step will be skipped as you will not be asked to share your credit card details at the creation of the project.
跳到下面部分的第5步以完成项目创建。
-
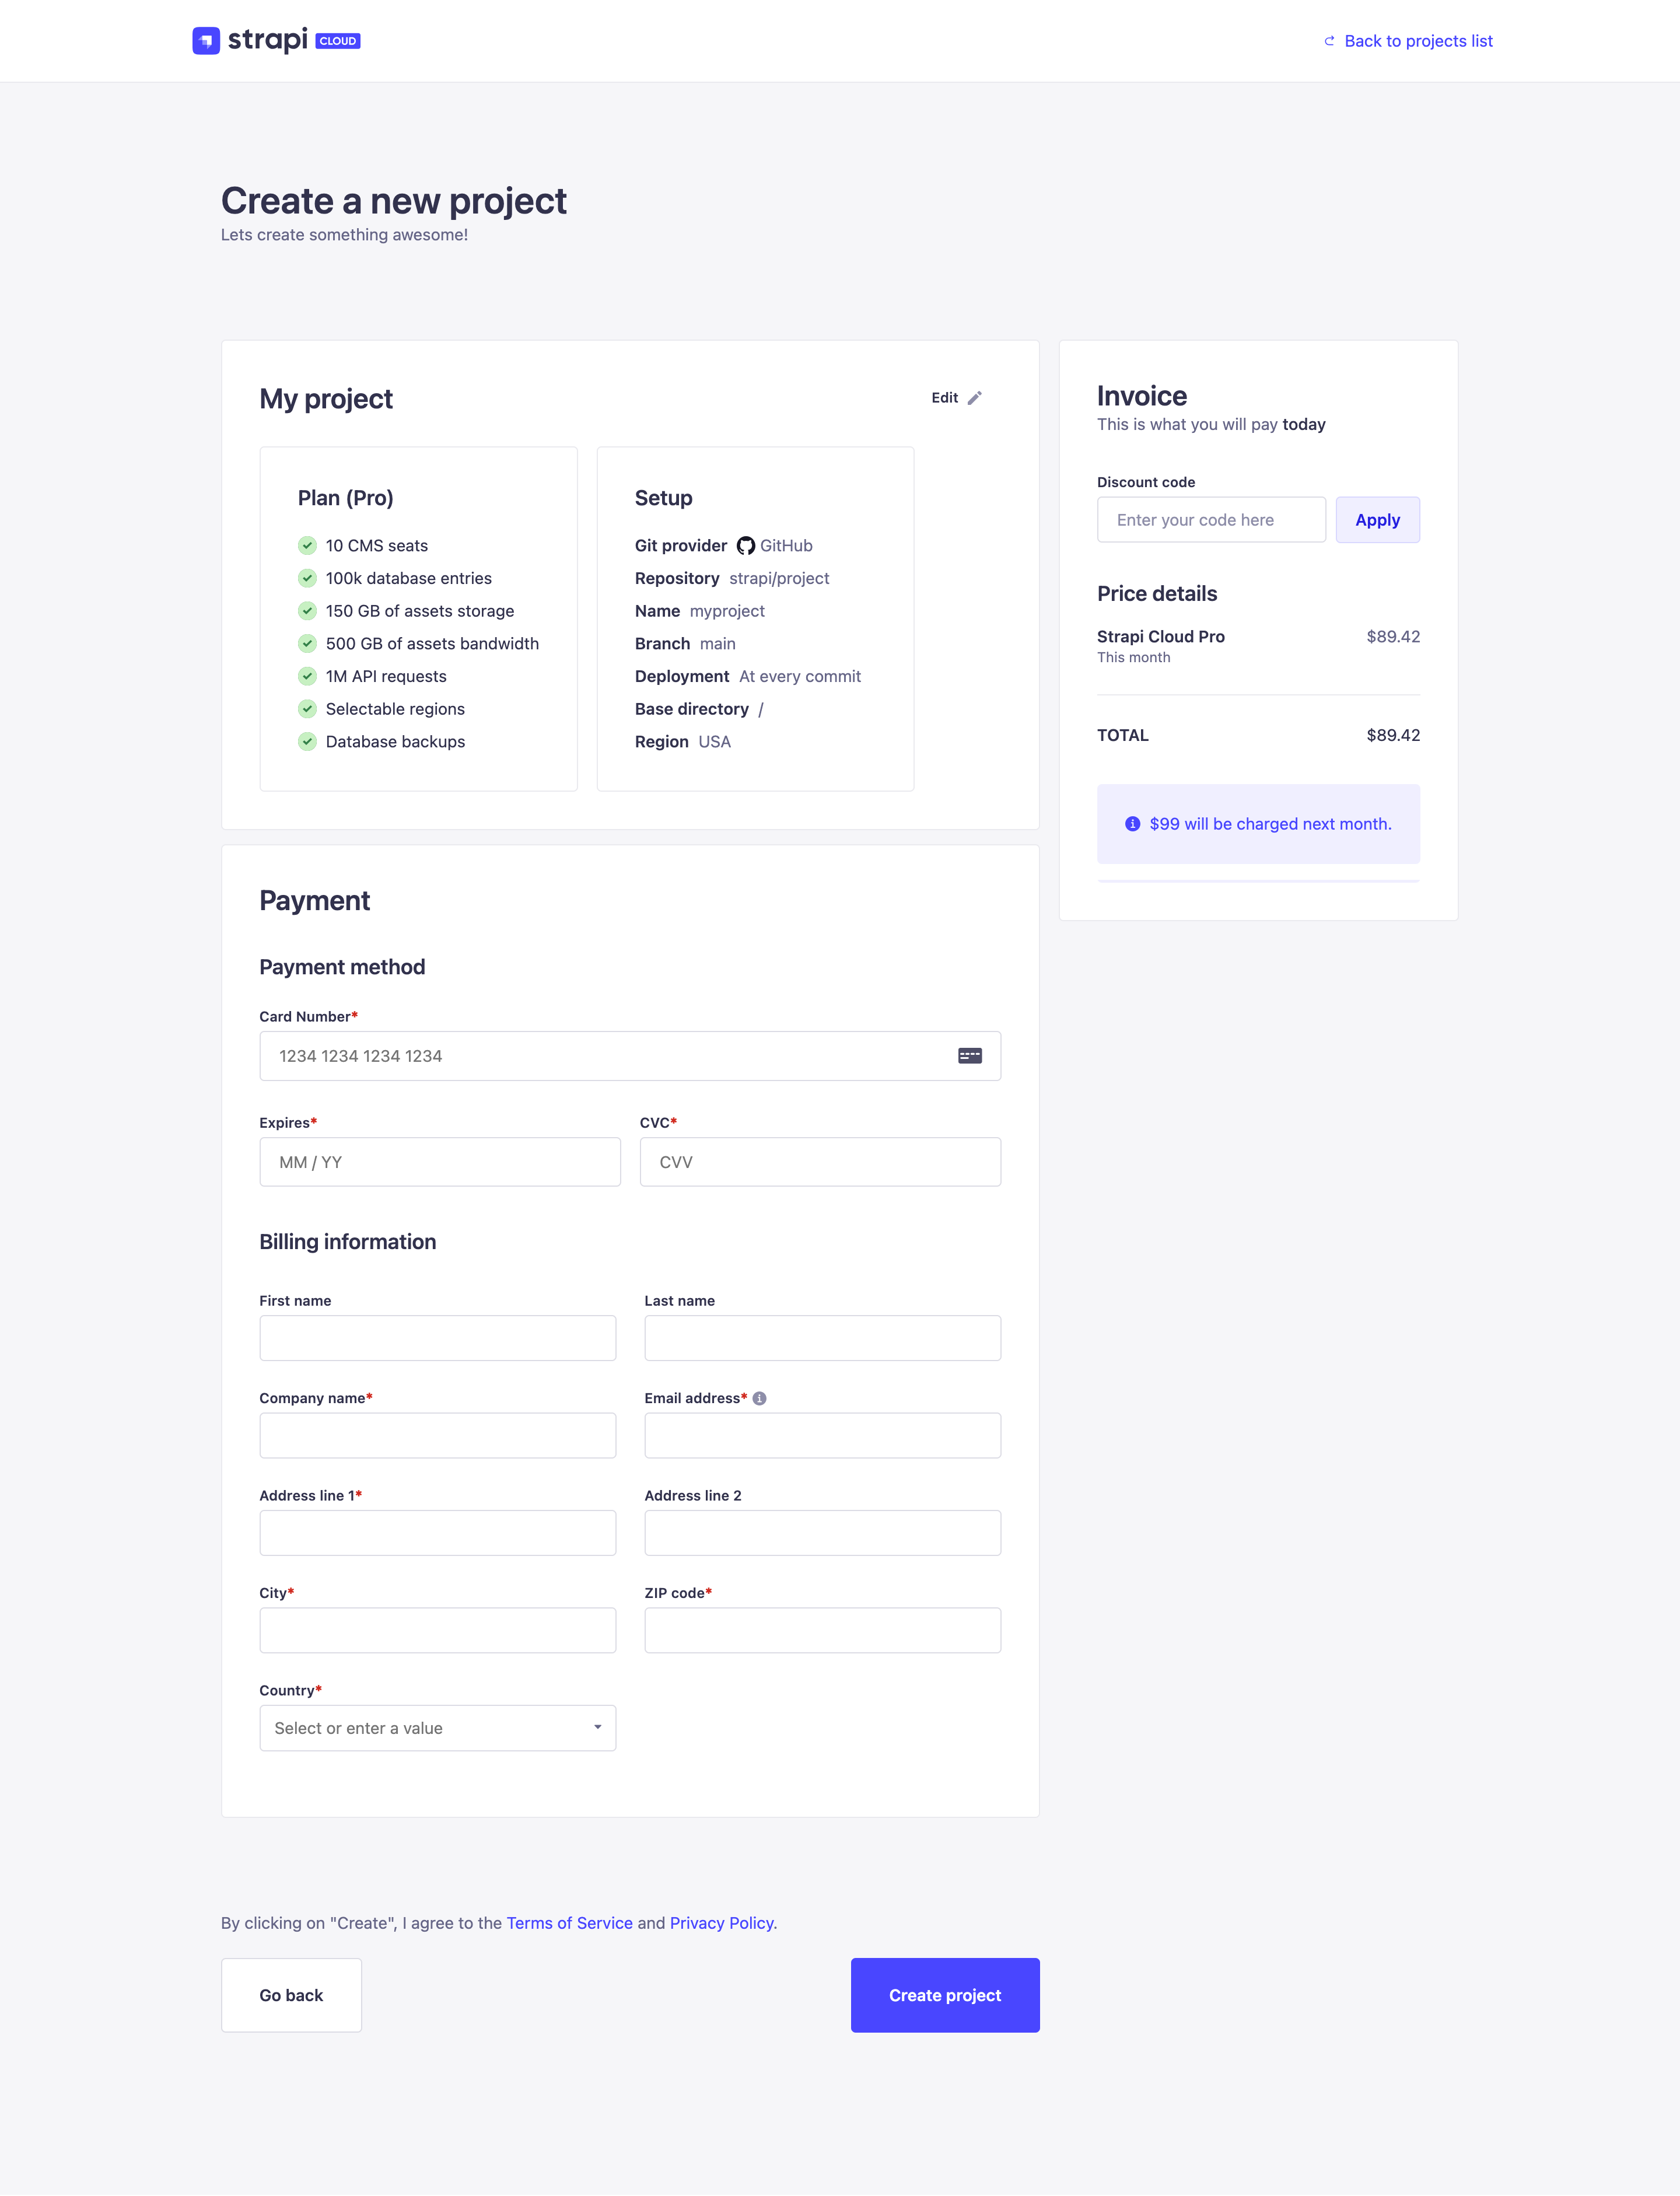
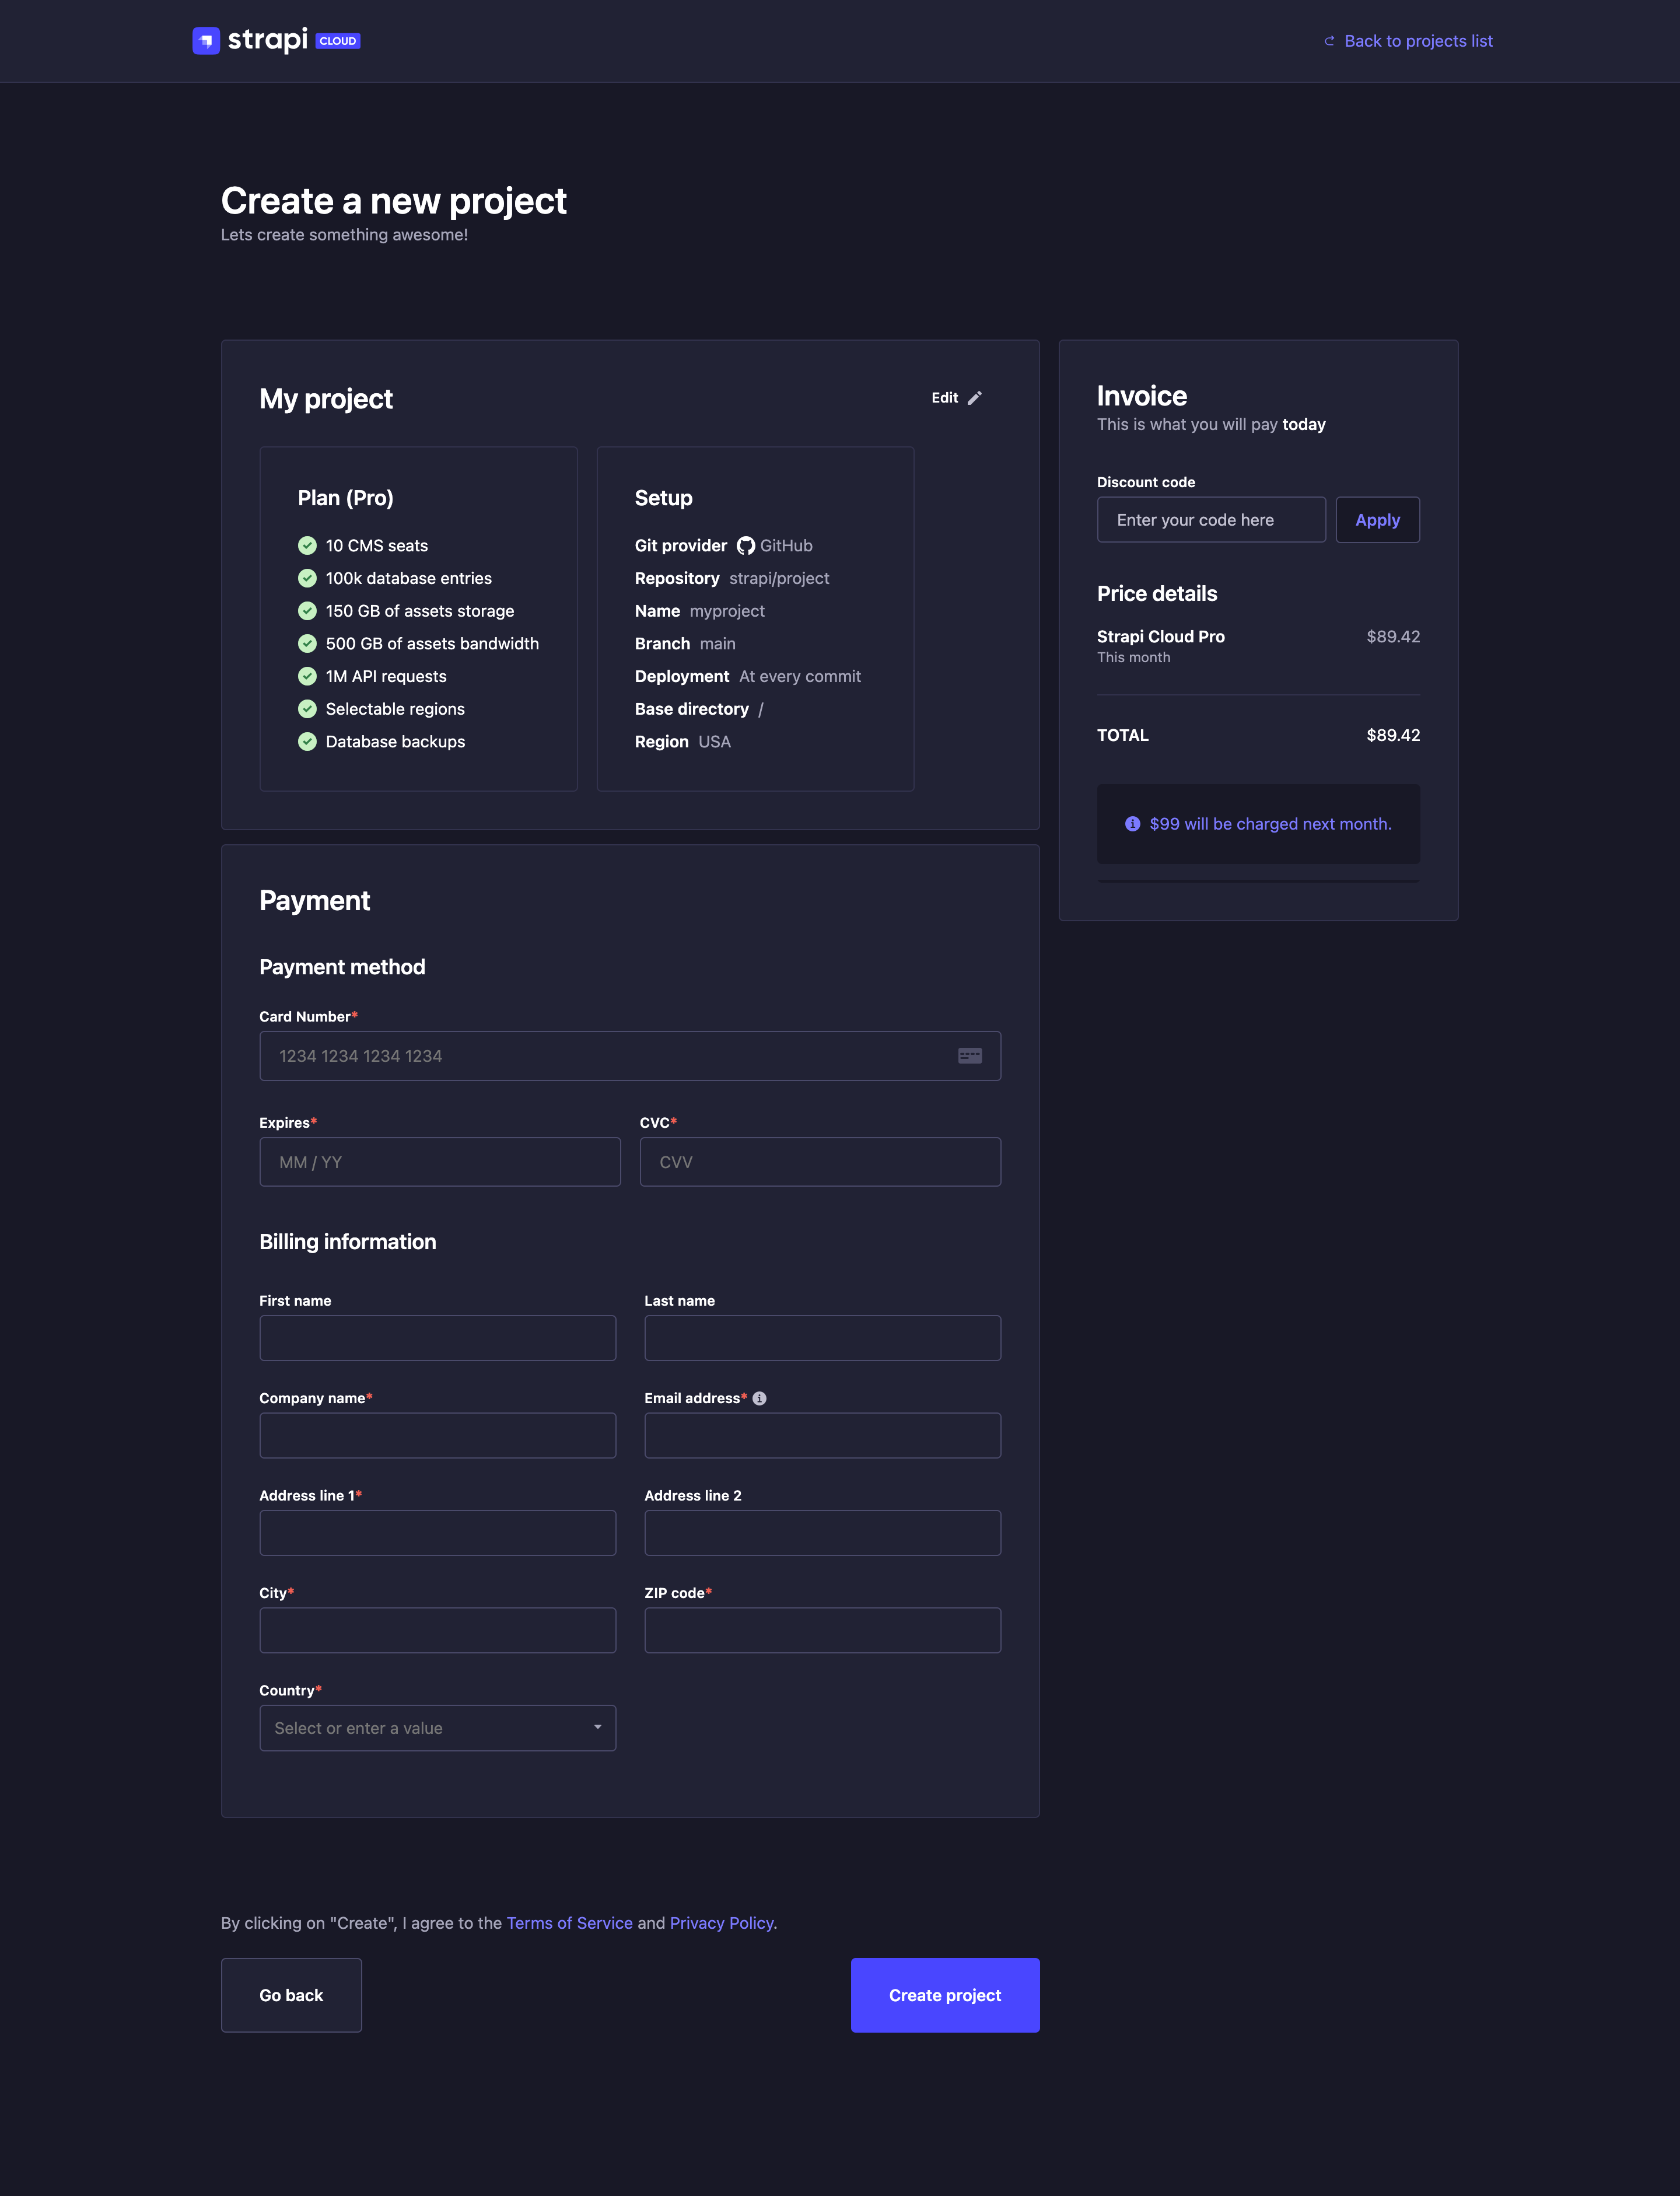
点击 继续到付款 按钮。你将被重定向到付款页面,在那里你可以输入你的付款信息并查看你的发票。
-
在付款方式部分,添加一张信用卡。此卡将用于所有与项目相关的事务,包括附加项目和超额费用。
-
在账单信息部分,填写你的付款信息和账单地址。
-
查看发票部分。购买月度订阅时,订阅价格将按当前计费周期剩余天数按比例计算。也可以展开折扣码部分以输入代码。
Note根据你的账单地址,可能会在你的发票上加收税费:
- 在欧盟和英国,提供有效的增值税编号可免除增值税。如果未提供有效的增值税编号,增值税将被添加到你的发票中。
- 在美国,适用的销售税是根据你的州和地址计算的。
-
点击 订阅 按钮以完成新 Strapi Cloud 项目的创建。
部署你的项目
🌐 Deploying your project
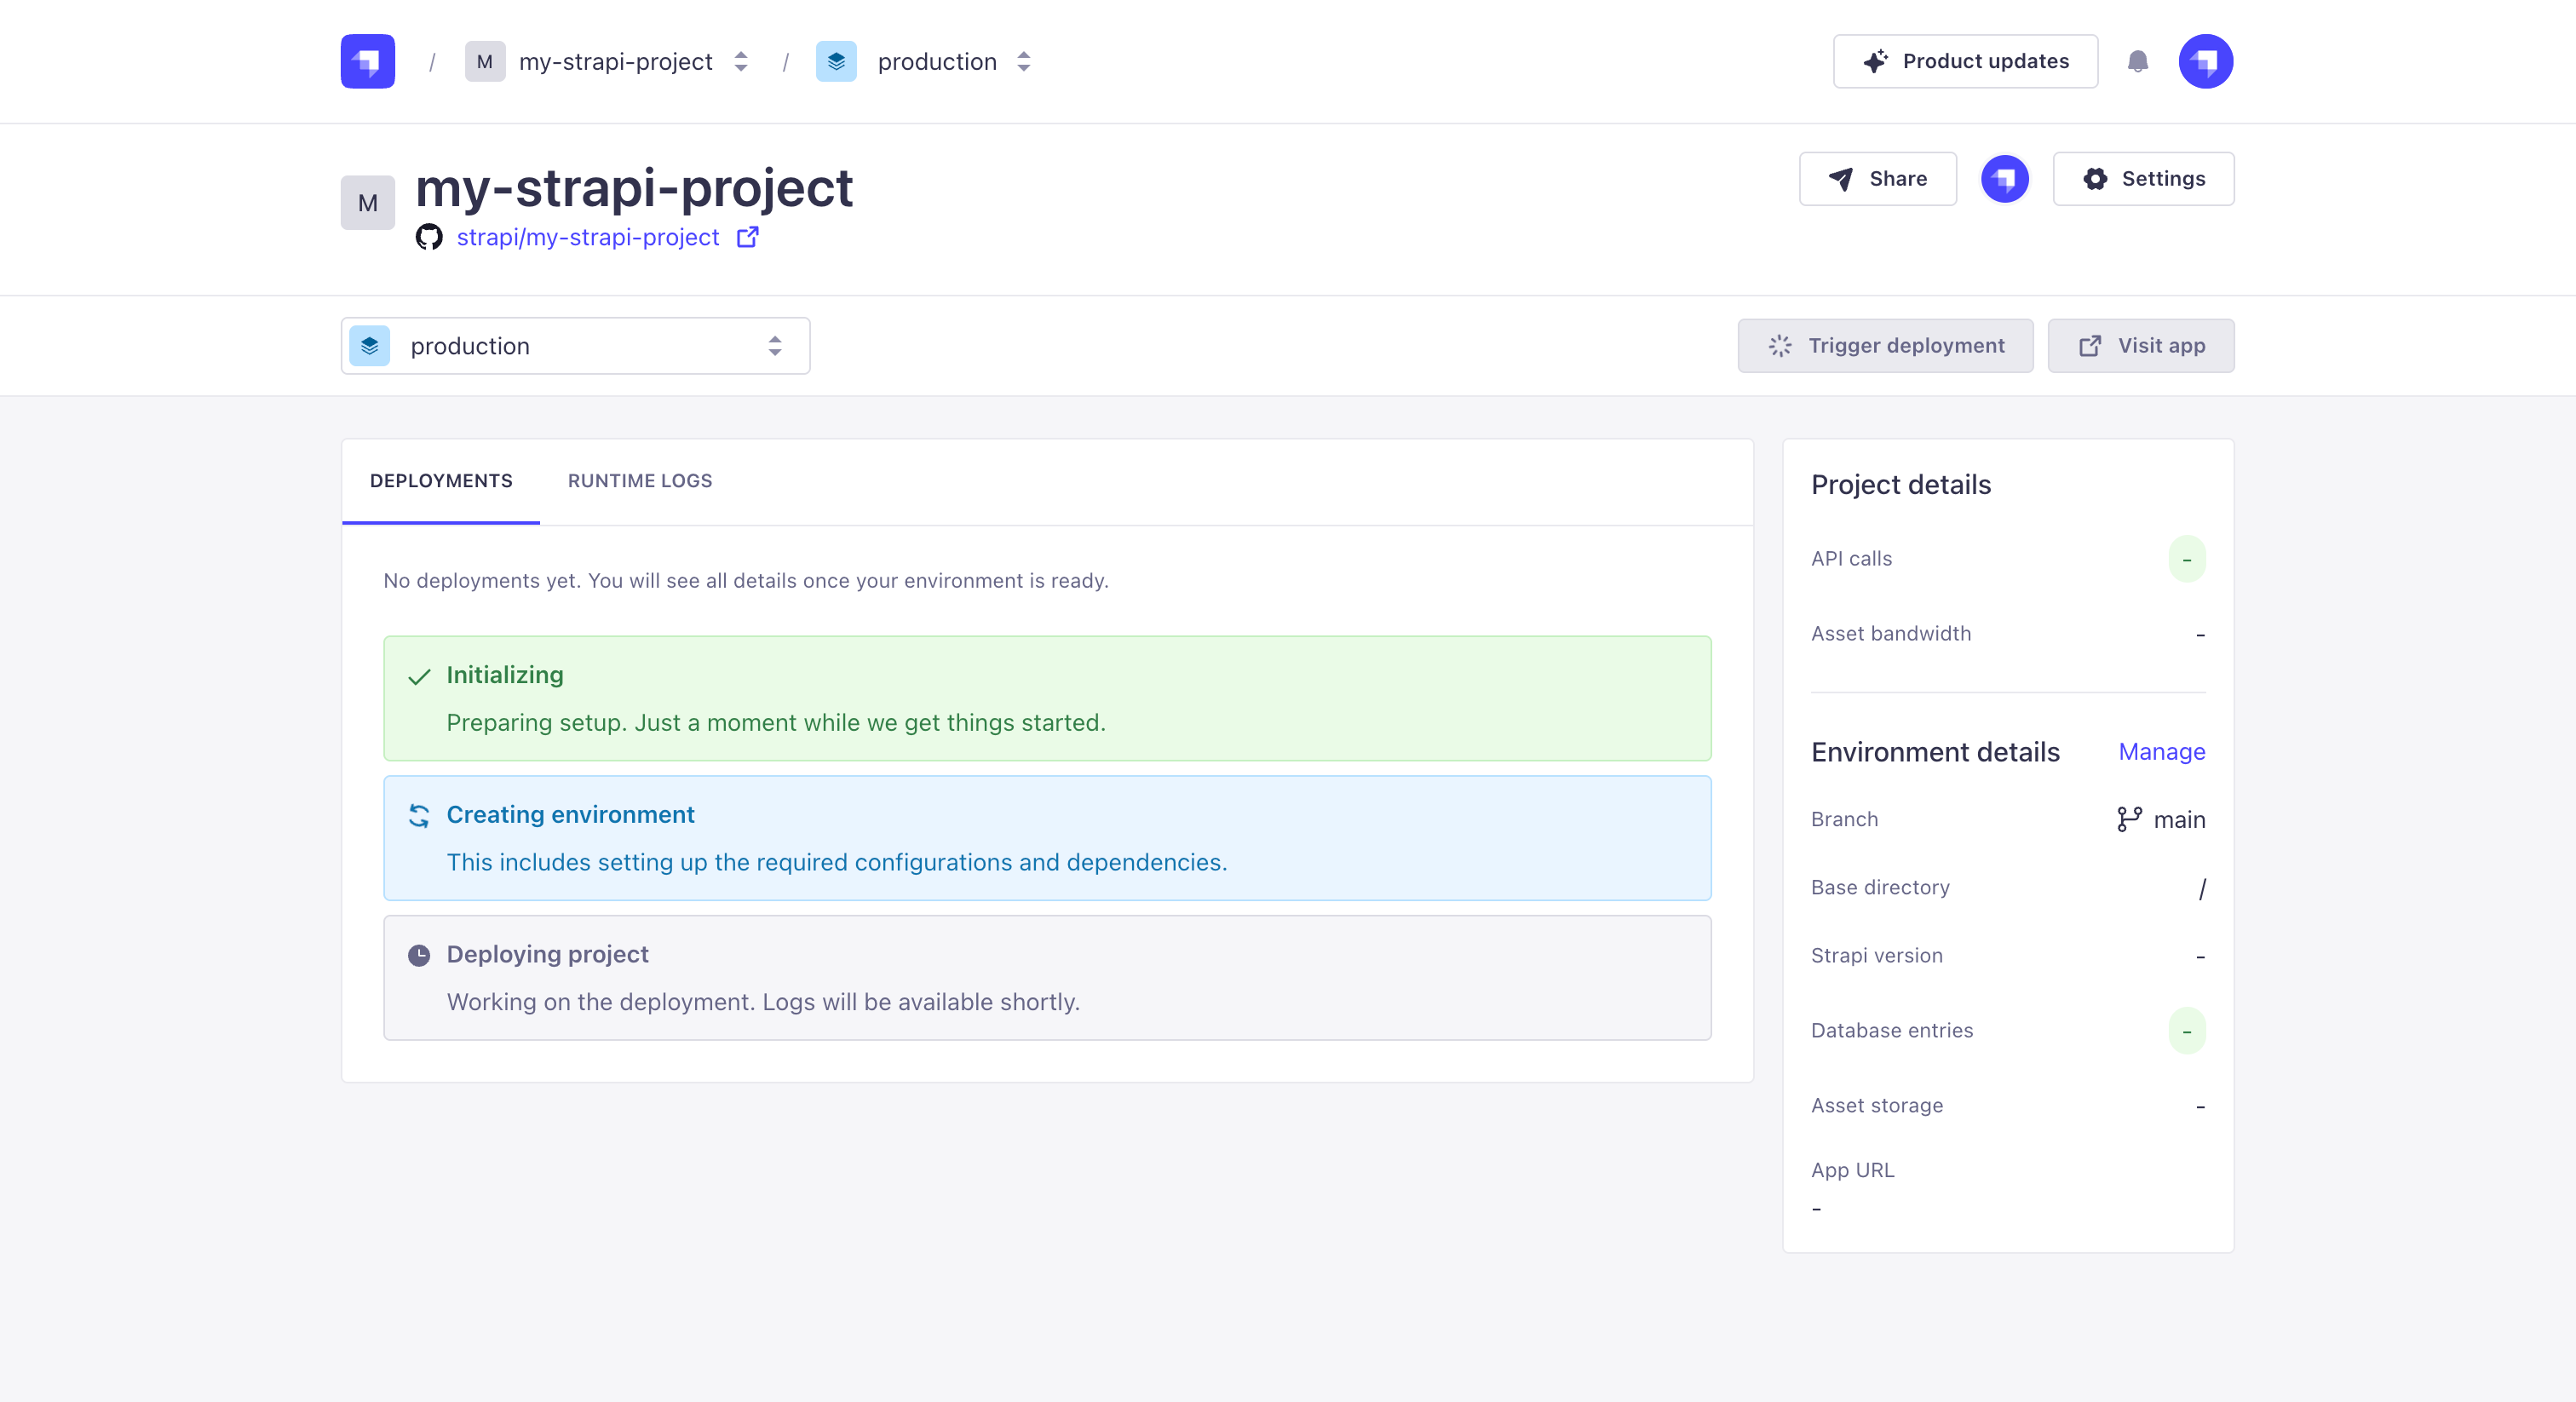
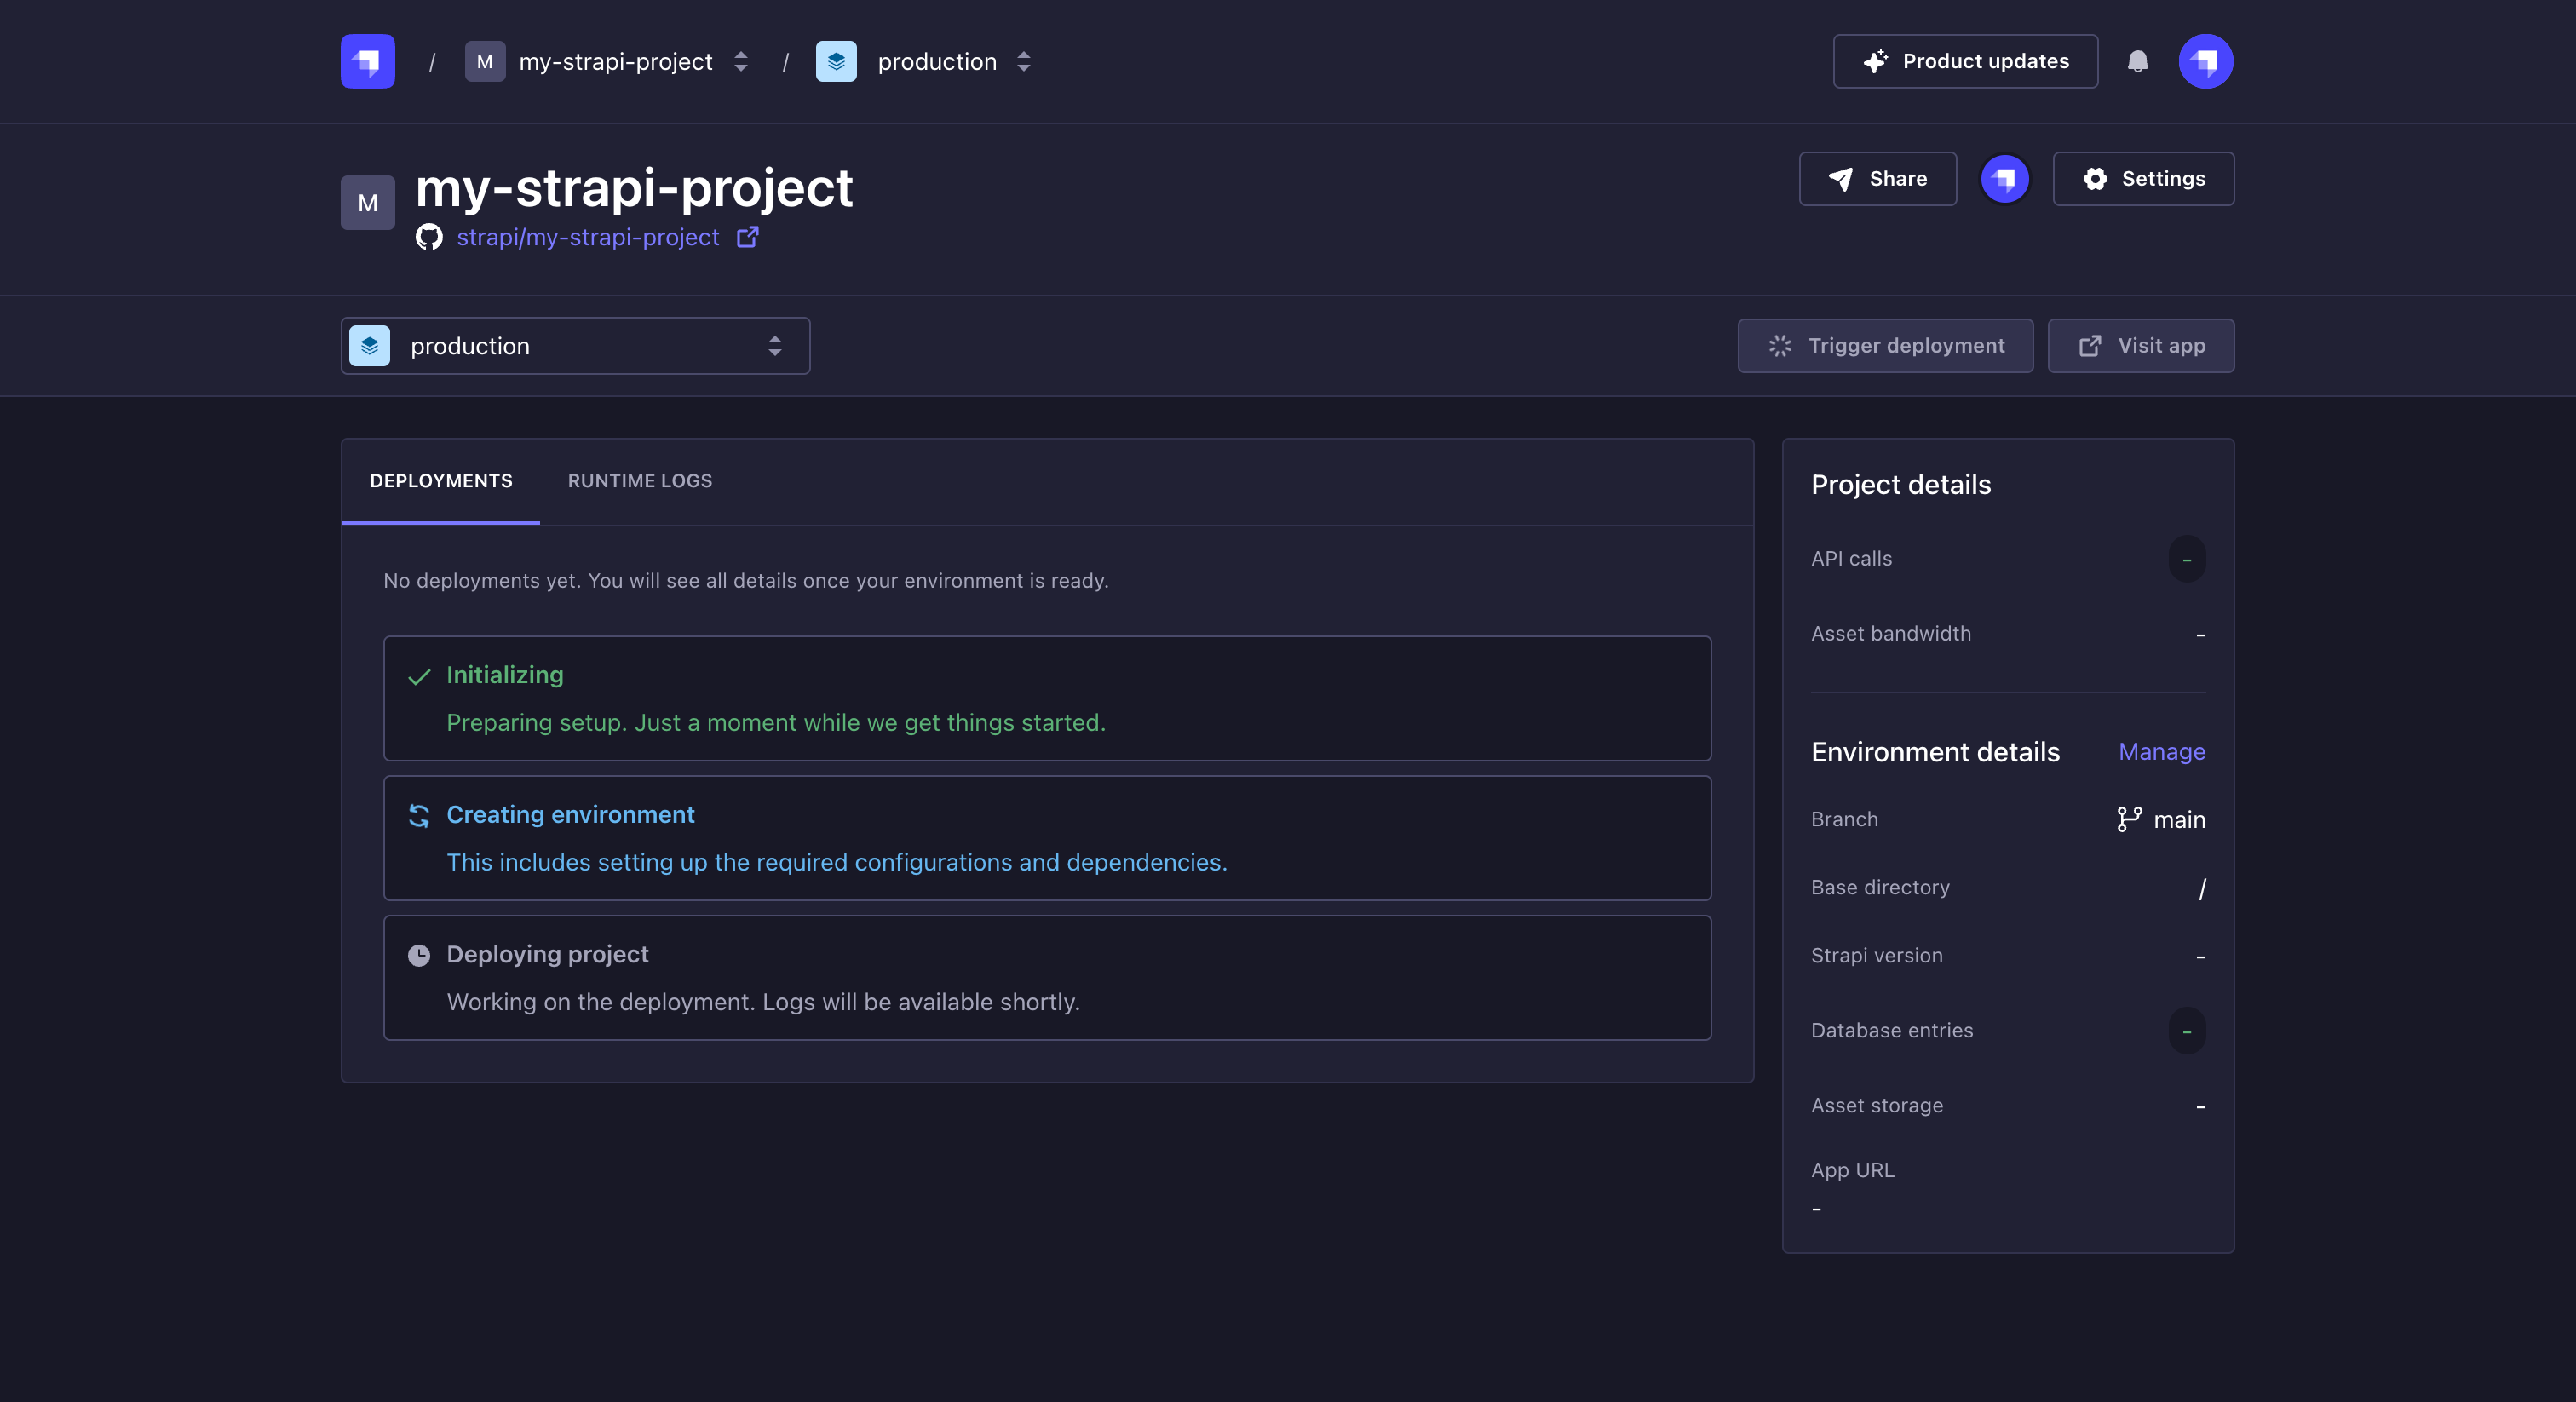
确认项目创建后,你将被重定向到你的项目仪表板,在这里你将能够跟踪其创建和首次部署。
🌐 After confirming the project creation, you will be redirected to your Project dashboard where you will be able to follow its creation and first deployment.
在你的项目部署时,你 already 可以开始配置一些 项目设置。
🌐 While your project is deploying, you can already start configuring some of your project settings.
如果在项目创建过程中发生错误,进度指示器将停止并显示错误消息。你将在失败步骤旁看到一个重试按钮,允许你重新启动创建过程。
🌐 If an error occurs during the project creation, the progress indicator will stop and display an error message. You will see a Retry button next to the failed step, allowing you to restart the creation process.
一旦你的项目成功部署,创建跟踪器将被你的部署列表取代,你将能够访问你的云托管项目。不要忘记在分享你的 Strapi 项目之前创建第一个管理员用户。
🌐 Once your project is successfully deployed, the creation tracker will be replaced by your deployments list and you will be able to visit your Cloud hosted project. Don't forget to create the first Admin user before sharing your Strapi project.
接下来做什么?
现在你已经通过云控制面板部署了项目,我们鼓励你探索以下想法,以获得更完整的 Strapi 云体验:
🌐 Now that you have deployed your project via the Cloud dashboard, we encourage you to explore the following ideas to have an even more complete Strapi Cloud experience: